Took it to a shop to get the alignment (toe-in) verified and corrected. The machine that goes on the wheels doesn't clear the fenders. So he measured it by hand, 1/4 to 3/8.He thinks that is close enough. I think that will likely lead to scrubbing. I'll try and get it to 1/8.
The new condenser didn't seem to alleviate the miss at 40-45 mph. I'll install the rest of the tune up kit anyway. I wonder if I tried a new coil? Could it be missing on account of not getting enough gas as well?
The miss can be due to several things. Do you get popping or just a miss? If it is fuel generally you will get the typical popping from lean burn. Also normally if fuel starvation then the engine will noticeably slow down before picking back up. Weak valve spring(s), points bouncing, carburetor not coordinated are other possibilities.
Pop or backfire are same by my way of expressing. I have some orange valve springs that might be '34-'35. Would need to check against specs to be sure.
Bouncing points are due to a weak spring on the movable point arm.
Yes I am referring to adjusting the rod from throttle arm to coordinator. If it is not adjusted properly the carburetor will either be too rich or too lean at some given speeds. Other speeds will be okay.
Yes I am referring to adjusting the rod from throttle arm to coordinator. If it is not adjusted properly the carburetor will either be too rich or too lean at some given speeds. Other speeds will be okay.
Thanks Chipper. I'll change the points too so that should eliminate that possibility. Would the carb rebuilder do that coordination as a matter of fact or is that something I have to do? If it is something I was supposed to do, then I am in trouble.
The rebuilder should have coordinated the carburetor. It takes a special gauge to set it right. Some rebuilders don't have the gauge. Anyone the specializes in W-1 carbs should have a gauge. They also should have the correct replacement parts. I have seen several W-1 carburetors with incorrect parts that don't run well at all. I have a few that I can't make run right. Don't know why, yet! Still learning!!!!!even after rebuilding a bunch of them.
Pat, the carburetor pictured is a later model ca. 1941-48. Has the double bend accelerator arm that fits '37 and later. '36 and earlier use straight arm.
Chipper, assuming we eventually narrow it down to the carb and I want to change it, would the arm or arm/shaft combination be interchangeable? It actually was on the engine I bought that was in this coach.
My problem with the carb on the 34 is the bowl cover pivot point needs to be bushed. That is why I was having all kinds of popping before Flint....figured that out and over adjusted the carb to make it work. Just need to get in there now and make it work correct before I try driving it more this summer.
Bruce
32 Confederate Bruce S. DeFord VCCA Judging Committee Chair
Is it possible you have a valve adjusted too tight?I would think if all your electrical parts are working fine and you get popping through the carb,you may have an intake valve too tight.
I installed the rest of the tune up kit today. There is quite a difference in the tension of the breaker point spring. Didn't have time to pick it up as my cousin's son in law came and picked it up to bring it to the family reunion we are having tomorrow. I'll have to drive it about 6 miles tomorrow morning. We'll see then.
I installed the rest of the tune up kit today. There is quite a difference in the tension of the breaker point spring. Didn't have time to pick it up as my cousin's son in law came and picked it up to bring it to the family reunion we are having tomorrow. I'll have to drive it about 6 miles tomorrow morning. We'll see then.
This is what his garage looks like. I'll drive it from there to the reunion later. The reunion is taking place in a community halkl which was the grade school I went to.
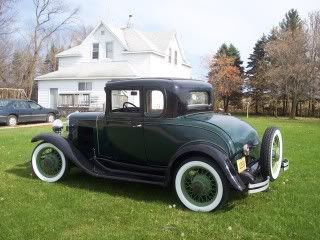
Thank you Chipper. Turns out the points were the culprit. When I drove the 7 miles or so to the reunion I had a searing 55 mph run followed by the Vauxhall and the Chrysler. There were about 150 people there spanning 4 generations. At least 30 remembered the old car sitting in the field or had played in it as children. One of my uncles had actually ridden in it in the late 40's. We recreated a scene of him sitting in his own '34 Master coach in 1950 when he was 22. Now 85, he had a bit of a problem assuming the same position due to the shorter window but he was a good sport about it.
I've had too many sets of points that caused missing under acceleration or high speed once they have been run and/or stored for a while. I think it is the slight amount of oxidation on points that coupled with short duration of point contact that produces a weaker spark. Of course the acceleration problem is the richer mixture that needs a stronger spark to complete the burn quickly.
I've had too many sets of points that caused missing under acceleration or high speed once they have been run and/or stored for a while. I think it is the slight amount of oxidation on points that coupled with short duration of point contact that produces a weaker spark. Of course the acceleration problem is the richer mixture that needs a stronger spark to complete the burn quickly.
That makes sense. How does one go about getting the mixture right? I've turned that screw up to two turns with no noticeable difference. Right now it's at factory setting of 1/2 to one turn.
The miss is gone and I'm sure if I'd held it it would have crept to over 60.
If it idles smoothly then don't worry about it. If you have a rough idle then try to clean out the passages in the carburetor. Blow every opening you can get to with air, both ways if possible. Squirt carburetor cleaner in them as well. If that does not work then you might have to send it off to an experienced rebuilder.
Now that we're crowding 180 miles, I decided to get down and under to check for loose stuff and to try and take up what appeared to be 3-6 inches of slack in the steering. Turns out there was movement where the steering arm goes through the king pin housing. Tried to tighten it but it wouldn't. Took off the big nut and inserted a large washer. That did it. It had been bottoming out on the threads. Probably a result of my mix & match.
That was also why my alignment appeared to change for no reason. I also found where the knees are leaking from, it is the shock covers. Any ideas on how to seal that?
If it idles smoothly then don't worry about it. If you have a rough idle then try to clean out the passages in the carburetor. Blow every opening you can get to with air, both ways if possible. Squirt carburetor cleaner in them as well. If that does not work then you might have to send it off to an experienced rebuilder.
Dumb question here Chipper, I suppose I do that with the carb off the engine? I'm not sure if you can call it a rough idle. There is very little vibration but the exhaust sound isn't regular. Valve adjustment?
I would first check each spark plug. Are any a different color? Or have build up on the electrode? While at it run a compression check hot. That should tell if you have a valve problem. In most cases it is not the carburetor but something else.
Looked in the differential Happy to find out it wasn't overfilled with oil from up front. But, there is always a but, the oil looks foamy. Is that bad?
Also, I had adjusted all the doors but the driver's door now rubs at the top and sags a bit. I suppose I could give the front bolt a few cranks but I'm afraid it might pop some of the filler in the roof. Any thoughts?
Pat if the door is rubbing at the top, you cannot shim the body to the frame bolt on frame in middle of the door, to lift the door up, to get body lines too line up, only going to make the rubbing worse.
But if the door is rubbing on the side of post, does it look like shimming door up slightly will move the door slightly up & away from the post. It will also align the body seams.
Mike, it is rubbing at the top of the lock pillar. I had it lined up but maybe we lost something along the way or it settled during the rides. I'm just worried that pulling down on the front bolt might stress the body & crack the filler above the door.
Hi Pat: The leak you showed photos is an easy fix. Take the covers off, discard the cork gasket, clean the surfaces well with brake parts cleaner, and apply a small bead of "Right Stuff" silicone sealer. Be sure it is "Right Stuff". Let the sealer dry for a couple days, then using a single edge razor blade, trim off the outside bead keeping the blade flat against the cover. Top off the fluid. End of story. JIM.
Hi Jim, Tried one with the Blue stuff. Didn't work. I guess I should have listened to you and bought some "Right Stuff". Those covers are not bad to take off but a pain to put back on. Maybe all that fussing damaged the silicone bead. One thing I might have done wrong, is not waiting for a couple of days.
Hi Pat, I just wanted to add my opinion of the Blue stuff. Jim is 100% on when he says to use the "Right Stuff". I have seen a lot of engine failures when people used the blue stuff-mostly because of improper application , however in the shop I worked at the blue stuff was referred to as the "Blue S#*t".
Finally getting around to starting on the To-Do list. First item is to install a fire extinguisher in the trunk. I can't bring myself to drill into anything so I'll mount it on a piece of wood which will be either velcroed or carpet taped to the trunk floor. I have a piece of willow left over from a previous project which will do the job.
that's a fantastic piece of wood......willow you say..........2 thumbs up from here !!!
I also bought a tube of right stuff......to use on intake manifold ends of a small block chevy. Gotta be quick getting things together , label said 5-6 minutes is all you have to assemble parts.
I've had some suggestions to put the extinguisher inside the passenger compartment in case a fire develops at the rear or if it takes too long to get out, open the trunk, and take it out. I'm open to suggestions. I hate to drill into anything.
I keep mine under the passenger seat. I was having fun some years ago honking the horn for folks as I passed by. Then I smelled smoke. Opened the hood to find the grease and oil around the horn wire (before I restored the engine) had caught fire. It was a quick trip to the passenger seat and returned to put it out. A fire ext. is a must. You never know when it will come in handy to save your "baby".
I keep mine under the passenger seat. I was having fun some years ago honking the horn for folks as I passed by. Then I smelled smoke. Opened the hood to find the grease and oil around the horn wire (before I restored the engine) had caught fire. It was a quick trip to the passenger seat and returned to put it out. A fire ext. is a must. You never know when it will come in handy to save your "baby".
Attacked the leaky knee. Removed the two shocks and placed them on the confusion avoider. Stuck a piece of paper towel in the housing to wick up the oil to a lever below the bottom bolt hole.
Cleaned up all the mating surfaces. Last time it had been a challenge to collapse the springs and attach the bolts So I threaded some 3" bolts all the way and "pushed" the caps on. Used some "Right Stuff" as per Jim Hogan and will let it sit for a couple of days as he says and then trim off the excess and refill. Everyone please pray they don't leak.
Next time get some long studs with allen key sockets in the ends, snug them up and get right size nylocks and torque them to a specified torque and you should not have to play with them for a long time.
Everybody says this new RIGHT STUFF is a great product.
Dumb question. Why is it that when I pick the hub up with the hydraulic jack it only moves up about one inch before lifting the axle off the stand and when I let it back down after putting the wheel back on it goes down by a whole bunch more?
Next step, the side cover. I may even remove/clean/repaint Wisebri's starter.
Answer to the dumb question. It is the angle of the dangle. With the jack under it the wheel can not roll back - the long arm moves the wheel ahead when jacked up. Same thing if the hand brake is set and car is jacked-up.When the jack is lowered the car will be sitting high and drops to normal when the brake is released. It is some times normal for a knee to leak when the car is jacked up.
To repiar the leak I would apply a very thin coat of gasket sealer along the bottom on both sides of the gasket. The problem is the modern gaskets are much harder than the all cork gaskets from years ago preventing them from compressing.
Well, the one I fixed looks OK. But...we haven't taken it for a ride yet. The other one still weeps. The oil appears to come from the top, either some overrun from topping it up or leaking around the top cover. I'll have to jack it up with the wheel off and take a closer look.
Removed the side cover, put a beat of Permatex #2 as per Gene's instruction & reinstalled. Looks good in there after 500 miles.
What about the plugs? They're all brown between the electrodes but the rest looks sooty to me.
Okay I assume this is going to come in a tube or a caulking gun ???? which one.?
How are you going to get the windshield rubber to peel back while you inject the glue to seal the rubber to the metal ?
Last question Pat...........why this particular product ??
mike
Hi Mike, It comes in a cartridge for the caulking gun. He told me to drill a 1/16 or 3/32 hole in the tip rather than cut it and it should stay stiff enough to pull and lift the rubber while injecting the stuff. Otherwise I'll need a helper to pull the plastic wedge thing ahead of the nozzle.
The product was recommended (and sold) by the glassman at the local glass shop who cut all my glass. It was Ziebart/Uniglass.
Hey Pat... I'm not well versed on '34 paint, but do you have plans to pinstripe it? Some matching orange would sure look nice with your wheel colour!
You must be a mind reader. I was tossing ideas around. One was to buy one of Eastwood's little pinstripe rollers and try to do it myself. The other was to do what I did with my Model A, lay down a twin pinstripe tape and paint in between.
Also, I had asked Yosemite Sam if he'd come here (His ad says your shop or mine)but he said the trip charges would kill me. He suggested trying to link up with him at a show further South.I had visions of the June show in Gravenhurst.
While the valve cover is off, I ran the engine with the intent of ckecking the valve clearances. They look OK to me. A sight drag on the gauge. However, I noticed there is still a slight hesitation or stumble when applying throttle. So while I was revving it up I thought I saw movement down below. Sure enough, there were tiny orange sparks coming out from under the manifolds. So I shut it down and waited for my heart rate to get back below 300. I looked underneath with my dental mirror and couldn't see anything untoward. So I started it again and felt underneath. There appears to be a leak on the underside of each exhaust manifold runner, more in front. I'm sure I lined up the flanges when I put the two manifolds together. I might even have tightened them only after they were attached to the engine. Would doubling up on the gaskets help?
I also reinstalled one of the hood corners which had fallen off. I used epoxy, it should stay there. I also put a bit of split tubing on the flange at the rear of the hood which rests on the cowl vent when the hood is laid flat.
On a lighter note, I found the perfect article for the glove box. If you look closely there is no 401. And if you look really closely, you can just about see Brewster and Mike Lynch's homes.
Pat, my house was not constructed until 1976, it was all part of the Ontario Ladies College grounds.. Just up from me is a circa 1850 real castle that the sherrif of durham had built . His wife passed away early after it was completed , and he passed away with no children.
Its a magnificent structure built in the English castle style with all kinds of chimneys sticking out of the roof. Its now a finishing school for women from all over the world. Its a live in or a come to everyday.
Your hood corners, do they have a stud with wings that gets bent over on the inside ?? They should never come off. good idea on the rubber on the inside.
Pat: Did you check the manifolds with a straight edge before you put them back on? Extra gasket material can help a bit but you may need a machinist to mill them. Steve
Pat: Did you check the manifolds with a straight edge before you put them back on? Extra gasket material can help a bit but you may need a machinist to mill them. Steve
I seem to remember putting them flange down on the table saw deck before snubbing them. I may need to take them off and get them planed.
Your hood corners, do they have a stud with wings that gets bent over on the inside ?? They should never come off. good idea on the rubber on the inside.
mike
They do have the little tabs. That the corner that I welded up, making it somewhat thicker. Of course I had forgotten to make a template for the location of the hole which ended up a bit off.
Pat... I noticed that there is no hiway 9 between Orangeville and Aurora. It ends at Hiway 50, right where it turns south to my town of Bolton. Also of note is all of the ferry lines that run the Great Lakes. Now we have Super Highways, no ferries, and gridlock! Progress Blows!
Those accustomed to the finest...find it in Chevrolet. 1953 Belair Convertible 1951 2dr Deluxe Sedan 2015 GMC SLE 4X4
Pat... I noticed that there is no hiway 9 between Orangeville and Aurora. It ends at Hiway 50, right where it turns south to my town of Bolton. Also of note is all of the ferry lines that run the Great Lakes. Now we have Super Highways, no ferries, and gridlock! Progress Blows!
I'm sure we'd have a lot of fun poring over that map with a cold one. Maybe this summer....
I found that the bolts holding the manifold to the block could use some tightening. So I did that. Now it looks like the leak is only under the front runner/port/branch. what can I squirt into the carb to do a smoke test?
Pat: Did you check the manifolds with a straight edge before you put them back on? Extra gasket material can help a bit but you may need a machinist to mill them. Steve
I seem to remember putting them flange down on the table saw deck before snubbing them. I may need to take them off and get them planed.
Pat, I experienced a similar problem on my 35 manifolds, I made the mistake of assembling the 2 halves of the manifold before attaching to the head...wrong... I slackened the 4 inlet manifold nuts after loosely attaching the complete assembly to the head, I then did all the manifold bolts up tight to the head. Once that was done I tightened the 4 inlet manifold bolts and by doing it that way, the flanges tightened up and aligned and any discrepancies between the inlet and exhaust flanges were eliminated because the top casting with a small amount of movement was allowed to move and settle in a none stress position....then no more leaks! this worked for me, your flanges may need machining as mentioned before, but maybe try this first ?
Received the manifold gaskets. Bit the bullet and injected windshield sealant under the rubber and created the mess of the century in the process.
Luckily, that cleans up quite well with varsol and about a thousand paper towels. There still is a bit of squeeze out here and there so I'll have to have another go at it. Today I was disgusted with the smell of the Varsol.
When I had done the woodgrain of the garnish moldings I had used the rear window molding from my sedan parts car. That ended up being way too narrow, so the upholsterer had installed it with a length of black hidem between it and the glass. It looked a bit like a thick rubber. I now have a proper coupe molding. Next step is to strip it and woosgrain it. Then I'll be able to install that neat little blind which goes in the back window.
I have 3 of those diecast 1.24 danbury mint roadsters, 1 green and 2 burgundy/maroon.
If you lift up the front seat the metal tray is under there with all the tools and the battery. Engine is fully detailed.
Underneathe you can see all the rivet detail and special ribs for the rumble seat floor system . I believe the 35 tech advisor mike Bancroft's roadster was the model for this.
I just put a scale duvall V style windshield on the green roadster off a 32 ford. Had to slice 1/8" out of the models top to get it to sit down properly.
I believe the 35 tech advisor mike Bancroft's roadster was the model for this.
About a year ago there was a '34 listed on ebay that was formerly owned by Wayne Taylor. The listing stated that it was used as the Danbury model. I'm not sure how accurate that story was… but I think this was the car.
But then again, I could be really wrong...
Those accustomed to the finest...find it in Chevrolet. 1953 Belair Convertible 1951 2dr Deluxe Sedan 2015 GMC SLE 4X4
Wayne Taylor's car was a "put-to-gather". Too bad they elected to use it as a model. I have ridden in that car and also driven it.
What exactly does " put-to-gather " mean ??? " Too bad they elected to use it as a model " ???
What are you trying to say exactly.????????????????
Its not overly accessorized....as far as OPTIONS.....It only has rear spare with metal cover.........radiator ornament, bumper guards and right side tail light, twin horns, that I can see on the model.
I thought they used Mike Bancrofts VCCA tech advisors car a 35 roadster as the basis of the model. ?
Checked the moldings today, they were good and dry. So I applied the toner. It is a dark transparent wash that gives it warmth and bring the grain out. First picture is before, second after.
Here it is installed. Before everyone sends me back to the shop to redo it, let me assure you that it doesn't look blotchy like that in daylight. It is the flash which gives that effect.
Now for the blind, does the roller go in front or behind? It is not clear in the picture I have in front of it.
Thanks Gaither and Gunsmoke. I'm rather proud of it but I know where all the little defects are and you'd likely find them too if you got to inspect the car.
Next come two seat belts. I've been told by my daughters that if I intend to give rides to my grandchildren we going to need seatbelts. I imagine they'd bolt to the back board of the seat frame bottom, perhaps just below the backrest cushion? Any ideas?
Belts are a great idea for the kids. Although your car is seatbelt exempt due to it's historical age, the kids are required to be belted in until 12 yrs old, or 80 pounds. You don't want child services paying a visit...
Those accustomed to the finest...find it in Chevrolet. 1953 Belair Convertible 1951 2dr Deluxe Sedan 2015 GMC SLE 4X4
Also, when I was fiddling with the garnish molding and the blind, I noticed that some stuff had fallen off the parcel shelf. My sedan seat doesn't seal that area like a real coupe seat does. So I decided to make a fence for the parcel shelf out of a trip of oak and some leftover headliner material. Not "correct" but efficient, neat looking too.
Hi Pat, The seat belts need to be bolted to a substantial section of the floor. Attaching to the seat or a small piece of sheet metal in the floor will not keep the passenger from leaving the car in an accident unless the seat gets caught in the window opening. Hopefully you can upgrade the fasteners holding the seat to the frame and use them somehow. Cheers, Steve
Pat could attach the bolts for the seat belts directly too the rear of his K member sections and then drill thru it and attach long bolts with steel washers in between the metal floor panel and the frame. Its as solid as it could be. If pat wants to leave it as it is and not make any more holes in his floor, has my blessing.
Great Idea pat with the wood across parcel shelf to stop things falling down. Just shows the old noggin is still working properly . mike lynch
Back In January I had started the car to check the valves etc. only to discover an exhaust leak. So today I removed the manifolds and the location and cause of the leak are obvious. Gasket failure. The new ones look to be of better quality. Here is a dumb question: does it matter which way the dimpled side of the gasket goes? I had pot the old ones dimpled side to the manifold.
Check the manifold and head mating surface for flatness. The gaskets should be installed with the bulge away from the engine. Looks like in your case the bumps would be toward the manifold.
Pat, make sure that your cylinder head mounting surface, where the manifold bolts up too , is perfectly straight, use a straight edge to check it.
Same applies to the manifold itself. If its not straight you might have to take it to a machine shop to have it made straight like a cylinder head. You could also try double gasketing it.
Mr Gasket or whatever he calls himself down in Hamilton sells mineral fiber ( non asbestos ) gasket material and you can cut your own out of it for exhaust manifold gaskets.
The luggage rack knobs, did you get them from somewhere reproduction ???? or were they originals restored.?
mike
Mike the whole thing was NOS. The knobs were covered in a fine surface rust but not pitted. I had cleaned them and painted silver for the time being. This time I bit the bullet.
Pat, make sure that your cylinder head mounting surface, where the manifold bolts up too , is perfectly straight, use a straight edge to check it.
Same applies to the manifold itself. If its not straight you might have to take it to a machine shop to have it made straight like a cylinder head. You could also try double gasketing it.
Mr Gasket or whatever he calls himself down in Hamilton sells mineral fiber ( non asbestos ) gasket material and you can cut your own out of it for exhaust manifold gaskets.
mike
Laid the manifolds on the table saw deck and poked around with feeler gauges. Ended up taking the exhaust manifold to the machine shop.
If the manifold is bowed it will bend straigh when bolted down. The small block Chevrolet manifolds would always bow when removed. A spreader tool was made the spread them apart so the bolts could be inserted. Tightening the bolts would flatten out the manifold perfectly....and it was a much shorter manifold.
The luggage rack knobs, did you get them from somewhere reproduction ???? or were they originals restored.?
mike
Mike the whole thing was NOS. The knobs were covered in a fine surface rust but not pitted. I had cleaned them and painted silver for the time being. This time I bit the bullet.
WOW WOW WOW, nos one complete.......get yourself some lottery tickets. That is one lucky find my friend.
You know that it is an American style luggage rack. I have 2 of these one on my coupe that I bouight at Hershey in 80 and the other for the roadster I got off glen rarick last year.
I had to buy all new stainless trim because mine was so badly dented up. Now its sitting at a restoration shop to have the twist taken out of it with a big press machine.
Yep, it is American style, which looks better. At least to my own taste. Thanks to Mr. Leventon for saving it for me through all these years and to Joe to point it out to me.
If the manifold is bowed it will bend straigh when bolted down. The small block Chevrolet manifolds would always bow when removed. A spreader tool was made the spread them apart so the bolts could be inserted. Tightening the bolts would flatten out the manifold perfectly....and it was a much shorter manifold.
Gene, one thing he needs to be aware of is that due to the age of these manifolds , excess or heavy tightening of them might cause the ears of the manifold to break. Then your either trying to properly weld cast iron or trying to locate another manifold.
I say its much more sensible and possibly cost effective to have them/it resurfaced straight so that the leak---leaks is easily fixed without undo stress on the parts.
I had the machine shop mill both the intake and exhaust. Also had to take a little off the 3 spacers so the assembly would lay flat on the head. Had a little stock taken off the manifold side of the head,a little rough by the exhaust ports. Tightened up the manifolds first and then the 4 nuts on top. I also used grade 8 flanged bolts(black) to get a good bite on the steel flanges that hold the manifold on. Used copper coat on original type gaskets.
I did tighten the four nuts that hold the manifolds together a little but I did the final tightening last. After machining I had to take them apart anyway to make up a new heat riser shaft and plate out of stainless. Also if higher grade bolts are used still watch the torque values.
Pat, altho I own a beugler striper and at one time a couple of dagger brushes like in the picture..........its harder than you think...........hey only way to learn is to try it. Lots & lots of practice can use Bristol board.
myself I would mask off the lines with tape you pull a line out of then either air brush it or use a high quality flat brush.
Wipe the area to be striped with silicon wax and polish remover.
Grey car, are you doing a green stripe ??? did not notice colour on the can label.
Well I did go for a ride, about 3 miles. It started out fine, but at one stop sign it showed signs of wanting to race. A few stabs on the gas pedal settled it (binding?). On the second half of the ride it stopped twice at stop/red lights. I don't think it stalled, more like wound down and stopped. (fuel?). I've had problems getting a smooth idle (air leaks?) and need to speed up the idle to get it out of its tendency to "bog" down. I have a feeling (since I don't understand enough to know what is wrong) that this is all carb related. Any ideas? I realize that it is next to impossible to diagnose something from 500 miles away, maybe someone can pint me in the right direction.
After, I had removed the plugs in the carb. (look on the under side. They remove with a large screw driver. Must have carb. on the bench.)and dumped out the trash on the screens. A fine dirt was there. It had passed the filter.)I have had your problem. It was the float that was set to low. I opened the carb. and moved it so it would be higher and let more gas be in the bowl. (On stopping problem) On the Motor races, will not throttle down...an old trick is to spray wd-40 around the area to see if it stops racing...air leak in inlet piping..defective induction pipe joints....leaky carburetor flange packing.Also could be "Throttle stop screw open too much". Good Luck. Try one thing at a time then go to the next. It is a mater of trial and error.
WD40 is a good test and equally good is "carb and throttle body cleaner". Both cause a variation in engine revs to indicate where a problem exists. Tony
Thanks Terrill & Tony. I think I know where to look now. I noticed the spacer and the carb base didn't just slide onto the studs, I had to wiggle them down and they are likely not seated and take air.. I bet they banged or pried the studs in the machine shop. I'll just wrap some tape over the seam first. If it proves to be the problem, then everything has to come apart again.
Looks like that was it. I removed the carb and spacer, reamed out the holes rather than prying on the studs and they went right to the bottom. Put a tiny bit of high-temp gasket maker just to seal the air and retightened snugly. Idle is a lot smoother. Went for a long ride yesterday, half of it with stop signs and stoplights, no stalling or stumbling. Went right up to a blistering 50 mph.
Decided to use this cross piece to mount the seat belt anchors to. It is mortised into the sills and the floor pans are screwed to it. I doubt anything would pull it out. Besides it is 1 1/2 inches thick.
Marked the opening of the seat frame then removed the frame. Drilled some pilot holes. The outside ones came out right by the frame.
Had to reduce the recommended minimum spacing from 15" to 13" because the centre holes would have come out above the center of the X-member and would be inaccessible. In the "other car", the short belt is by the door and the long one by the centre. So I'll install these like that.
The frame (in theory) is a good place to anchor seat belts but in the forbidden occurence the body moves in relation to the frame, guess what happens to the belt? Tony
Both. Hi Pat. I thought the Right Stuff was only for water connections. Changing the subject, I pulled the rear cover plug on my 35 and oil came pouring out.
That is probably because oil is getting past the driveshaft seal and is coming from the u-joint ball and the transmission. As for the "Right Stuff" their website says it is good for both coolant & oil.
Well, I have the wherewithal, now I need the gumption. I guess I'll practise on a spare door first.
Tried a short strip on a piece of glass to get the feel of the tape and to practice cutting a point. Works pretty well. This with model paint and a modeler's brush. Next I'll try it with the actual paint and that fancy brush.
Question: this is the only place where the molding don't quite line up. Should I go straight through with the tape and have the stripe visually offset the mismatch or should I follow the molding in case the hood gets its right position some day (highly unlikely).
I would try to repair the hinge assembly at the rear of the hood top.
It looks like its pushing this part of the hood outwards. The top area seems to sit down onto the hood lacing perfectly.
I would also look at the rear part of the side panel hinge assembly to determine why it may be pushing the top panel outwards.
Hopefully it will be something simple and easily corrected with a bit of twist and pressure ???
I would stripe it after you rectify the alighnment.
mike lynch
Mike, I thought I had that hood fitting perfectly before sending it out to the painter's but obviously It didn't. Well, we're going to have to live with it. I'm sure trying to bend it some more would crack the finish and I'm not going there.
Did a very challenging job today. I laid down the pinstriping stencil. What are the odds of them being the same color as the car? You can hardly see them, making it difficult to tell if they are straight. The orange will certainly tell whether they are. I put them on three times in places. Almost ran out. I was dizzy and cross-eyed when I got done.
I hate to bring this up, but I think I know why you were having so much trouble. Take a look at your last picture, on the ground to the right side is a "Church Key", now don't tell me that it was there to open a can of paint.
I hate to bring this up, but I think I know why you were having so much trouble. Take a look at your last picture, on the ground to the right side is a "Church Key", now don't tell me that it was there to open a can of paint.
Makes sense to have a CHURCH KEY laying around because in first picture it appears Pat is praying to the Chevrolet god ?
Here... there are a few hills here and there but it'll do. It actually is easier to paint between invisible tapes than to apply them. And yes they are incorrect but isn't that old crock pretty with her "lines"?
Man, I love that. I keep thinking back to the first time I saw a picture of your car and said, "No way will I ever be around to see that finished if ever." Amazing.
I think I'm a fairly wise person because I'm smart enough to realise I'm not too bright.


![[Linked Image from i1176.photobucket.com]](http://s1176.photobucket.com/user/landman2/media/P1030986.jpg.html)


![[Linked Image from i1176.photobucket.com]](http://s1176.photobucket.com/user/landman2/media/20110401004.jpg.html)

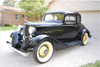
![[Linked Image from i1176.photobucket.com]](http://s1176.photobucket.com/user/landman2/media/LukaweskyCoachbefore-2.jpg.html)


![[Linked Image from i1176.photobucket.com]](http://s1176.photobucket.com/user/landman2/media/GaragePierre.jpg.html)
![[Linked Image from i1176.photobucket.com]](http://s1176.photobucket.com/user/landman2/media/Garagepierre2.jpg.html)
![[Linked Image from i1176.photobucket.com]](http://s1176.photobucket.com/user/landman2/media/Scan-Copy.jpg.html)
![[Linked Image from i1176.photobucket.com]](http://s1176.photobucket.com/user/landman2/media/DSC_0169.jpg.html)
![[Linked Image from i1176.photobucket.com]](http://s1176.photobucket.com/user/landman2/media/P1040021.jpg.html) [/URL[URL=http://s1176.photobucket.com/user/landman2/media/P1040023.jpg.html]
[/URL[URL=http://s1176.photobucket.com/user/landman2/media/P1040023.jpg.html]![[Linked Image from i1176.photobucket.com]](http://s1176.photobucket.com/user/landman2/media/P1040019.jpg.html)
![[Linked Image from i1176.photobucket.com]](http://s1176.photobucket.com/user/landman2/media/P1040035.jpg.html)
![[Linked Image from i1176.photobucket.com]](http://s1176.photobucket.com/user/landman2/media/P1040034.jpg.html)
![[Linked Image from i1176.photobucket.com]](http://s1176.photobucket.com/user/landman2/media/P1040040.jpg.html)
![[Linked Image from i1176.photobucket.com]](http://s1176.photobucket.com/user/landman2/media/P1040041.jpg.html)
![[Linked Image from i1176.photobucket.com]](http://s1176.photobucket.com/user/landman2/media/July1820131.jpg.html)
![[Linked Image from i1176.photobucket.com]](http://s1176.photobucket.com/user/landman2/media/201401043.jpg.html)
![[Linked Image from i1176.photobucket.com]](http://s1176.photobucket.com/user/landman2/media/201401045.jpg.html)
![[Linked Image from i1176.photobucket.com]](http://s1176.photobucket.com/user/landman2/media/201401041.jpg.html)

![[Linked Image from i1176.photobucket.com]](http://s1176.photobucket.com/user/landman2/media/201401065.jpg.html)
![[Linked Image from i1176.photobucket.com]](http://s1176.photobucket.com/user/landman2/media/201401066.jpg.html)
![[Linked Image from i1176.photobucket.com]](http://s1176.photobucket.com/user/landman2/media/201401061.jpg.html)
![[Linked Image from i1176.photobucket.com]](http://s1176.photobucket.com/user/landman2/media/201401072.jpg.html)
![[Linked Image from i1176.photobucket.com]](http://s1176.photobucket.com/user/landman2/media/201401074.jpg.html)
![[Linked Image from i1176.photobucket.com]](http://s1176.photobucket.com/user/landman2/media/201401075.jpg.html)
![[Linked Image from i1176.photobucket.com]](http://s1176.photobucket.com/user/landman2/media/201401103.jpg.html)
![[Linked Image from i1176.photobucket.com]](http://s1176.photobucket.com/user/landman2/media/201401106.jpg.html)
![[Linked Image from i1176.photobucket.com]](http://s1176.photobucket.com/user/landman2/media/201401101.jpg.html)

![[Linked Image from i1176.photobucket.com]](http://s1176.photobucket.com/user/landman2/media/20140113.jpg.html)
![[Linked Image from i1176.photobucket.com]](http://s1176.photobucket.com/user/landman2/media/201401137.jpg.html)
![[Linked Image from i1176.photobucket.com]](http://s1176.photobucket.com/user/landman2/media/2014011310.jpg.html)
![[Linked Image from i1176.photobucket.com]](http://s1176.photobucket.com/user/landman2/media/201401135.jpg.html)
![[Linked Image from i1176.photobucket.com]](http://s1176.photobucket.com/user/landman2/media/201401136.jpg.html)

![[Linked Image from i1176.photobucket.com]](http://s1176.photobucket.com/user/landman2/media/201401168.jpg.html)
![[Linked Image from i1176.photobucket.com]](http://s1176.photobucket.com/user/landman2/media/201401161.jpg.html)
![[Linked Image from i1176.photobucket.com]](http://s1176.photobucket.com/user/landman2/media/2014011610.jpg.html)


![[Linked Image from i1176.photobucket.com]](http://s1176.photobucket.com/user/landman2/media/201401172.jpg.html)
![[Linked Image from i1176.photobucket.com]](http://s1176.photobucket.com/user/landman2/media/201401174.jpg.html)
![[Linked Image from i1176.photobucket.com]](http://s1176.photobucket.com/user/landman2/media/201401175.jpg.html)
![[Linked Image from i1176.photobucket.com]](http://s1176.photobucket.com/user/landman2/media/201401171.jpg.html)
![[Linked Image from i1176.photobucket.com]](http://s1176.photobucket.com/user/landman2/media/201401177.jpg.html)

![[Linked Image from i1176.photobucket.com]](http://s1176.photobucket.com/user/landman2/media/201401242.jpg.html)
![[Linked Image from i1176.photobucket.com]](http://s1176.photobucket.com/user/landman2/media/201401241.jpg.html)
![[Linked Image from i1176.photobucket.com]](http://s1176.photobucket.com/user/landman2/media/201401243.jpg.html)
![[Linked Image from i1176.photobucket.com]](http://s1176.photobucket.com/user/landman2/media/201401244.jpg.html)
![[Linked Image from i1176.photobucket.com]](http://s1176.photobucket.com/user/landman2/media/201401246.jpg.html)
![[Linked Image from i1176.photobucket.com]](http://s1176.photobucket.com/user/landman2/media/201401247.jpg.html)

![[Linked Image from i1176.photobucket.com]](http://s1176.photobucket.com/user/landman2/media/LucaweskyCoachAfter-1.jpg.html)
![[Linked Image from i1176.photobucket.com]](http://s1176.photobucket.com/user/landman2/media/P1040816.jpg.html)
![[Linked Image from i1176.photobucket.com]](http://s1176.photobucket.com/user/landman2/media/201402054.jpg.html)
![[Linked Image from i1176.photobucket.com]](http://s1176.photobucket.com/user/landman2/media/201402055.jpg.html)
![[Linked Image from i1176.photobucket.com]](http://s1176.photobucket.com/user/landman2/media/201402051.jpg.html)
![[Linked Image from i1176.photobucket.com]](http://s1176.photobucket.com/user/landman2/media/201402103.jpg.html)
![[Linked Image from i1176.photobucket.com]](http://s1176.photobucket.com/user/landman2/media/201402104.jpg.html)
![[Linked Image from i1176.photobucket.com]](http://s1176.photobucket.com/user/landman2/media/201402101.jpg.html)
![[Linked Image from i1176.photobucket.com]](http://s1176.photobucket.com/user/landman2/media/20140213.jpg.html)
![[Linked Image from i1176.photobucket.com]](http://s1176.photobucket.com/user/landman2/media/201403036.jpg.html)


![[Linked Image from i1176.photobucket.com]](http://s1176.photobucket.com/user/landman2/media/P1040894.jpg.html)
![[Linked Image from i1176.photobucket.com]](http://s1176.photobucket.com/user/landman2/media/P1040895.jpg.html)
![[Linked Image from i1176.photobucket.com]](http://s1176.photobucket.com/user/landman2/media/P1040898.jpg.html)
![[Linked Image from i1176.photobucket.com]](http://s1176.photobucket.com/user/landman2/media/P1040899.jpg.html)
![[Linked Image from i1176.photobucket.com]](http://s1176.photobucket.com/user/landman2/media/P1040904.jpg.html)
![[Linked Image from i1176.photobucket.com]](http://s1176.photobucket.com/user/landman2/media/P1040905.jpg.html)
![[Linked Image from i1176.photobucket.com]](http://s1176.photobucket.com/user/landman2/media/201403082.jpg.html)
![[Linked Image from i1176.photobucket.com]](http://s1176.photobucket.com/user/landman2/media/201403081.jpg.html)

![[Linked Image from i1176.photobucket.com]](http://s1176.photobucket.com/user/landman2/media/201403115.jpg.html)
![[Linked Image from i1176.photobucket.com]](http://s1176.photobucket.com/user/landman2/media/201403111.jpg.html)
![[Linked Image from i1176.photobucket.com]](http://s1176.photobucket.com/user/landman2/media/Rearwindowdetail.jpg.html)
![[Linked Image from i1176.photobucket.com]](http://s1176.photobucket.com/user/landman2/media/201403122.jpg.html)
![[Linked Image from i1176.photobucket.com]](http://s1176.photobucket.com/user/landman2/media/201403124.jpg.html)
![[Linked Image from i1176.photobucket.com]](http://s1176.photobucket.com/user/landman2/media/201403126.jpg.html)

![[Linked Image from i1176.photobucket.com]](http://s1176.photobucket.com/user/landman2/media/2014031414.jpg.html)
![[Linked Image from i1176.photobucket.com]](http://s1176.photobucket.com/user/landman2/media/201403145.jpg.html)
![[Linked Image from i1176.photobucket.com]](http://s1176.photobucket.com/user/landman2/media/201403147.jpg.html)
![[Linked Image from i1176.photobucket.com]](http://s1176.photobucket.com/user/landman2/media/2014031411.jpg.html)
![[Linked Image from i1176.photobucket.com]](http://s1176.photobucket.com/user/landman2/media/2014041410.jpg.html)
![[Linked Image from i1176.photobucket.com]](http://s1176.photobucket.com/user/landman2/media/201404149.jpg.html)
![[Linked Image from i1176.photobucket.com]](http://s1176.photobucket.com/user/landman2/media/2014041411.jpg.html)
![[Linked Image from i1176.photobucket.com]](http://s1176.photobucket.com/user/landman2/media/2014041414.jpg.html)
![[Linked Image from i1176.photobucket.com]](http://s1176.photobucket.com/user/landman2/media/2014041413.jpg.html)
![[Linked Image from i1176.photobucket.com]](http://s1176.photobucket.com/user/landman2/media/2014041415.jpg.html)
![[Linked Image from i1176.photobucket.com]](http://s1176.photobucket.com/user/landman2/media/April2320132.jpg.html)
![[Linked Image from i1176.photobucket.com]](http://s1176.photobucket.com/user/landman2/media/P1050173.jpg.html)
![[Linked Image from i1176.photobucket.com]](http://s1176.photobucket.com/user/landman2/media/201405032.jpg.html)
![[Linked Image from i1176.photobucket.com]](http://s1176.photobucket.com/user/landman2/media/201405033.jpg.html)
![[Linked Image from i1176.photobucket.com]](http://s1176.photobucket.com/user/landman2/media/201405037.jpg.html)

![[Linked Image from i1176.photobucket.com]](http://s1176.photobucket.com/user/landman2/media/Wood_6.jpg.html)
![[Linked Image from i1176.photobucket.com]](http://s1176.photobucket.com/user/landman2/media/201405285.jpg.html)
![[Linked Image from i1176.photobucket.com]](http://s1176.photobucket.com/user/landman2/media/201405287.jpg.html)
![[Linked Image from i1176.photobucket.com]](http://s1176.photobucket.com/user/landman2/media/201405288.jpg.html)
![[Linked Image from i1176.photobucket.com]](http://s1176.photobucket.com/user/landman2/media/P1050229.jpg.html)
![[Linked Image from i1176.photobucket.com]](http://s1176.photobucket.com/user/landman2/media/P1050226.jpg.html)
![[Linked Image from i1176.photobucket.com]](http://s1176.photobucket.com/user/landman2/media/P1050225.jpg.html)
![[Linked Image from i1176.photobucket.com]](http://s1176.photobucket.com/user/landman2/media/P1050230.jpg.html)
![[Linked Image from i1176.photobucket.com]](http://s1176.photobucket.com/user/landman2/media/201406124.jpg.html)
![[Linked Image from i1176.photobucket.com]](http://s1176.photobucket.com/user/landman2/media/201406123.jpg.html)
![[Linked Image from i1176.photobucket.com]](http://s1176.photobucket.com/user/landman2/media/2014062010.jpg.html)
![[Linked Image from i1176.photobucket.com]](http://s1176.photobucket.com/user/landman2/media/201406207.jpg.html)
![[Linked Image from i1176.photobucket.com]](http://s1176.photobucket.com/user/landman2/media/201406204.jpg.html)
![[Linked Image from i1176.photobucket.com]](http://s1176.photobucket.com/user/landman2/media/201406203-1.jpg.html)
![[Linked Image from i1176.photobucket.com]](http://s1176.photobucket.com/user/landman2/media/201406211.jpg.html)
![[Linked Image from i1176.photobucket.com]](http://s1176.photobucket.com/user/landman2/media/201406213.jpg.html)
![[Linked Image from i1176.photobucket.com]](http://s1176.photobucket.com/user/landman2/media/201406215.jpg.html)