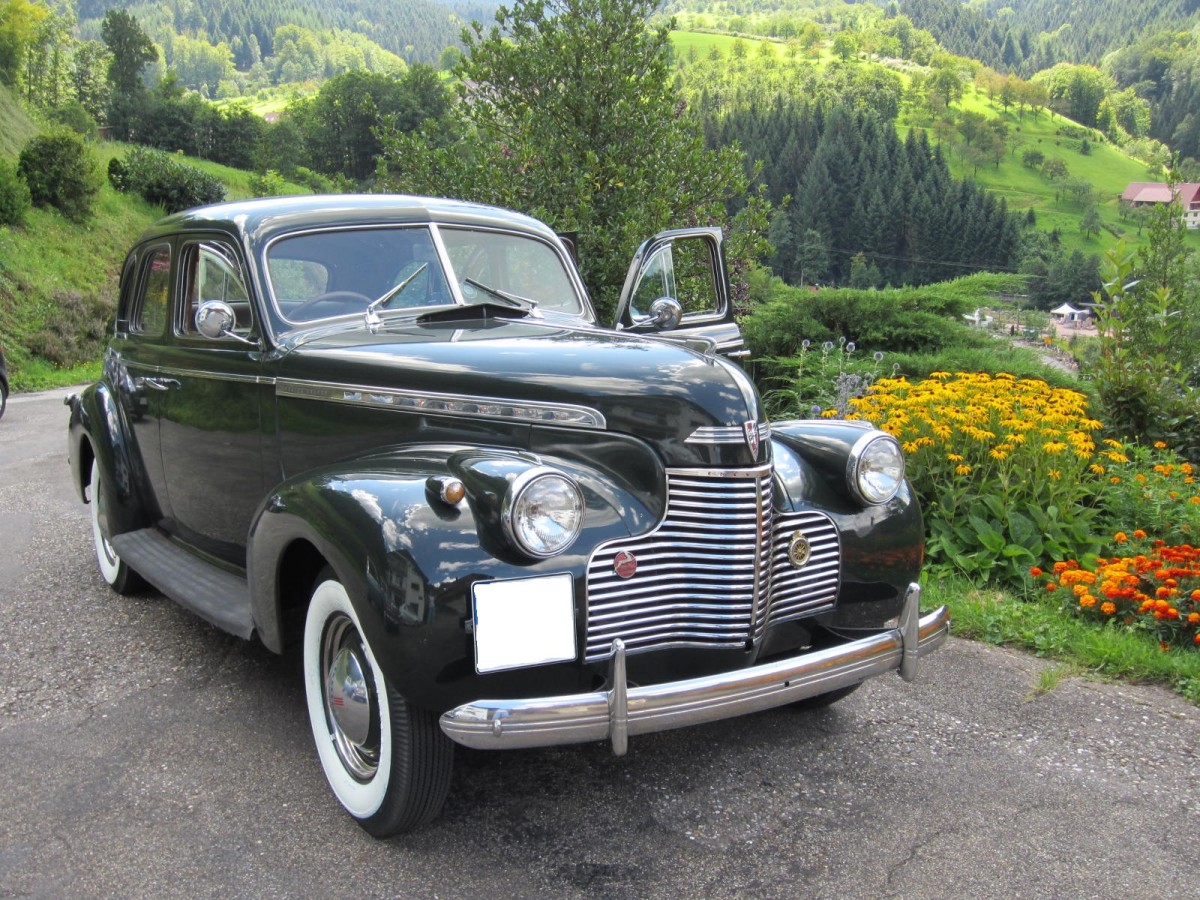
This weekend the head disassembly and inspection, measering of the block was on program. Unfortunately, it is not as positive as I had imagined. The visual inspection was already nothing good guess. There was at 1.Cylinder pitting in the bore. The other holes are without major damage, but the former cross-cut by honing is no longer visible. With an indoor meter, I then measured all cylinders and registered the results in a Chart. The basic dimension of the bore is 3 1/2 ", metric 88.900 mm. The manual says, if the hole is tapered or out of round must be honed. Should the deviation exceed 0.1mm, should be drilled and oversize pistons are installed. Cylinder 1 suggests everything because it is wider than 0,165mm above the bottom. Measurement at 45 ° rotated, vary the deviations of 0.047 on 0.075 to 0.180 mm. That is not only conical, but also oval. The other cylinder would be here possibly still within the tolerance range, but by this pitting only Honing is no Option. What to do, do not know yet. There must be researched first time what all the fun costs. Either everything from one source, or only drilling and honing and assemble themselves - of course without guarantee. At least the head and engine block have "Matching Numbers". So, 75 years of age and untouched!
As a next step, I then split the head completely. The exhaust valves look optically good, further digestion must here give measurement. What bothers me on the intake valves , is the non-visible contact with the valve seat. There must be also bright spots , like the outlet also - or I'm wrong ? I also wonder about the caps on the intake valves. I can´t find them in the parts catalog, is that original? Pictures and chart you can also see here, sorry only in german ;-) https://1940specialdeluxe.wordpress.com/
Your website page looks great. When I went to it, my computer asked me if I wanted to translate your German text into English. I said yes and read the whole article in English. Life is good.
Great 1940. Keep us posted on your progress.
dtm
the toolman 60th Anniversary Meet Chairperson Dave VCCA # L 28873 VCCA #83 Tool Technical Advisor for 1914-1966 VCCA #83 1940 Chevrolet Technical Advisor
Yes, Google is our best Friend ;-) But sometimes the Translation is a little bit funny.
I also wonder about the caps on the intake valves. I can´t find them in the parts catalog, is that original?
Crankshaft and Bearings should not be in better Condition I mean, but that will show the next days. Can you tell me something about Quality of the CHEVROLET Master Engine Kit from chevs? Which Parts are in this Kit? Where did you get your Engine Parts? Crankshaft and Bearings should not be in better Condition I think, but that will show the next days. Can someone tell me about Quality of the CHEVROLET Master Engine Kit from chevs? Which Parts are included? Where did you get your Engine Parts?
I think that your intake valves were just a bit too tight and were not touching the seats. The caps are aftermarket and keep oil from running down the valve shafts into the cylinders.
I love your '40! Hoping to have mine looking so nice some day!
The caps on the intake valves are not original. They are what we call aftermarket and were thought to prevent oil from running down the valve stem causing oil burning and smoking.
The rusted intake valves is caused by long periods of not being run and damp conditions. I wouldn't worry about rust pits on the cylinder walls but would have the head tested for cracks.
Andre The pitting in the cylinder wall WILL do more damage, most likely caused by moisture entering the cylinder and settling on top of the piston. The only way I know of to fix is to have the cylinder (preferably all cylinders) bored out and fit new pistons. I the boring goes too far oversize for available pistons the machine shop can fit sleeves to bring the cylinder diameter back to factory size.
The valve appears to have not been closing properly.
@RichardJ … checked the Valve Clearance last year (warm engine!). Was correct and I wonder about that all 6 intake valves should be too tight? Don’t know whether this is coming from this aftermarket covers?? They make no sense for me, because there are plastic Caps on the Valve shaft.
@Stefan … looks not bad? O.k. he isn´t cracked anywhere but from good condition miles away.
@Tony … that’s the way I would go. Next week will have a meeting in the engine shop. I will report on the progress
I got all the parts for rebuilding my engine from Kanter Click.
You have three choices of part packages according to what your rebuild plan may be.
My machine shop was satisfied with the parts except for the springs on the valves (too weak) and the pushrods (two long). I could have returned the parts but I had them over a year before the shop tried to use them (shop not on a good rebuild schedule). My shop choose to use my originals.
Please search our old posts for my rebuild experiences especially information on my rear seal replacement. I recommend using only the original replacement seal. You can buy them occasionally on ebay or from a Canadian parts company, I also have a few on hand and might sell you a set.
To find my rebuild experiences search our posts using the Keyword Search Terms+engine +rebuild and the Display NameMike Buller.
German's are great at managing details, and this is very important for a successful rebuild.
Best wishes, Mike
P.S. Just got back from a great 3 weeks in Germany. We survived two rail strikes, one forced us to ride a bus from Kassel to Leipzig. The driver talked most of the time to passengers in the front seats. On the autobahn he drove like a little old lady. In urban areas he drove like he was on the autobahn!! Saw only two American cars. A new Chevy Camero and a 1958 Buick. I did get to drive a BMW electric car. The owner had rented it for 6 weeks for about 500 Euro. Great acceleration, half hour recharge at a charging station, or 8 hours at home. Lots of automotive innovation (carbon fiber body, small turning radius, can park itself without assistance). It should be the next generation of automobile once the price is reasonable. This one cost about $50,000. Saw an interesting quote on a bag a man was carrying, "less oil more courage."
"I wouldn't worry about rust pits on the cylinder walls but would have the head tested for cracks."
Alligator,
I'm no "Expert" but if I found a block in that condition I would rebore it to clean up the bores. Why assemble an engine with such obvious damage?
Since the head is off there is performance to be gained by blending the bowls (port area directly below the valves) to smooth the sharp angles. Airflow hates sharp angles. Many articles in automotive publications show that the best bang for the buck in porting street engines is in smoothing out obstructions to air flow in the port bowls. High quality aftermarket heads for current engines have very nicely blended bowls. Smooth airflow through the ports is not just a race concept, but benefits street performance also. Those old engines need all the performance they can get.
Does anyone know the exact piston diameter and piston height (compression height)? How big is the piston pin diameter? Wants to look for alternative piston in Germany. Apparently fits the piston from Volvo B 20 engine with small adjustments. The engine I dismantle now completely and then I'll check the tolerances.
Alligator I would only use pistons made to fit the engine you are repairing. It doesnt take much of a difference to cause major catastrophy, been there.
As Brino said if you can see the pitting in the cylinder wall get the lot bored and NEW pistons. If the pitting is deep the machine shop can fit dry sleeves and bore them to match the others.
Would like to use pistons who made fit to this engine,too. But must buy from Germany, don´t know the Quality. Shipping, Customs and Tax are very Expensive and sent back if faulty, isn´t an option. So i look for Alternatives. Here is a very good machine shop who can make pistons fit. But Diameter and Compression Height must fit. Now i found on EGGE Homepage Bore 3,5" and CH 2,25", so the Volvo Pistons doesn´t fit because they are to high for machining
Hi Tino, thanks for your Help. Know the Opel Pistons but the Diameter is with 91mm too big. Biggest oversize Boring from Chev is 90,932mm (3,58")and the CH doesn´t fit. Pistons with the right Height and Diameter are allmost diesel and have to big pins :-( Seems i have to buy in USA!
The piston pictured had a domed top, 1937-1940 Chevrolets had a dome top piston. The 1941-1953 216 requires a flat top piston. Also most European Chevrolet engines had the small bore "Cheata" engine so be careful.
None of the measurements match what I show in my manuals. Do you have any casting or stamped numbers from the crankshaft? Per the post above by Chevnut perhaps your engine is not of US manufacture or specs.
I just look at the picture to the crankshaft and think, these are not enough bearing points! There are only nine, where is the tenth? In another picture the main bearing is then seen under the timing gear cover
I have instead the connecting rod bearing measured. I just wondered about the similar diameter. Will again remeasure. Nevertheless, the diameter out of tolerance
Please tell me how to remove the oil filler, is this only pluged?
Use a block of wood and tap gently on the oil filler and it will come out. It is held in by friction and the clamp near the bottom. Looks like the clamp is already loose.
Bearing Points??? There four main bearing journals and six connecting rod bearing journals on a 216 engine. Your engine has the correct - as per the pictures.
I know, but i can`t see it under the Time Gear Cover and than measured the wrong bearing. More pictures and explanasions about the Motor Condition you can see on my blog. The Pictures are with english discriptions.
The wrist pins must be replaced. (piston pins)....They come in oversize and in .003", .005" AND ,010". iF NOT REPLACED THEY WILL MAKE NOISE AT IDLE SPEED. iF NEW PISTONS ARE INSTALLED THEY WILL COME WITH FITTED PINS. Both timing gears should be replaced. Normal wear on cmshaft, should be OK. If main bearing material looks OK they can be reused aand adjusted by removing shims between cap and block. If replaced will need to be line bored - expesive. Rods do not have inserts, babbitt is right on the rod. One with bad babbtt should be replaced and all adjusted (has shims also) Lifters should be placed back in original holes, hope you marked them.
Time has come to order Parts. Seems that Chevs is the only one who have all parts I need. Will get them only there to save shipping costs. Can someone tell me Details about Quality and components of the Master Engine Kit MEK140? Are there Shims (Rod / Main Bearing), Expansion Plugs etc.. included?
One of the reasons the Chevy Vega had such a bad history is the use of aluminum pistons in an iron block....no one here seems to be concerned about using aluminum pistons in our 216's....why?
~Jim
'38 Master Deluxe 2-Dr
*Disclaimer*...All technical advice given is for entertainment value only, and is not to be taken seriously...
The. Vega had an aluminum block and cast iron head.
Dens Chevys 1927 Speedster 1928 coupe 1941street rod 1947Fleetline 4 door 1949 1/2 ton Pickup (sold) 1954 210 4 door 1972 Monte Carlo 2003 Corvette convt..
There are several of us on Chat that do not use aluminum pistons in early six cylinder engines. One reason is the crankshafts are balanced for cast iron pistons and not aluminum. Another is the quality of many aluminum pistons. Finally the expansion of aluminum is much greater than cast iron so the pistons need to be sized accordingly. That means the aluminum pistons will wobble and wear more than cast iron particularly when engine is cold. Or they can seize when then engine heats up.
For what it is worth, I believe the arguments that the engines will rev faster, have less strain on the babbitt bearings are not significant given the use our old Chevys receive. And in case you are asking I drive my old Chevys. For instance I have driven my recently restored (with cast iron pistons) '31 Phaeton over 1000 miles in the last year. Some distance at ~ 50+ mph.
First I will disagree that the six cylinder engine is balanced for the heavy cast iron pistons. On a V-8 the engine is balance for a certain piston weight but a six cyliner any weight piston can be used. To quote from a speed manual from years ago "On a six cylinder engine, changing piston weight does not affect engine balance, providing all of the pistons are in balance with each other. This how ever is not true on a V type eight cylinder engine"
I had aluminum pistons in both my 1934 and 1939 and the engines were exreeemly smooth. That being said I would not trust most of the aluminum pistons made today. If you never drive over 55 MPH the irons are fine.
I think may have some NOS 40 pistons. I'll look tomorrow. If I do I'll identify as to whether they are standard or oversize (or is it undersize. I always get that mixed up.)
If I have any and you want them, I'll send them to you. You pay for the ride only.
Good luck with whatever you try to do on that old engine.
If your pistons are still a good fit and the ring grooves are good, I would suggest reusing them. The new aluminum pistons made by Egge use much thinner rings. I found this out when I bought some.
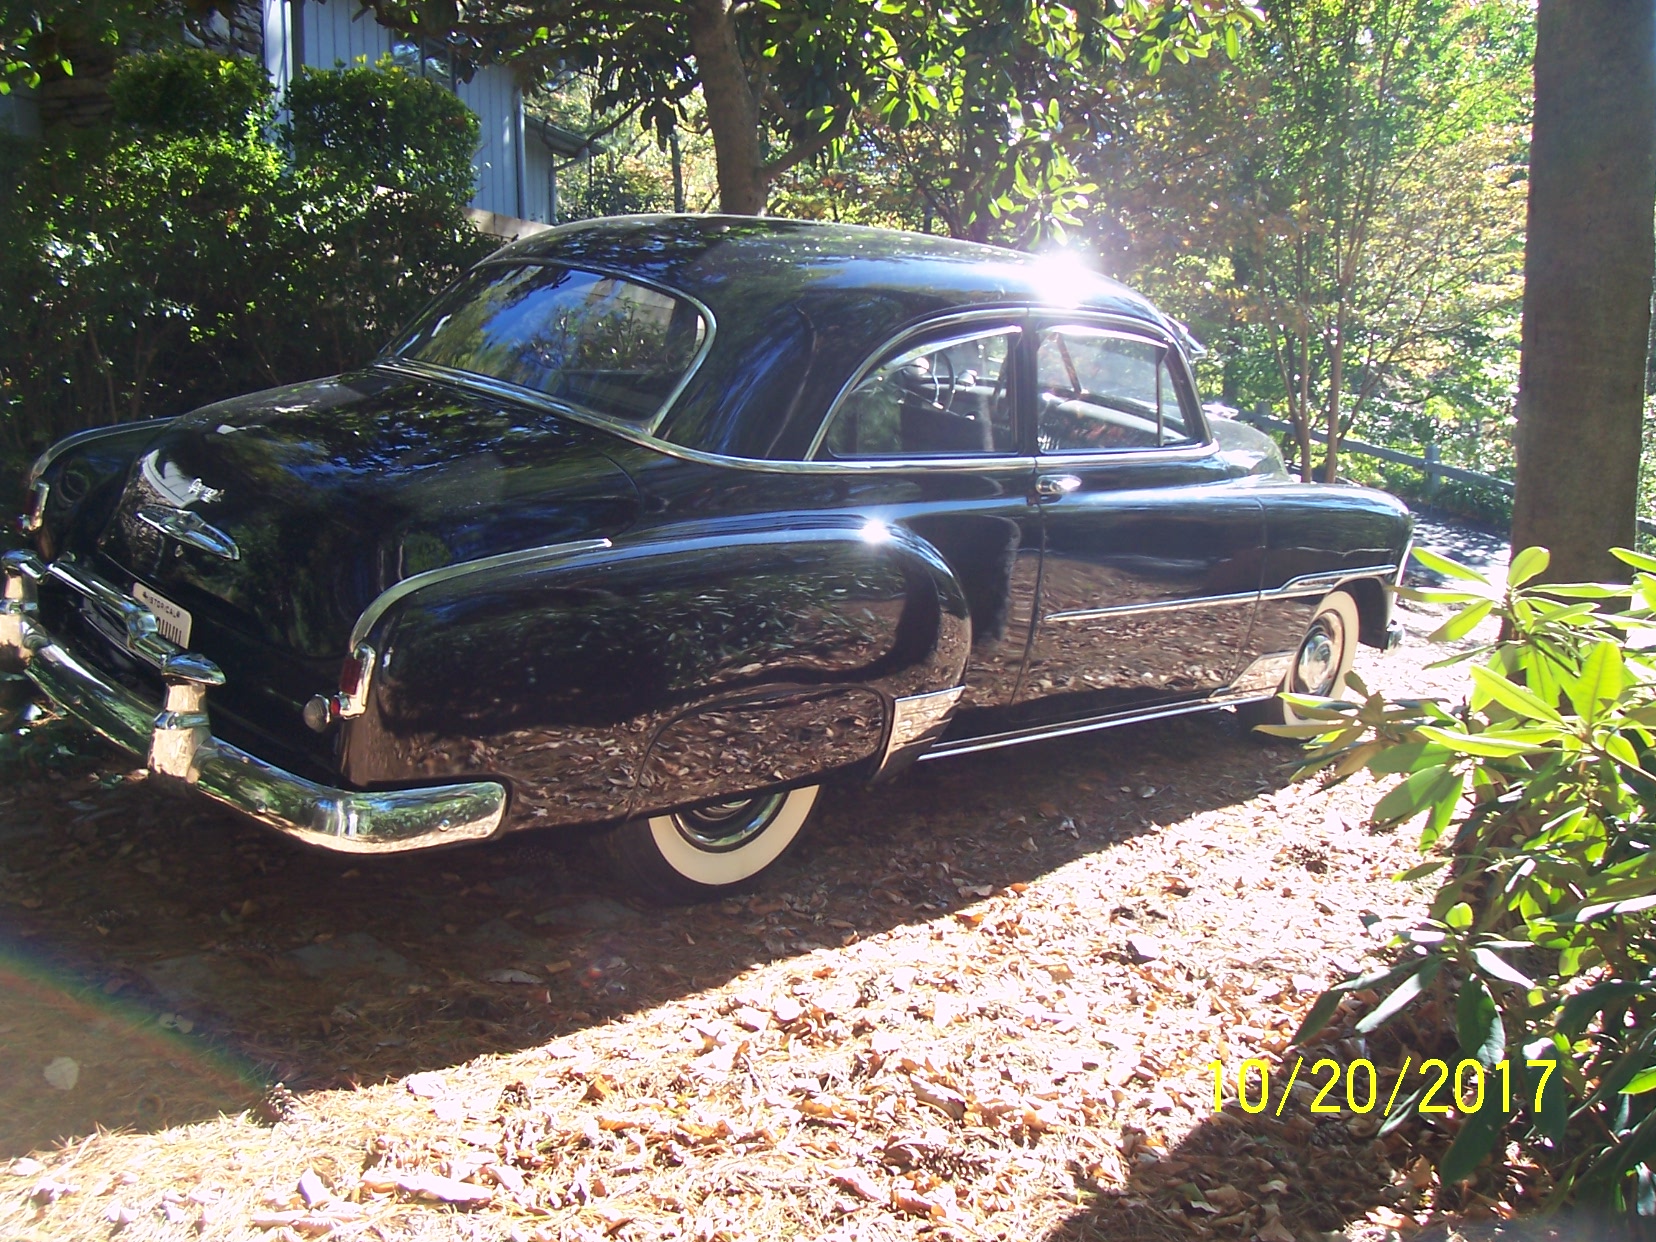
My 1951 1 Ton is now on the road! My 38 Master 4 Door is also now on the road .
There is nothing wrong with aluminum pistons. If cast iron was better piston material, engine manufacturers would still be using it. Of course there are very likely some cheap made aluminum pistons that could cause problems but quality aluminum pistons are fine. As far as the expansion goes, the piston manufacturer knows what the expansion rate is for the aluminum he uses, and he will allow for that when he finishes the pistons to size. It matters not how much piston clearance there is when cold, only when hot. I used to build race engines. Venolia pistons were set up at about .0015" per inch of bore. This means that on a four inch bore, cold clearance was .006". Mahle and a couple of others were set up for only about .002" to .003". Some people didn't like Venolia because of that, but truth be known, Venolias were made from an alloy that had more expansion, but was far less likey to break. When the engines were hot all those different pistons ended up running at about the same clearance. As far as thin rings goes, thinner is better because there is less drag on the cylinder walls, resulting in a cooler and freer running engine. Ring technology has improved immensly since the old Chevy 216 days. When I started working on engines, they used an old one piece cast iron oil ring. They lasted about 40000 miles or so before loosing thier ability to control oil. Todays oil rings consist of an expander and two steel rails with plated edges. They will last basically forever.The compression rings have also improved to the point that 200,000 miles on an engine is now considered normal rather than the exception.
Long Time past by. Monday i had a meeting in my motor shop. They measured the engine, on the To Do List now
- Grind crankshaft to .020 ", adapt new main and connecting rod bearings, straightening and polishing the crankshaft. - New Camshaft and Bearings - Customize New bearings for old rods. - Cylinder fine boring to .030 "and honing. - Cylinder head repair, planning, grinding valves etc., renew valve guides.
Recommended to me was new valves, though the old were still good, but the grind of the seats, could still fall under the limit area. At a price of $ 15-20, money saving would be here the wrong way. The same by the intake valve guides. They were also good, but let them in by a cost of $ 20? No way. Maybe I need new lifter, they can´t check them - I had forgotten in the my garage. Do you think they are in good condition or should i replace them? Please look the pictures on my Blog.
Is it possible to change only 3 or 4? Want to buy my parts by Egge, but the Lifter from chevs, saves $13?!
But what has surprised me most? - that were probably already installed Lead free seat rings for valves in Argentina. This was namely also as an option to the debate, but it has done, according to mechanics.
If crankshaft is reground to .020" I would convert the connecting rod bearings to the insert type. If the original babbitt type is retained the extra thickness of the babbitt is not good. If a new camshaft is installed replace all lifters. Cylinder boreing will require new pistons . If new valve seats have been installed. Good. Not necessary except better than if valves have been ground many times and seats too deep. Not necessary because in 1940 most gas contained no lead. Valve guides ? If new are installled make sure fit is not too tight. New exhaust valves would be my choice if any doubt on old valves.
I used Kanter for all my engine parts Kanter Auto Parts. I did have some part problems which were not backed up by their warranty. The problem was the parts set around for at least 6 months before the shop went to install them. They found the push rods to be too long and the lifter springs too weak. I would also not use the rear seal they provide as part of their rebuild kits. I would buy a set off of ebay. that are made with asbestos and originally designed for these engines. Do a search of our old posts to find discussions on this topic.
Good luck, Mike
P.S. Search using the terms +rear +seal. Remember to use the "+" (plus symbol) before each search term. For Display Name put Mike Buller.
You name the part and it had a problem. It would take a long essay here to explain all of the issues with Egge machine and the parts that they either make or rebuild. Stay away from their complete engine rebuilding service as well.
I used new Egge pistons in my 51 216 and it runs really well. I mentioned in a previous post that the rings were much thinner. This was sort of a heads up that the standard style rings would not work with the new style pistons.
My 1951 1 Ton is now on the road! My 38 Master 4 Door is also now on the road .
Confused more than it helps. What should i do? Kanter is no option, too expensive, eventually still get EGGE, and when i hear what Mike happens.. No thanks. About Chevs no one says something? More junk than EGGE? Alternatives? Need -camshaft -timing gears -pistons -lifter -valves -valve guides -main bearings -cam bearings -rod bearings( my shop will prepare the rods for them) Where can i get all this for a good price and Quality? Cant buy from several dealers because shipping and customs are very expensive too germany. for 1300$ parts, have to pay here 500$ shipping and customs
Deal with obsolete parts suppliers who sell either new old stock or new old replacement stock (aftermarket) parts. There are a lot of mechanical parts around and parts such as pistons and etc. are available. I believe that the Filling Station has some new old replacement stock timing gears for sale.
Check out ads in the G&D and Hemmings Motor News for example. Avoid purchasing parts that Egge makes and also stay away from any machine shop that uses Egge made parts. Your engine will thank you for it!
You name the part and it had a problem. It would take a long essay here to explain all of the issues with Egge machine and the parts that they either make or rebuild. Stay away from their complete engine rebuilding service as well.
And I thought Egge, with their years of service, were one of the première suppliers out there. Thanks for the "heads up", junkyard dog.
1951 Chevy Styleline Deluxe 2 door sedan / purchased from second owner 6-19-2000.
By the way, if you want to do a search here on Chevy Chatter, a few years back I explained about some of the issues with Egge. If you can find that post it will give you further information.
In the chevs Catalog there are valve cover grommets 838083. Do i need them? Can´t find them in the Parts Catalog and in my opinion they were also not installed. And whats about the valve seals 3835333 ?
Hello Alligator....as far as searching for good parts ....there is an auto parts store in Hendersonville North Carolina......name .....Wards Auto Parts......you can find them online ...google them .....They have an extensive supply of OLD parts .....I have found many nos parts for my `40 there ....I would give them a call or e-mail them with a list of what you need .....
David Martin-Hendersonville NC, Pine Island Fl....... 1940 Chevy SDSS,
Little bit frustrated Today. Got back the engine from the shop but wht´s that? Thought they clean the Water Channels in the shop?!
And this was only after 30 minutes with a air pistol and a small hose as extension. At the end of the day i had a dust pan full with rust. The engine must back to the shop to clean it correct. Bad News.
From what I see in the photos the shop did not do a quality cleaning job....far from it. I would definitely take your engine back and have it done right!
Good that you found the problem before reassemblying the engine. The good news is the the material coming out of the block is dried out so is not real stuck inside the water jacket of the block. Best practice is to always blow out the block and HEAD to double check the shop's work. Here is a link to a good post on this topic Overheating issues.
If it were me I would just re-clean out everything with air pressure and coat hanger probes myself, then run water through the block to see if anything was missed. The head only needs to be blown out before installing it to the block. No need for a water flush.
MY local machine shop cleaned up a head of mine and checked it for cracks. When I got it home it took me 1/2 and hour of blowing air through all the head coolant passages before the air came out without any debris. I then took the block to my engine rebuilder and he checked the block for cracks and found several, which he showed me. Even the best of shops can make mistakes so it is important to double check as much of the work as possible. I ended up with over $5000 in my engine rebuild, and the engine had to be returned after I had installed it because the rear seal had a bad leak. It takes a lot of luck, work, time, patience, and money to get through a restoration.
Is your machine shop going to replace the oil line that runs through the block? This is another problem area to test your patience Oil Line and Oil Line #2
Good luck, Mike
P.S. The debris in the block might also be caused by the shop not removing the freeze plugs before cleaning out the block?
Shops accustomed to working on later blocks do not understand the old car rust build-up problem. First the amti-freez from years ago casued rust if not changed every year or they were run with plain water which encouraged rust. You won't find this in an 8 year old or aluminum block.
Seems so that the engine shop has done his job. When i called them, they say: ".. yes, we have flushed the engine, there was much more rust inside..." and i can see they have replaced the two plugs on the side. Seems it is not very helpfull when the engine is lying 6 Month in the shop without water and anti freeze
yesterday pull out the other two plugs on the front and back, so i can clean it better again with air pressure.
The two oil lines i have bought from Chevs, but there seems something wrong. But this problem will describe better on the “ Oil line ” post
Next Problem … wanted to mount the Oil pump with the filter. But, Surprise, the filter doesn´t fit! The engine shop mounted the bearing cap 180 degrees in the wrong direction. Called them and they come on Tuesday to my garage to fix the Problem. To the excuse of the workshop I must say, I had delivered the motor completely disassembled. But a call with me would have solved the problem…
If the line bored the main bearing reversing the cap will throw-off the alignment. If this were my eninge I would remove each main beraing cap and inspect the inserts an make sure the "other" moin bearing cap is correct. There is usually a F on the cap indicating front of engine.
It is common to find this much rust in an old engine. This is a good example why it takes more than just a water flush to remove all the rust.
One question about the timing gears. Can´t find any details in the manual about the constallation from Cam- and Crankshaft? Have a german translated Manual from Switzerland, but the discription is a little bit confuse for me.
Zeichen "0" auf Zahnfuss, Nocken und Kurbelwellenrad müssen zusammenfallen. Die 8. Zahnlücke des Nockenwellenrades (durch Mitte Keilnut nach Rechts gerechnet) muss sich in den 5.Zahn des Kurbelwellenrades (von Mitte Kurbelwellenraddurch Mitte Keilnut nach links gerechnet) einschieben)
Translation: The sign "0" on tooth foot. The Cam and crankshaft must coincide. The 8th tooth gap of the camshaft sprocket (calculated from the center keyway to the right) must be inserted into the 5th tooth of the crankshaft gear (from center crankshaft sprocket through the center keyway to the left)
What do they mean with the Tooth Root?? Were can i find a sign "0"
Monday I Had blown out the block again after removing the forgotten Frost Plugs. Again a good handful rust sludge
Now the engine is back in the shop, hope they will do better work, now. It seems that they haven't cleaned it correct. Found Sludge in the Oil Channel and on the Main Bearing Caps
@chevy1937 and Chev Nut - If I could do all the work myself I had done this ..
Just want to make sure you see the marks on the timing gears for aligning them. I reassembled an engine about 5 years ago with the gears off one tooth. The engine would start but only run at high idle. You can see two dots on the smaller gear and one dot on the larger one. I painted the larger one so I could easily see its position. You are doing a great job of micromanaging your assembly process. Thanks for sharing all the pictures and experiences with us. Future restorers will benefit a lot from the process/challenges you have gone through.
As someone that has an engine currently being rebuilt, I've been following this post with keen interest. I know it's always best to thoroughly clean out a block but given the fact that it's almost impossible with these old engines, why not install a radiator coolant filter that at least prevents radiator clogging ? I guess this a question for anybody following this post, not just a suggestion to Alligator. Anybody running one of these ? I bought a Gano Coolant Filter and plan to install it when I get my engine back. Obviously not period correct, but ….what the heck , I can alway remove it
Hi Mike, thanks, yes i can see the marks. On my new gears there are marks on both gears. On the old there are only on the small gear two marks?! Both gears from you are fiber? The small one on my car was and is metall, the big fiber.
@hardaground - seems a good idea and i thought about that too. Brings more safety for the, new rebuilt, Radiator i think. Its impossible to clean the system from alll the rust. What size should i bought? Somebody knows the diameter?
From the shops that I have been in over the years, my impression is that it is possible to completely clean the block. I used to see ones that were tanked and they did not have buildup inside the coolant passages. the same with the heads that were done. I understand that some shops have converted to a system that heats the block in an oven and then afterward all the ash is blown out.
My 1951 1 Ton is now on the road! My 38 Master 4 Door is also now on the road .
From the shops that I have been in over the years, my impression is that it is possible to completely clean the block. I used to see ones that were tanked and they did not have buildup inside the coolant passages.
Many shops are now using the oven heat method for cleaning as it eliminates the hazardous waste issues. I do not think it does as good a job as an aerated heated tank.
From what I have seen the only way to fully clean the water passages is the a piece of wire and compressed air and that is even more effective when the block has been dry for months. It is surprising how long the crud will stay damp. Tony
A temperature of ~800 deg F will remove the organic materials such as oil and grease. However, those temperatures will remove most of the water from iron oxides (rust) and hard water salts. It makes them brittle and powdery but some will still stick to the surfaces. Still takes mechanical abrasion or chemicals to remove the final traces.
June 17 - Engine is back again. Now it is, how I want to see good work. Everything is clean and the screws and bolts are marked for right measurement / torque.
2018 - Did some work on the engine. Installed the Oil pump with a new Pipe, because the old fitting was cracked.
Installed the Timing Cover with new shaft seal.
For the Balancer I got “Speedy Sleeve” from SKF, because the shaft was worn by the oil seal and Speedy is fantastic for this repair.
In order to mount the balancer correctly, I made the puller and driver, which is described in the 1940 manual, myself
Are these the right torque specifications for the 1940 216ci? http://www.hotrodreference.com/1209/chevy-stovebolt-216-235-six-cylinder-torque-specifications/ treasure threatments I´ve found a pdf called "inline six timing" torques shown there are different? Need Water pump, flywheel to crankshaft, flywheel housing to engine, clutch to flywheel, head bolts, rockerarms etc. Manual has´nt any torque specification?
My 1939 shop manual makes no mention of torque. The 1941 and 1942-47 manual mentions head torque only in the installing cylinder head section. 1949-1954 manual has a chart at the end of the engine section giving torque of al engine related parts as well as end of other units sections with the torque listed.
It can be set (with the engine running at slow idle speed) any where between the 0 and 10 degress advanced. Setting is determined by yhe octane rating of the gas you are using.I have found that about 8 is the best setting on my cars.
I see NOS rocker arms on Ebay all the time cheaper than that. Even if a machine shop took their time, there's a maximum of maybe 2 hours labour to clean up a dozen of these. You may need new rocker shafts and bronze bushings in the rockers too if the tips are this worn. The shafts/bushings are also on Ebay regularly for under $50USD for the whole set.
My machine shop reamed and replaced my bushings to match new shafts - this is when they dressed the rocker tips at the same time without me needing to ask. Sadly it's hard to find a shop with this level of old engine experience and care. When I first phoned them when trying to locate a suitable machinist, one of the FIRST questions the 18 year old kid on the phone asked me was "do you still have babbited rods with shims or have they been converted to inserts". I couldn't get my engine there fast enough when an 18 year old kid could actually picture and understand the guts of my engine.
1938 Canadian Pontiac Business Coupe (aka a 1938 Chevy Coupe with Pontiac shaped front sheet metal - almost all Chevy!) 1975 4-speed L82 Vette
Alligator you said "refurbishing" so I would think they mean supply and install new bushes as well as reface the valve end. My local shop refaces the end only for $5 or $6 each. Tony
The link shows a lot more involved (more worn) than yours.If you were patient and careful with a very fine grinding wheel you could nearly do them yourself. The hardest part is keeping it square to the wheel while following the radius. I have done it though not very well. Tony


![[Linked Image from 1940specialdeluxe.files.wordpress.com]](https://1940specialdeluxe.files.wordpress.com/2015/05/img_5299-e1433089402226.jpg)
![[Linked Image from 1940specialdeluxe.files.wordpress.com]](https://1940specialdeluxe.files.wordpress.com/2015/05/img_5340-e1433089618673.jpg)
![[Linked Image from 1940specialdeluxe.files.wordpress.com]](https://1940specialdeluxe.files.wordpress.com/2015/05/img_5337-e1433089636139.jpg)
![[Linked Image from 1940specialdeluxe.files.wordpress.com]](https://1940specialdeluxe.files.wordpress.com/2015/05/img_5321.jpg)
![[Linked Image from 1940specialdeluxe.files.wordpress.com]](https://1940specialdeluxe.files.wordpress.com/2015/05/img_5323.jpg)
![[Linked Image from 1940specialdeluxe.files.wordpress.com]](https://1940specialdeluxe.files.wordpress.com/2015/05/img_5328.jpg)


![[Linked Image from 1940specialdeluxe.files.wordpress.com]](https://1940specialdeluxe.files.wordpress.com/2015/06/img_5309-e1433333624252.jpg)
![[Linked Image from 1940specialdeluxe.files.wordpress.com]](https://1940specialdeluxe.files.wordpress.com/2015/06/img_5314-e1433333681457.jpg)
![[Linked Image from 1940specialdeluxe.files.wordpress.com]](https://1940specialdeluxe.files.wordpress.com/2015/06/img_5316-e1433333673705.jpg)


![[Linked Image from 1940specialdeluxe.files.wordpress.com]](https://1940specialdeluxe.files.wordpress.com/2015/06/img_5532-e1435509859947.jpg)
![[Linked Image from 1940specialdeluxe.files.wordpress.com]](https://1940specialdeluxe.files.wordpress.com/2015/06/img_5521_masse.jpg)

![[Linked Image from 1940specialdeluxe.files.wordpress.com]](https://1940specialdeluxe.files.wordpress.com/2015/06/img_5522-e1435545174351.jpg)
![[Linked Image from 1940specialdeluxe.files.wordpress.com]](https://1940specialdeluxe.files.wordpress.com/2015/06/img_5490-e1435545735898.jpg)


![[Linked Image from 1940specialdeluxe.files.wordpress.com]](https://1940specialdeluxe.files.wordpress.com/2016/05/kuehler-31.jpg)
![[Linked Image from 1940specialdeluxe.files.wordpress.com]](https://1940specialdeluxe.files.wordpress.com/2016/09/img_20160928_1320491-e1475148980129.jpg)
![[Linked Image from 1940specialdeluxe.files.wordpress.com]](https://1940specialdeluxe.files.wordpress.com/2016/09/img_20160928_1320271-e1475149029216.jpg)
![[Linked Image from 1940specialdeluxe.files.wordpress.com]](https://1940specialdeluxe.files.wordpress.com/2016/09/img_20160928_1320331-e1475149009844.jpg)
![[Linked Image from 1940specialdeluxe.files.wordpress.com]](https://1940specialdeluxe.files.wordpress.com/2016/09/img_20160928_1322051-e1475148967797.jpg)
![[Linked Image from 1940specialdeluxe.files.wordpress.com]](https://1940specialdeluxe.files.wordpress.com/2016/09/img_20160928_1322191-e1475148951207.jpg)
![[Linked Image from 1940specialdeluxe.files.wordpress.com]](https://1940specialdeluxe.files.wordpress.com/2016/10/img_20161013_131219-e1476383307940.jpg)
![[Linked Image from 1940specialdeluxe.files.wordpress.com]](https://1940specialdeluxe.files.wordpress.com/2016/10/img_20161013_125153-e1476383323525.jpg)
![[Linked Image from 1940specialdeluxe.files.wordpress.com]](https://1940specialdeluxe.files.wordpress.com/2016/10/img_6891-andere.jpg)
![[Linked Image from 1940specialdeluxe.files.wordpress.com]](https://1940specialdeluxe.files.wordpress.com/2016/10/img_6888-andere.jpg)
![[Linked Image from 1940specialdeluxe.files.wordpress.com]](https://1940specialdeluxe.files.wordpress.com/2016/10/img_6890-andere.jpg)
![[Linked Image from 1940specialdeluxe.files.wordpress.com]](https://1940specialdeluxe.files.wordpress.com/2016/10/img_6892-andere.jpg)

![[Linked Image from 1940specialdeluxe.files.wordpress.com]](https://1940specialdeluxe.files.wordpress.com/2016/10/rostausblock1-e1477018262682.jpg)
![[Linked Image from 1940specialdeluxe.files.wordpress.com]](https://1940specialdeluxe.files.wordpress.com/2016/10/rostausblock3-e1477018253111.jpg)
![[Linked Image from 1940specialdeluxe.files.wordpress.com]](https://1940specialdeluxe.files.wordpress.com/2016/10/c3bblschlamm_nw_kanal-e1477018073636.jpg)
![[Linked Image from 1940specialdeluxe.files.wordpress.com]](https://1940specialdeluxe.files.wordpress.com/2016/10/verstopfte_ablc3b1ufe_lagerbock_vorn-e1477018228979.jpg)
![[Linked Image from 1940specialdeluxe.files.wordpress.com]](https://1940specialdeluxe.files.wordpress.com/2016/10/verstopfte_ablc3b1ufe_lagerbock_hinten-e1477018240790.jpg)
![[Linked Image from i1321.photobucket.com]](http://s1321.photobucket.com/user/41chevymike/media/IMG_0685_zpslantfaqx.jpg.html)
![[Linked Image from farm1.staticflickr.com]](https://farm1.staticflickr.com/971/26958122657_9e7ff1a237_z.jpg)
![[Linked Image from farm1.staticflickr.com]](https://farm1.staticflickr.com/907/26958124057_a78b7fabe5_z.jpg)
![[Linked Image from farm1.staticflickr.com]](https://farm1.staticflickr.com/963/40018845350_9d5c40df42_z.jpg)
![[Linked Image from farm1.staticflickr.com]](https://farm1.staticflickr.com/971/40018846420_cf68afcfdf_z.jpg)
![[Linked Image from farm1.staticflickr.com]](https://farm1.staticflickr.com/959/40018850510_498f84f928_z.jpg)
![[Linked Image from farm1.staticflickr.com]](https://farm1.staticflickr.com/906/41783870172_00e85a8999_z.jpg)
![[Linked Image from farm1.staticflickr.com]](https://farm1.staticflickr.com/863/40018856180_518e792459_z.jpg)
![[Linked Image from farm1.staticflickr.com]](https://farm1.staticflickr.com/955/41783869532_c5e1c916d6_z.jpg)
![[Linked Image from farm1.staticflickr.com]](https://farm1.staticflickr.com/947/41740687761_cf9fa6fbd9_n.jpg)
![[Linked Image from farm1.staticflickr.com]](https://farm1.staticflickr.com/908/26872301207_8aba7c551f_n.jpg)

