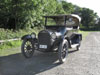
I'm about to have a mechanic replace the clutch leather on my 1920 490 Touring. He's charging $80 per hour, which I think is very fair, but I have a few questions.
1) How long should this job take?
2) What are some problems he might encounter?
3) What other parts may need replacing and are they available?
4) Any advice that may help him?
Sorry for all the questions, but my car seems to be in nice original condition and I'd really like to get her on the road again!!
I recommend you to search this forum. Choose ”Advanced Forum Search”, scroll the ”Forum(s) to search” to ”Technical-Prewar”, begin to choose 1916-1922 (Model 490 only) and print ”clutch leather” (Note: don’t forget the ”...”:s) in the ”Keyword Search Terms”, then ”Searth Entire Posts”. On ”Date Range, choose ”Newer than 20 years. Klick ”Search forums” and you’ll get a handy number of posts (I got different numbers, between 24 and 43!), many of them from the same thread. Choose one post, go to the first post in that thread and often you will find a lot of good information. Sometimes different opinions on the same subject. In some of these threads you will find links to other threads, or tips of different kinds.
1 How long time? I have no idea. Depends on the mechanic's knowledge and experience. I replaced the clutch leather, during the winter 2006/2007, with extremely lot of help from a good friend, not a professional mechanic but with a lot of knowledge and quite a lot of experience from restoring and reparing older cars on hobby basis. At that time I was not a member of the VCCA, and i did not have the excellent ”Chevrolet Repair Manual 1918-1924”, third edition January 1923, which I one year later bought from Gary Wallace.
2 Some problems? In my opinion: a lot. Depends on the mechanics knowledge and experience. For me alone it had been an impossible job. One example: How to remove the gear box without removing the rear end? I got the information from a man who was restoring a 490. Another example: How to construct and make a ”Clutch Puller”? My friend succeded! And he did that without the instructive picture of the tool in the Repair manual mentioned above.
3 What other parts? I cannot remember if we replaced some other parts. I used leather, and I recommend that. After the replacement the clutch has worked for more than 11 000 miles, so far without issues. The six expanders are crucial, mine were quite good.
4 Any advice I have quite a lot of pictures from the replacement, also from the check of the clutch leather I did one year later, when I had to make an engine overhaul.
Thanks for the response swedechev! I bought the new clutch leather from Gary Wallace and it came with new rivets. I also have the repair manual from him too. I'm hoping the replacement goes well without too many complications. I'll try and look for your pictures.
Take pictures and make drawings during the process,it will help greatly when putting it back together. The manual explains what is needed to compress the spring and remove the pin. I was rebuilding the engine at the same time, if it is going to sit for some length of time you should release some of the tension on the spring.
1917 490, 1928 Depot Hack, 1925 Buick roadster, 1978 Vette pace car, 2002 Z06
Avatar, sorry for delay. Actually I thought that I had posted some pictures in some of my old posts. After I noticed your Private Message I found out that there were no pictures. After that it took some time to find out some ways to make it possible for you to view pictures of my clutch leather replacement.
First I recommend you to take a look on my my website . Under ”Sidor” (pages), go to ”Reparationer, tips”. Scroll to ”Nytt läder på kopplings konan” (new leather on the clutch cone). You can click on pictures to see them in full size. To go back, click the ”back” arrow in your browser. The text is in swedish ...
Then take a look on the following 14 pictures. The pictures are in quite high resolution, so it takes a couple of seconds before the they shows correct.
The first three pictures are from the removal of the engine with the clutch, december 2007. The removal of the engine was necessary in order to make an engine overhaul.
The following seven pictures are from the the investigation of the clutch, also december 2007.
Leather after one season 4372 Note that I had the leather mounted with the smooth side out. Other recommends the rough side out, so I guess both will work. Also note I had the ends of the leather slanted, more two inches, maybe more, and then glued togetheter. The rivet on the right side is positioned through the slanted and glued ends. Others, for instance Bob Knaak, who seems very experienced, recommends cutting the leather without slanting, but with two extra rivets near the leather ends, so I guess that works too.
I have a question regarding the roller balls for the ”Clutch Spring Tension Rod”. What do the roller balls look like? What orientation are they installed in? Does the tension rod go into the end of the crank, then roller balls, then the washer retainer? What holds all of this together? Is there supposed to be a pin? I’m in the process of putting my clutch back together. Any more pictures of the process that you have would be greatly appreciated. If it’s easier my email is anthony248angelini@gmail.com Thank you!
Take a look in the attached file, Repair Manual chapter about cone clutch, page 71, Fig.63. Same picture as in the Service Manual page 88, Fig.76.
The roller balls are seven plain balls. I do not have the measure. Take a look at Fig.63.
Yes, first put the tension rod into the end of the crank. Maybe some grease can help to keep it in place. Or better, a helping hand. Then the seven balls, again grease to keep them in place.
Then the thick washer retainer (the rear part of the roller bearing track) , wich in next step will be hold when you put the flywheel to the end of the crank. No pin here.
One crucial point is to fit the washer retainer into the recess (?) indentation (?) in the end of the crank. Look closely at Fig.63. I cannot recommend that you just try to press the washer retainer into the recess by placing the flywheel against the washer retainer and screwing it to the end of the crank. I think it is more safe if you have a helping hand to hold the rod steady, then use a wood club or some suitable tool to knock gently on the washer retainer, keeping full control to avoid that the washer retainer gets into the end of the crank in a skew position. You do not need to ask me how I know.
When you are sure that the washer retainer is fitted correctly in the end of the crank, now ask your helping hand to hold the flywheel against the protruding part of the washer retainer, in the correct position, while you knock on the flywheel, carefully and with full control to avoid that the washer retainer gets into the opening in the flywheel in a skew position.
The ”correct position” when holding the flywheel is when the notches or other markings on the flywheel and the end of the crank matches. When they match, the holes for the six screws will also fit. If you have a couple of screws similar to the six screws that you shall use to fix the flywheel maybe it is a good idea to use them as steering pins.
I looked for pictures, but I have none. As you can guess, I had not a second couple of helping hands to take pictures!
Thank you so much! Sadly I was not the one who disassembled the clutch. That is why I have so many questions. I wonder if anyone here knows the exact size of the ball bearings? The mechanic that worked on it said that they possibly may be 5/16, but I want to make sure.