|
|
Joined: Jan 2002
Posts: 1,866
ChatMaster - 1,500
|
OP

ChatMaster - 1,500
Joined: Jan 2002
Posts: 1,866 |
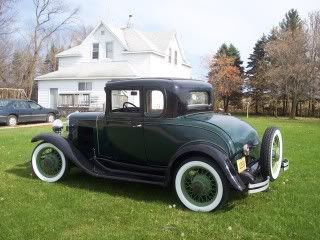
I was wondering if I could assemble the wood for my '31 coupe on a work bench and then when the frame was power coated and ready, lift the assembled wood frame, which I would leave unglued and screws just snugged up, onto the car frame, put on the metal, adjust, take metal off, glue and tighten screws? This would work out the best for me as I have someone who is willing to help me with the wood but it would be done in his shop. :confused: I already received the wood kit from Jim Rodman.  Thanks!!
I think I'm a fairly wise person because I'm smart enough to realise I'm not too bright.
|
|
|
|
|
Joined: Nov 2001
Posts: 19,758 Likes: 64
ChatMaster - 15,000
|
|
ChatMaster - 15,000
Joined: Nov 2001
Posts: 19,758 Likes: 64 |
It can be done that way if you wish. The wood framing is heavy but can be moved as a unit. The main sills should be used to lift it.
How Sweet the roar of a Chevy four!
|
|
|
|
|
Joined: Nov 2001
Posts: 29,863
Tech Advisor ChatMaster - 25,000
|
|
Tech Advisor ChatMaster - 25,000
Joined: Nov 2001
Posts: 29,863 |
That's the hard way to do it and a lot of extra work too, but you can use that procedure if you prefer. There are several different ways to proceed, but the method that I used worked great for me. The first thing that I did was to lay out all of the main sills and the cross sills on my bare frame and then checked for fit since the mail sill assembly is the basic foundation for the rest of the body. Once I was satisfied, I then glued and screwed all of the joints using "Titebond II", and while the glue was still wet, I put in all of the body to frame bolts to keep the main sill structure in place an in perfect alighment to the frame and then I used large "C" clamps to hold the main sill structure in place on the frame while the glue dried. When the glue was dry, I then removed the main sill frame and placed it on a wooden jig that I had made that was on a large steel cart with big cast iron wheels on ball bearings. This way I could roll the wood frame around as needed. When in place, I leveled the main still structure from left to right and from front to back and clamped it down. For the rest of the wood assembly, there are several ways to go. You can either start at the front and work back, or you can start at the back and work forward. Since I have a coupe with a rumble seat, and since the door pillars and the rear window section are somewhat adjustable, I decided to start from a fixed point so I started at the back cross sill below the rumble seat. Getting the rumble lid and the upper panel to fit on a coupe is critical, so I figured that if I completed that first, then the doors and cowl section would fall into place where they needed to be based on starting at a fixed point. It worked! When we lifted the completed wood body (without the sheet metal) onto the frame to check for fit, the wood body fit like a dream and all of the body bolts fell into place! Also, as I proceeded I checked the sheet metal for fit as I went along and made the adjustments then as needed. Some sanding here, some filing there, and etc. and everything fit. When the sheet metal fit as it should, I then glued the joints that were supposed to be glued and then inserted the screws tightly at that time. Assemblying my wood frame proceeded nicely and when I got to the cowl section it fit perfectly! Also, I saved the old wood framing without disassembling any piece (I only removed the sheet metal and that was it) and I placed saw horses next to the new body that I was working on. I used the old wood body as a schematic and a template as to how the pieces go and for the measurments. This was a tremendous help and it saved hours and hours of time and guess work!  
The Mangy Old Mutt
"If It's Not Junk.....It's Not Treasure!"
|
|
|
|
|
Joined: Jul 2003
Posts: 10
Grease Monkey
|
|
Grease Monkey
Joined: Jul 2003
Posts: 10 |
I spent the time assembling the wood right on the finished frame. I measured and drew each piece of the sheet metal and the location of the fasteners as I dismantalled the car. (28 Landau coupe). When the time to put everything back in place, the careful measuring really paid off. By starting everything from the same spot as the original, all the parts and the sheet metal went together without a snag. Door alignment and panel alignment problems were so small that they were easy to overcome. For me, the care with which the car was taken apart and the drawings, photographs, and measurements were the most important part of the restoration. I replaced all wood and used a wood guage to size each piece of wood for length,width & thickness.
Couper
|
|
|
|
|
Joined: Nov 2001
Posts: 29,863
Tech Advisor ChatMaster - 25,000
|
|
Tech Advisor ChatMaster - 25,000
Joined: Nov 2001
Posts: 29,863 |
The Mangy Old Mutt
"If It's Not Junk.....It's Not Treasure!"
|
|
|
|
|
Joined: Jul 2003
Posts: 10
Grease Monkey
|
|
Grease Monkey
Joined: Jul 2003
Posts: 10 |
I didn't know what I was getting into when I started on this truck. I put the truck up on stands to make it easier to work underneath. The hardest part for me is to work patiently. I found out that speed costs time and money. It took me quite a while to figure this out. I'm not the fastest learner.
Couper
|
|
|
|
|
Joined: Oct 2002
Posts: 1,050
ChatMaster - 1,000
|
|
ChatMaster - 1,000
Joined: Oct 2002
Posts: 1,050 |
The hardest part for me is to work patiently. I found out that speed costs time and money. Couper, I sure agree with your sentiments. I also am not the world's most patient person. Over the years I've learned to work when inspired and stop working when perspiring or feeling tired. I've let projects sit for months (in one case, years) until the 'bug' bit me again. Working in a hurry or while tired just seems to lead to shoddy workmanship, costly mistakes or accidents. When I start feeling it's not fun, I quit for the night and look at it again the next day.  -Bob
-BowTie Bob
|
|
|
|
|
Joined: Jan 2002
Posts: 1,866
ChatMaster - 1,500
|
|
OP
ChatMaster - 1,500
Joined: Jan 2002
Posts: 1,866 |
Just to let you know, I'm reading and re-reading this topic and the others on wood assembly so I'll be better prepaired this summer. Thanks guys. This all sure helps. :cool2:
I think I'm a fairly wise person because I'm smart enough to realise I'm not too bright.
|
|
|
|
|
Joined: Jan 2004
Posts: 6
Grease Monkey
|
|
Grease Monkey
Joined: Jan 2004
Posts: 6 |
intersting topic !!! i am putting my woodworking project off till this fall ( 28 national ab) thanks
|
|
|
|
|
Joined: Jan 2002
Posts: 1,866
ChatMaster - 1,500
|
|
OP
ChatMaster - 1,500
Joined: Jan 2002
Posts: 1,866 |
R. Wayne Wright, There are other threads dealing with the wood assembly also. Just have to go to search and try to find them.
I think I'm a fairly wise person because I'm smart enough to realise I'm not too bright.
|
|
|
|
|
Joined: Jan 2002
Posts: 1,866
ChatMaster - 1,500
|
|
OP
ChatMaster - 1,500
Joined: Jan 2002
Posts: 1,866 |
I got the frame back from being sandblasted and painted. Sure looks nice to me. Now to find the thread if and when it's the best time to seal it as I plan on starting on the wood assembly in a few weeks. I'm sure it's after it's all assembled so it doesn't interfer with the glue. Forgot to ask Jim Rodman what type of wood he used but my son-in-law said it looked like ash.
JYD or anyone else, You wouldn't happen to have a picture or two of your wood frame completed before the metal went on that you could e-mail me would you? Like I said in another post, I hope to go see Jim later this spring if everything works out. Thanks.
I think I'm a fairly wise person because I'm smart enough to realise I'm not too bright.
|
|
|
|
|
Joined: Nov 2001
Posts: 19,758 Likes: 64
ChatMaster - 15,000
|
|
ChatMaster - 15,000
Joined: Nov 2001
Posts: 19,758 Likes: 64 |
Jim uses ash so you son-in-law is correct.
The wood frame is illustrated in the 1932 Master Parts Price List for most Chevrolet models including all three 1931 Coupes.
How Sweet the roar of a Chevy four!
|
|
|
|
|