well FINALY got a break in the weather to get the engine back in the car !!
it snowed Friday night and Saturday morning, but was a grass snow, all the roads and driveways were just wet. about an inch of snow on the lawn and rooftops. so Saturday afternoon prepped the car and engine to go back in. my garage is NOT deep enough to load it in the garage, so have to roll the car out of the garage back to the cowl, then roll engine in front and drop it in.
engine connected to load leveler on engine lift
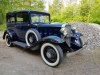
front of car prepped for entry
AACA - VCCA - Stovebolt - ChevyTalk Love the Antique Chevrolet's from 1928-1932 The Beauty, Simplicity, History, and the Stories they Tell
Test photo. I tried posting a photo and no go so I think we have a system problem as previously I had no problems posting a photo. I have posted the results in the Comments/Suggestions forum .
Took some time and made sure everything was lined up, then secured the driveline to the frame, as well as the u-joint housing to the transmission. also bolted up the brake cross shafts to the transmission as well.
AACA - VCCA - Stovebolt - ChevyTalk Love the Antique Chevrolet's from 1928-1932 The Beauty, Simplicity, History, and the Stories they Tell
figured get this in, then i can finish the line from the fuel tank to the pump. this way there is nothing in the way. i marked off where the starter sits so that i can go around it.
AACA - VCCA - Stovebolt - ChevyTalk Love the Antique Chevrolet's from 1928-1932 The Beauty, Simplicity, History, and the Stories they Tell
Engine is looking good, and project well documented as always, I really enjoy your detailed pictures.
Thank you, i take a lot of pictures for my own reference and glad to share them with others to help them
Originally Posted by Morten
Is the gray paint from Filling Station, and is the color we see in the last 2 pictures, close to what you see in person?
Yes that is the Gray from The Filling Station, and the color in the pictures is pretty close to what i see, they were taken in doors under fluorescent light
AACA - VCCA - Stovebolt - ChevyTalk Love the Antique Chevrolet's from 1928-1932 The Beauty, Simplicity, History, and the Stories they Tell
Installed the passenger side splash pan last night. always a fun task getting it in there just right and all the holes lined up. figured get that in before anything else so that i have more room to work around to get it situated
Drivers side will go in later, doing one side at a time
AACA - VCCA - Stovebolt - ChevyTalk Love the Antique Chevrolet's from 1928-1932 The Beauty, Simplicity, History, and the Stories they Tell
next up was the starter, get it in, lined up and then power from the battery and then the wire to the dash pretty simple install, the Rubber boot was added after several discussions and an incident where the electrolock cable brushed by the starter post and threw sparks everywhere !! this isolated and protects the starter post which is positive (Direct to the Battery) from the electrolock (which is ground)
AACA - VCCA - Stovebolt - ChevyTalk Love the Antique Chevrolet's from 1928-1932 The Beauty, Simplicity, History, and the Stories they Tell
used my compression gauge to ensure i had cylinder 1 at Top Dead Center (TDC) this way i can set in the distributor and ensure it is on 1. used my tool and lined up the oil pump so that the distributor can seat fully. dropped in the thrust washer, and after a little tinkering and adjusting it dropped right in. installed the spark cable bracket to the block, put in the distributor adjustment screw for the spark cable, this limits the range/motion of the distributor when using the spark cable.
adjusted and set the point gap to .018", should be rough timed for now
secured the distributor in place
next up i put the spark cable in place and made sure it worked and moved freely, also put in a few drops of oil in the line to keep it freely moving.
now hte electrolock, luckily i have a colored cheat sheet that have been using, and done this a few times, so was not that difficult. always double check the order and that everything is in its place, especially the isolators for the points/contact. then secure it in place.
dropped in a new rotor button and distributor cap.
AACA - VCCA - Stovebolt - ChevyTalk Love the Antique Chevrolet's from 1928-1932 The Beauty, Simplicity, History, and the Stories they Tell
saturday afternoon spent a little time on the 1929
put the manifold together and installed it in the car. everything went in loose and then tightened one everything was seated correctly. want to try to ensure there NO leaks, also reason why i had machine shop machine all faces !!
AACA - VCCA - Stovebolt - ChevyTalk Love the Antique Chevrolet's from 1928-1932 The Beauty, Simplicity, History, and the Stories they Tell
put in the starter pedal followed by the toe board. then installed the lower & upper pedal plates, secured them in place and then put on the new pedal seals i made a while back. fit nicely !
AACA - VCCA - Stovebolt - ChevyTalk Love the Antique Chevrolet's from 1928-1932 The Beauty, Simplicity, History, and the Stories they Tell
when i put in the accelerator pedal, installed the anti rattle spring and such on the carburetor as well as the accelerator pedal return spring, which connects to one of the manifold studs.
AACA - VCCA - Stovebolt - ChevyTalk Love the Antique Chevrolet's from 1928-1932 The Beauty, Simplicity, History, and the Stories they Tell
set the pedal clearance from the toe board per hte manual and service news 1/4" - 1/2" i use a small 3/8" thick block and tape it to the back of hte toe board and adjust hte pedals using that. installed the clutch return spring, adjusted the clutch pedal, also set the stop on the shaft for the pedals. put the brake linkage back on from the proportioner.
AACA - VCCA - Stovebolt - ChevyTalk Love the Antique Chevrolet's from 1928-1932 The Beauty, Simplicity, History, and the Stories they Tell
putting in the exhaust downpipe and the brass nuts were hitting the flange on the downpipe, always been an issue with this exhaust. so decided to see if i could solve it. made up a tool so that i could turn down the hex on part of the nuts to clear the flange. primitive but worked. did a test fit and seems to clear nicely. no more interference. going to need to get a new donut gasket. looking for one locally.
AACA - VCCA - Stovebolt - ChevyTalk Love the Antique Chevrolet's from 1928-1932 The Beauty, Simplicity, History, and the Stories they Tell
put on the radiator and support to hold it in place. realized I needed to drop on the splash apron to help located the radiator as well. so a little tweaking, some measuring, etc., got the radiator lined up and the splash apron in place. snugged down the radiator and the supports. splash apron will get secured later when i put on headlamp bar with the stanchions.
AACA - VCCA - Stovebolt - ChevyTalk Love the Antique Chevrolet's from 1928-1932 The Beauty, Simplicity, History, and the Stories they Tell
secured the headlamp wiring in place along the front under the radiator and belt, as well as up the side off the radiator. used a 3m stickie pad and zip tie
AACA - VCCA - Stovebolt - ChevyTalk Love the Antique Chevrolet's from 1928-1932 The Beauty, Simplicity, History, and the Stories they Tell
This is where I am as of now, getting close, going to install the Gano Filter on the coolant return line so I can monitor the fluid for a bit. then once content will put the solid hose in.
Hood will NOT go on until i am content with the timing, tuning, and operation of the driveline. unfortunately this is NOT my first rodeo with this car. but hopefully the last.
AACA - VCCA - Stovebolt - ChevyTalk Love the Antique Chevrolet's from 1928-1932 The Beauty, Simplicity, History, and the Stories they Tell
well this weekend did a recheck of nuts, bolts, connections...
sunday morning picked up fluids, and started to prep car for fire up. put in 600wt in trans, and put on top cover, put some in the u-joint housing. filled radiator up with 50/50 green and water. had a few drips on the hose connections, so snugged those up. put in plugs connected wires. double checked the double check.
dropped in the battery, connected it up, left disconnect OFF, then put in about 2 1/2 gallons in the tank and looked for leaks. all looks great.
flipped switch and bumped starter to make sure we had connection and lined up. good to go
AACA - VCCA - Stovebolt - ChevyTalk Love the Antique Chevrolet's from 1928-1932 The Beauty, Simplicity, History, and the Stories they Tell
next was going to leave ignition off and prime the system, pump fuel from tank to pump, then pump to carb. noticed i did not put in the paper filter yet, so started to do that and then noticed smoke coming out around the starter band !!
immediately flipped the kill switch and removed starter band, smoke was pouring out, not smell though >!>
what happened ??
starter was really warm as as the positive cable and the top portion of the battery. we disconnected everything and pulled the starter. pulled it apart to diagnose.
This morning i had a thought, and went out to look and noticed that the clip on the starter was missing, and the contact pad on the starter was black and roughed up. also noticed that the spring on the starter button was weak, hardly any rebound ? figured that when we bumped it the spring clip fell off, and the button did not release, it was arcing across the starter contact button. you can clearly see the points on the starter button and the contact button. i did bump the starter with the battery this morning and it spins up, but does not seem to have the power it did before. so going to get a complete rebuild kit and have it rebuilt. not taking any chances, also putting on a NOS Delco-Remy starter button I have on hand.
AACA - VCCA - Stovebolt - ChevyTalk Love the Antique Chevrolet's from 1928-1932 The Beauty, Simplicity, History, and the Stories they Tell
got a surprise in the mail today, the rebuild kits were scheduled for Friday, but arrived a day early, no complaints here !!
bought one for the starter and one for the generator. very nice kits, most everything you need to rebuild them, they also offer new end caps if needed with eth brush holders installed.
AACA - VCCA - Stovebolt - ChevyTalk Love the Antique Chevrolet's from 1928-1932 The Beauty, Simplicity, History, and the Stories they Tell
dropped off the Starter & Generator at the Auto Electric Shop here locally. this is the place that rebuilt my 1930 generator about a year ago, great service and KNEW what they were doing. so they are my go to place to get Electric things done for my old Chevrolets
I hope they are done by the end of the week, we shall see
AACA - VCCA - Stovebolt - ChevyTalk Love the Antique Chevrolet's from 1928-1932 The Beauty, Simplicity, History, and the Stories they Tell
Hey BearsFan315, You are doing an amazing job !! Quite impressive to say the least. Everything is just over the top and I cannot wait to see the car when you are finished ! THANK YOU for all the great photos,it is so great to SEE what you have accomplished. And thank you for all the wonderful help you have given me,it is truly invaluable ! Jay
well been a while, but i did go pick up the starter and generator. was a short wait, only about a week and a half. but as always they did a great job. both look great.
AACA - VCCA - Stovebolt - ChevyTalk Love the Antique Chevrolet's from 1928-1932 The Beauty, Simplicity, History, and the Stories they Tell
when we were prepping for start up a few weeks ack, we noticed there was some coolant in the water pump. Problem was it is the new sealed water pump from The Filling Station, so it did not make sense.
we cleaned up the coolant, only a few drops and moved on.
while installing the starter and generator i went back and checked, and notice that there was a little more coolant in the water pump trough. i noticed some coolant on the front of the head, and a spot around the water outlet. tightened it up and bam leak gone.
AACA - VCCA - Stovebolt - ChevyTalk Love the Antique Chevrolet's from 1928-1932 The Beauty, Simplicity, History, and the Stories they Tell
went out last night and figured i would give starting a chance...
did a once over on the engine, checked fluids, cables, wires, etc... then went to drop in battery and noticed the ground wire was hanging ?!? rolled under the car and realized that the battery cut out was fired and melted !! guess when the starter was arcing it caused excessive heat and melted the casing on the cut out. i know the battery was warm when i pulled it.
had to order a new switch, they are rated for 500A 12Vdc
AACA - VCCA - Stovebolt - ChevyTalk Love the Antique Chevrolet's from 1928-1932 The Beauty, Simplicity, History, and the Stories they Tell
If it's rated for 500 amps @ 12 volts, it'll still only handle 500 amps @ 6 volts.
Amps are amps regardless of the voltage, and the rated amperage will be dependent on the size of the components. To make it handle 1000 amps would require the components to be larger.
did my once over, and installed battery, and then tried to fire spin the engine to pump gas to the pump, then carb. i primed the oil pump via drill wink. and the thing could barely turn over !! i can crank it by hand and it is a little tight, but i expect that on a freshly rebuilt engine. starter is fine and works great, they tested it and i bench tested it. i had to remove all spark plugs to get the thing to turn over.
so wondering if maybe the battery got fried ? burned out a few cells or something ? it is a Red Top Optima 6v, and this thing usually slings the motor around like there is no tomorrow. it stays on the tender and says it is fully charged, on a meter I get 6.4 v all day.
unfortunately i do NOT have a spare 6v battery around anywhere :( think i will call local auto store and see if they can load test the 6v.
AACA - VCCA - Stovebolt - ChevyTalk Love the Antique Chevrolet's from 1928-1932 The Beauty, Simplicity, History, and the Stories they Tell
Somewhere I read that way back when it was not unheard of to connect a "pony" engine to the newly built engine to loosen things up . If it were mine i would just give it a 12 volt boost for a few seconds . Once it runs for a minute or two I am guessing all it will need is the 6 volts. That is what I did after rebuilding my 32 engine.
It is common for newly rebuilt engines with new rings and honed cylinders to take some extra power to turn them over on initial attempts to run. Once the cylinders smooth out a little gets much easier to turn over. I have used 12 volt battery with 6 volt starter or jumped from 12 volts in the past. As long as the 12 volts is applied to the cranking starter all will be okay. 12 volts on the ignition system is also okay for a short time. I am sure I will have to do that when I try to start my freshly rebuilt '32 engine.
I will get the battery load tested, and if test good i will try to jump it and see what happens.
can i connect the 6v up as normal, then run jumpers from the 12v battery to the 6 v battery or should i just connect the 12v straight up ? do not want to ruin anything else :/
AACA - VCCA - Stovebolt - ChevyTalk Love the Antique Chevrolet's from 1928-1932 The Beauty, Simplicity, History, and the Stories they Tell
We used to jump straight to the 6v battery. We had one engine weld the points before we had a chance to run the starter, so after that we had one person engage the starter first, then the second person attached the last of the jumper cables while the starter was cranking. Prevents the full 12 volts from going to the ignition system. Probably only gets 9 or 10 volts that way.
took battery to get load tested, unfortunately no one locally can load test a 6v battery, everyone has the new auto testers that only do 12v. me and the guy played with the system and no where could you change it to 6v, so the battery would not load test because voltage was too low.
did try the battery back in the car, still can NOT spin the engine with plugs in it. if i jump it with a 12v then it will kick and spin over. going to get a new 12v battery this week. and try again. was able to prime the fuel pump, but took several rounds of 10 cycling (6v battery ONLY and no plugs)
AACA - VCCA - Stovebolt - ChevyTalk Love the Antique Chevrolet's from 1928-1932 The Beauty, Simplicity, History, and the Stories they Tell
You can buy a very basic Load Tester at Harbour Freight or even Napa I suspect. I have a cheap Harbour Freight style and a professional one from the 1960's I bought off Ebay.
This style is basically a voltmeter that shows your battery voltage 1)with no load connected and 2)with a heating element connected to the battery to produce a load. The loaded and unloaded voltages are compared while the "load" is connected for 15-20secs.
You could do the same type of test yourself with a voltmeter and electrical devices on your car - say 30sec with headlights or 5sec with starter and see if the battery voltage drops significantly with the load attached. With a good battery, your voltage will slowly drop the longer the load is connected. If the battery is bad, the voltage will drop significantly and suddenly. This is easier to watch with a voltmeter with a needle rather than digital but either will work.
Last edited by canadiantim; 04/05/2209:13 AM.
1938 Canadian Pontiac Business Coupe (aka a 1938 Chevy Coupe with Pontiac shaped front sheet metal - almost all Chevy!) 1975 4-speed L82 Vette
tinkered with the car some last night, mainly on spinning the engine over.
note that the 1930 is NOT home currently, it is actually out in Texas on Display at a Trade Show. It is being used for a NEWly formed Company as part of a promotion campaign, it will be featured on the company's NEW t-shirts to promote the company :)
on to the 1929 remember all is relative, and relative in to how I perceive it
had the battery load tested and it passed, but said it was in last quarter of its life. battery code date is 07/14 (Optima Red Top 3 Year)
spinning it by hand with plugs in it is a little harder than spinning the 1930 with 1000 miles on it, you know when you hit a compression stroke on any cylinder, especially if spinning slowly.
took the starter OFF tore it apart, made sure everything moved freely, was lubed up, and brushes seated and were free to move with armature
spun up starter on bench with (1) 6v battery, it spins up steadily, not an instant torque and spin. (2)12v battery, spins up fast and hard, way faster on torque end
installed starter back on car with plugs installed and attempted to spin up (1) 6v will spin engine till it hits compression stroke, which is not even a quarter or so turn, can NOT spin it past a compression stroke (2) 12v will attempt to spin engine but bendix gets stuck out and stops, tried various shim thicknesses and the same results. have to loosen starter to get bendix back in to try again.
strange thing is that with the plugs removed the 6v battery can spin over engine slowly, and bendix never gets stuck ?! maybe it is not kicking it out hard enough ? as noted i was able to slowly prime the fuel pump and carb via this method. took about 4-5 cycles of 10 seconds each to get the fuel pump full of fuel. remember New fuel line so has to pump from tank through line to bowl :)
Ordered a NEW Optima 6v Red Top today, should be here tomorrow. NO ONE Locally within 25 miles says they have one in stock, called everyone around. 2 Local Parts store can have one to me next day. rest say approx 5-7 days, probably drop shipping from manufacturer. either way i will check the Production Date to validate when it was made. Easy to do on an Optima !
AACA - VCCA - Stovebolt - ChevyTalk Love the Antique Chevrolet's from 1928-1932 The Beauty, Simplicity, History, and the Stories they Tell
got in the NEW optima 6v, did a test and same issue on the car as the other.
went through and double checked the timing and settings, reset the valves cold.
did a few test Chipper recommended, i have a strong snappy spark, easily jumps and snaps 1/4" + gap with a strong blue flame. **POP** also pulled plugs and spun over engine to validate plugs were firing and sparking. so know i have FUEL to Carb, FIRE at the Plugs, and Air all around.
installed the battery and would kick the engine about a quarter turn and stop at a compression. so i set up the riding mower 12v 525CA battery with some jumper cables and ran it in parallel with the 6v, only connected it when i hit the starter and disconnected as soon as i stopped. engine would spin over and rotated with plugs, etc... so made sure had fuel in carb, timing rough set and tried to fire it up, nothing. tinkered for a few hours, no avail.
went out monday evening and tuesday evening tinkered around, same ordeal. about an hour or two each time.
this morning went out and went over everything one more time, and then connected batteries, and after about half hour, the engine actually kicked and sputtered for a brief second. waiting a few seconds then hit it again, and tried to fire, once more and it started up, ran for about 10-15 seconds then died off. unfortunately had to pack it in and head to work. so i know it will now fire and everything is really close. figure if i can get it to fire and run, let it run for a short time and warm up and set in.
AACA - VCCA - Stovebolt - ChevyTalk Love the Antique Chevrolet's from 1928-1932 The Beauty, Simplicity, History, and the Stories they Tell
unfortunately did not have any time to work on the car last night, had an update meeting for hte upcoming AACA Grand Nationals... trying to get all the ducks in a row as the meet is about 30 days out !!
did have some time this morning to go out and tinker. i put in the 6v battery (was on tender all night), turned the key, hit the accelerator pedal a few times, and then hit hte starter switch. it turned about a quarter turn and stopped (compression). grabbed the 12v off the tender, jumped it over to the 6v, hit the starter and fired right up. rand for a minute or two, died when i tried to accelerate the then engine slowly. know timing and all is NOT perfect. hit hte starter and fired right back up. let it idle for a few minutes and get up to temp. smell the paint, oil, and lube burning off and out the engine.
Looks to me like your oil pump is working fine. What did the oil pressure gauge read?
PS Now that you have it running, and you are able to restart immediately after stopping, I don't think any bearings are TOO tight. If they were, the engine would be even "stickier" and harder to get rolling at restart.
That said, if I were you I'd wait on the next start up until you can run it steady for at least 20 minutes and run at a good fast idle. Maybe around 1500 RPM. At least 1200. This is to throw more oil up to the cylinder walls and wrist pins during a critical time of break-in.
As long as the cam in the distributor isn't significantly worn, I wouldn't bother with looking at dwell at all. Dwell and point gap are interlinked and one changes the other. Just make sure your point gap is right (you've already done that) and that will take care of dwell on it's own. And of course check timing AFTER any readjustments to point gap.
Nice work! And nice car! Wish mine looked like that.
As long as the cam in the distributor isn't significantly worn, I wouldn't bother with looking at dwell at all. Dwell and point gap are interlinked and one changes the other. Just make sure your point gap is right (you've already done that) and that will take care of dwell on it's own. And of course check timing AFTER any readjustments to point gap.
distributor is a complete rebuild by JYD :) first time it has been put to work.
AACA - VCCA - Stovebolt - ChevyTalk Love the Antique Chevrolet's from 1928-1932 The Beauty, Simplicity, History, and the Stories they Tell
last night i dropped in the NEW 6v Optima and hit the accelerator a few times, and hit the starter button, car spun over and fired up, slow idle then settled in once warmed up.
went out this morning, and decided to try the OLD 6v Optima, it spun quarter turn and stopped, i hit it again and spun around slowly, then car fired off and was running.
let the car idle and warm up a bit. then adjusted the idle down and settled in around 350 RPM or so per my meter. still ahs a slight hesitation if you hit the accelerator, but will work that out when i have time to tinker more.
AACA - VCCA - Stovebolt - ChevyTalk Love the Antique Chevrolet's from 1928-1932 The Beauty, Simplicity, History, and the Stories they Tell
That is the news we all just knew was coming !! Following your adventure from the beginning,seeing all the work you have done so well,just an amazing journey BearsFan !!! Congrats!! That Chevy will excite people for another 100 years to come!! Good on ya man!!! I bet your smile is ear to ear right now,enjoy !!!
Yes BearsFan315, I have been following tour well documented journey through to this great conclusion, My 29 gives me and everyone who sees it on the road a big smile on the dial. yours will too😍
finally had some time this weekend to get back to putting my 1929 together. I have been engulfed with the AACA Grand Nationals our Region recently hosted. Was a superb show !! working on closing that out and getting focused back on other things.
started to put together the front end. stanchions, headlamp bar, headlamps, etc... basically have to put it all together loosely then line everything up and tighten them down. slow and tedious.
AACA - VCCA - Stovebolt - ChevyTalk Love the Antique Chevrolet's from 1928-1932 The Beauty, Simplicity, History, and the Stories they Tell
next up was the front bumper and my turn signals bolting everything together and lining it all up then go back to tighten the bumper bolts down. the left side would jump skip and spin when i tried to torque it, then it hit me, the frame threads were stripped when i got it. so i ended up getting a thread insert (helicoil style) kit. drilled out he threads, screwed in insert, broke off tab, put on bumper, threaded in bolt, and bam like a charm !! worked great, was able to torque it down and not issues.
tested out my signals and they both are working and function correctly.
wired up the headlamps and tested those out. everything seems to work and look correctly now.
AACA - VCCA - Stovebolt - ChevyTalk Love the Antique Chevrolet's from 1928-1932 The Beauty, Simplicity, History, and the Stories they Tell
fired up the engine, as it has been sitting for a while, pumped hte accelerator a few times, a little choke, and fired up after a few tries... warmed up and idled nicely.
decided to tinker with the tail light & stop light, I have an original style on the car 2 bulbs, but also built and LED version using the Lambert LED kit. So i decided to run a few test on various bulbs, Incandescent & LED to see how they work and how bright they are in my garage.
then i backed car out of garage, 3 point turned it and backed it back in, so that the headlamps were facing garage door. this gave me a decent surface to tape off and line up the headlamps some and even run a few test on various bulbs, Incandescent & LED
will make separate postings for the test i ran, for those interested.
AACA - VCCA - Stovebolt - ChevyTalk Love the Antique Chevrolet's from 1928-1932 The Beauty, Simplicity, History, and the Stories they Tell