|
|
Joined: Sep 2020
Posts: 19
Grease Monkey
|
OP

Grease Monkey
Joined: Sep 2020
Posts: 19 |
Hello,
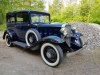
I have been reading threads new to site , I have a 1930 Sedan that I was told was running, I cleaned tank, replaced fuel pump diaphragm, checked for spark at points and plugs. Which I have. Motor turns over slow, so tried to pull start got it to pop a couple times. still no run. It seems to lock up when I pull choke but just cannot get it to go. Starting fluid no pop, Im thinking distributor could be installed wrong. What is the procedure to install distributor. Compression 50-60 per cylinder dry. About ready to sell!!!!!! 5000.00. Thanks for the help
|
|
|
|
VCCA members have access to a list of over 50 Technical Advisors who can help you with your car. It's worth the price of membership! While you can get a lot of information for free in this forum, sometimes the info that you REALLY need is only available from the right person. This is what "The World's Best Chevrolet Club" is all about!
JOIN THE VCCA TODAY!
|
|
|
|
Joined: Dec 2011
Posts: 1,019 Likes: 3
ChatMaster - 1,000
|
|
ChatMaster - 1,000
Joined: Dec 2011
Posts: 1,019 Likes: 3 |
Hello Winchway,
There are a few things to check. ( This process is one I used on the 216 in my '37. I wanted to check the engine before trying to start it )
1) Remove the valve cover and check for a rocker arm that may have excessive clearance between it and the top of the valve stem.
1a) This would indicate one of two possibilities, a valve is stuck in the open position due to varnish or a push rod is bent, if so, probably from the first possibility.
2) If everything appears to be okay, you would need to check the battery for fluid and for corrosion on the battery terminals. Check the battery cables for corrosion. With these cars you want to be sure the positive cable is at least 1/0 in size and the negative is either of the braided design or of the same size cable as the positive.
2a) With battery power checked, place the trans in neutral, set the e-brake. Remove the number one spark plug and remove the coil wire from the coil. Install your compression gauge. This next part you can do in one of two ways. You can have a helper bump the starter from inside the car to turn the engine and bring up the compression to get you close to top dead. The second way is for you to bump the starter by hand with the actuator rod at the starter.
3) At this point, locate number 1 spark plug wire on the cap and mark the distributor. Remove the cap and check to see how close you are to that mark. If it is close, look into the window of the bell housing next to the starter and see if the Beebee on the flywheel is visible or not. At this point you may want to remove the rest of the spark plugs so you turn the engine by hand with the fan blade to get the Beebee in line with the pointer.
Now you should be at top dead center and the rotor should align with the mark you made for the number one ignition wire. This will "tell" you if you need to reposition the distributor.
I don't know the particulars of a '30 Chevy engine, but I believe the process I described should apply to any vintage car as long as you know where the timing marks are located .
I hope this helps and keep us up-dated on your progress.
Dave
old cars are meant to be driven !!
VCCA # 047832
|
|
|
|
|
Joined: Sep 2016
Posts: 311
Backyard Mechanic
|
|
Backyard Mechanic
Joined: Sep 2016
Posts: 311 |
I would add make sure spark plug wires are in correct fireing order. I believe it is1 5 3 6 2 4
1932 4 door Special Sedan 1916 490 Touring
|
|
|
|
|
Joined: Dec 2011
Posts: 1,019 Likes: 3
ChatMaster - 1,000
|
|
ChatMaster - 1,000
Joined: Dec 2011
Posts: 1,019 Likes: 3 |
Hello RonPenn,
Good point, sometimes we overlook the simple things .....
Dave
old cars are meant to be driven !!
VCCA # 047832
|
|
|
|
|
Joined: Sep 2020
Posts: 19
Grease Monkey
|
|
OP
Grease Monkey
Joined: Sep 2020
Posts: 19 |
There are a few things to check. ( This process is one I used on the 216 in my '37. I wanted to check the engine before trying to start it )
1) Remove the valve cover and check for a rocker arm that may have excessive clearance between it and the top of the valve stem.
1a) This would indicate one of two possibilities, a valve is stuck in the open position due to varnish or a push rod is bent, if so, probably from the first possibility.
Yes I did, A couple were a little loose, lubricated is there a good way to free up if stuck, I have tried to pull start to exercise the components.
2) If everything appears to be okay, you would need to check the battery for fluid and for corrosion on the battery terminals. Check the battery cables for corrosion. With these cars you want to be sure the positive cable is at least 1/0 in size and the negative is either of the braided design or of the same size cable as the positive.
Yes New 6v battery Good Cables Not Positive to ground?
2a) With battery power checked, place the trans in neutral, set the e-brake. Remove the number one spark plug and remove the coil wire from the coil. Install your compression gauge. This next part you can do in one of two ways. You can have a helper bump the starter from inside the car to turn the engine and bring up the compression to get you close to top dead. The second way is for you to bump the starter by hand with the actuator rod at the starter.
Yes Did that 60 dry
3) At this point, locate number 1 spark plug wire on the cap and mark the distributor. Remove the cap and check to see how close you are to that mark. If it is close, look into the window of the bell housing next to the starter and see if the Beebee on the flywheel is visible or not. At this point you may want to remove the rest of the spark plugs so you turn the engine by hand with the fan blade to get the Beebee in line with the pointer.
Yes , Distributer retarded 1 is at about 6 otherwise 5, Fly wheel mark is visible
Now you should be at top dead center and the rotor should align with the mark you made for the number one ignition wire. This will "tell" you if you need to reposition the distributor.
I'm going to recheck this again, Points are operating and I have spark.
I don't know the particulars of a '30 Chevy engine, but I believe the process I described should apply to any vintage car as long as you know where the timing marks are located .
I hope this helps and keep us up-dated on your progress.
|
|
|
|
|
Joined: Sep 2020
Posts: 19
Grease Monkey
|
|
OP
Grease Monkey
Joined: Sep 2020
Posts: 19 |
|
|
|
|
|
Joined: Sep 2020
Posts: 19
Grease Monkey
|
|
OP
Grease Monkey
Joined: Sep 2020
Posts: 19 |
|
|
|
|
|
Joined: Dec 2011
Posts: 1,019 Likes: 3
ChatMaster - 1,000
|
|
ChatMaster - 1,000
Joined: Dec 2011
Posts: 1,019 Likes: 3 |
In past posts, some type of penetrating oil sprayed on the valve stem as the engine is rotated.
Do you have a strong spark at the plugs ?? By this I mean, the plug itself. Remove a spark plug and ground it to the block. Is the spark strong or weak ??
Dave
old cars are meant to be driven !!
VCCA # 047832
|
|
|
|
|
Joined: Dec 2011
Posts: 1,019 Likes: 3
ChatMaster - 1,000
|
|
ChatMaster - 1,000
Joined: Dec 2011
Posts: 1,019 Likes: 3 |
Winchwa,
I searched thru Google for 1930 Chevy engine tune up specs and it brought me back to the VCCA '29-'32 group. It was actually pretty informative.
Try this first, at the top of the forum page click on search. in the top box (key word) enter this number ....310362
look at the second chat, Bearsfan315 and click on his highlighted link.
Last edited by dfd37chev; 10/29/20 09:44 PM. Reason: info
Dave
old cars are meant to be driven !!
VCCA # 047832
|
|
|
|
|
Joined: Apr 2019
Posts: 115 Likes: 3
Shade Tree Mechanic
|
|
Shade Tree Mechanic
Joined: Apr 2019
Posts: 115 Likes: 3 |
Winchwa,
I searched thru Google for 1930 Chevy engine tune up specs and it brought me back to the VCCA '29-'32 group. It was actually pretty informative.
Try this first, at the top of the forum page click on search. in the top box (key word) enter this number ....310362
look at the second chat, Bearsfan315 and click on his highlighted link. Direct link to this post: Tune up spec
|
|
|
|
|
Joined: Sep 2020
Posts: 19
Grease Monkey
|
|
OP
Grease Monkey
Joined: Sep 2020
Posts: 19 |
|
|
|
|
|
Joined: Sep 2020
Posts: 19
Grease Monkey
|
|
OP
Grease Monkey
Joined: Sep 2020
Posts: 19 |
Seems weak like it may need a condenser hard to say with a 6 volt, No valves stuck, rotor points at number 1 plug on cap at tdc, I still do not like the low compression readings.
|
|
|
|
|
Joined: Dec 2007
Posts: 4,024 Likes: 99
ChatMaster - 4,000
|
|
ChatMaster - 4,000
Joined: Dec 2007
Posts: 4,024 Likes: 99 |
Did you run the compression test after squirting some oil into the cylinders?
You noted that you have new 6 volt battery cables. What size are they?
What is the battery voltage when the engine is cranking?
How hard is it to crank the engine by hand with the spark plugs removed?
Rusty
VCCA #44680
|
|
|
|
|
Joined: Sep 2020
Posts: 19
Grease Monkey
|
|
OP
Grease Monkey
Joined: Sep 2020
Posts: 19 |
Compression was done dry, I would say 1/2 inch cables, I will check voltage when cranking, with plugs out not to hard
|
|
|
|
|
Joined: Dec 2007
Posts: 4,024 Likes: 99
ChatMaster - 4,000
|
|
ChatMaster - 4,000
Joined: Dec 2007
Posts: 4,024 Likes: 99 |
That sounds pretty small for the cables. Look for some type of size designation on the insulation. My 2/0 cables are 5/8" OD. It you do some math they have about 30% more wire area than a 1/2" cable.
I apologize for the confusion. My suggestion is to check battery voltage when cranking with the plugs installed. Also feel how warm the cables get.
Then remove the plugs and determine how hard it is to hand crank the engine against no compression. If you feel up to it you can try to hand crank with the plugs installed.
Rusty
VCCA #44680
|
|
|
|
|
Joined: Sep 2020
Posts: 19
Grease Monkey
|
|
OP
Grease Monkey
Joined: Sep 2020
Posts: 19 |
Great thanks, I would say they are 1 Gauge. Neg goes to bell housing bolt, old one goes to frame which is no hooked up. Positive goes to starter both seem to be almost new. Cable does not get warm when cranking, Starter seems to be warmer. Turns over fine with no plugs in it. Thanks for the help
|
|
|
|
|
Joined: Dec 2007
Posts: 4,024 Likes: 99
ChatMaster - 4,000
|
|
ChatMaster - 4,000
Joined: Dec 2007
Posts: 4,024 Likes: 99 |
In these situations my father always said that his father always said "It's either the spark or the gas". I am not sure that your troubleshooting has confirmed which is the problem.
How much faster does the motor turn with the plugs out compared to installed?
How hard is it to crank the engine by hand with and without the plugs installed?
How hot do the starter and cables get when trying to start with the plugs installed? It appears that those are 12 volt cables. A 2/0 cable has almost 60% more area than a 1 gauge. And 1 gauge is not the same as 1/0.
I would also suggest that you use a squeeze bottle and squirt gasoline into the carburetor throat while you crank.
I do not think your problem is compression. I do not know the exact number for that engine but I expect the compression ratio is about 5 to 1. At 14 psi atmospheric pressure that is only about 70 psi.
Rusty
VCCA #44680
|
|
|
|
|
Joined: Sep 2020
Posts: 19
Grease Monkey
|
|
OP
Grease Monkey
Joined: Sep 2020
Posts: 19 |
Ok , Verified voltage we are good to the points, I moved timing to 18 before in the window, Number one seemed close to 6 o'clock so I moved back on cog so it was more in line with 5 o'clock. Motor now turns over normal but now I have no spark at the plugs, I looked closer at rotor and it seems to be worn at an angle. gapped all plugs a .40 is the only other change I made. Still does not even pop
|
|
|
|
|
Joined: May 2012
Posts: 4,374 Likes: 30
ChatMaster - 4,000
|
|
ChatMaster - 4,000
Joined: May 2012
Posts: 4,374 Likes: 30 |
ok lets go down the list, just had to do this with 1930 not running.... Fuel - Air - Fire 1-FUEL 1-a- do you have fuel pumping to the carb, if you remove bowl is it full ? if you remove the fuel line from the carb and then spin over engine does fuel pump out the fuel line ?? 1-b- if you look into the carb air intake do you see it squirt gas when you press the throttle lever on the carb. is this what happens when you push the accelerator: 1930 Chevrolet Universal AD - Carter RJH-08 150S Pump Test 2-Fire new cap, rotor, condenser set plug gap to .040" set points to .018" validate and confirm wires are in order 1-5-3-6-2-4 Idle Adjustment Screw: 5/8 to 1 1/4 Turn Open 3-Valves, confirm each valve is NOT stuck and that it moves when engine is turned over, they move up and down. then cold set the valves: Bring the U|C timing mark to the pointer for number 1 cylinder at TDC. The U|C mark comes to the pointer at TDC for number 1 and number 6 cylinders. confirm compression at number 1 cylinder when you are looking for TDC 1, i use a compression gauge. At 1 TDC, Adjust: 1- Intake & Exhaust 2- Intake 3- Exhaust 4- Intake 5- Exhaust 6- None At 6 TDC, Adjust: 1- None 2- Exhaust 3- Intake 4- Exhaust 5- Intake 6- Intake & Exhaust Intake Valve: .006" Exhaust Valve: .008" 4-timing, Set the timing set for approx 18 BTDC, per the diagram on Bill's Page when you get the timing mark as noted BEFORE 1 is under compression and TDC then you can go to the distributor and validate where number one spark wire is as the points should be on the lobe at number 1. makes sure the wire at that point on the cap goes to 1 cylinder, the wire rest in firing order 1-5-3-6-2-4 if the button /point is not on a lobe you should be able to spin the distributor and get it such, if not may require you to loosen and pull the distributor, spin it one tooth, which also requires you to spin the oil pump to line up, make sure that the distributor seats back down all the way !!! if the distributor end and oil pump end do NOT line up the distributor will NOT SEAT !! at this point you should get engine to fire ... these things will run easy even if everything is not perfect... then you need to fine tune to get it happy.
AACA - VCCA - Stovebolt - ChevyTalk
Love the Antique Chevrolet's from 1928-1932
The Beauty, Simplicity, History, and the Stories they Tell
|
|
|
|
|
Joined: Sep 2020
Posts: 19
Grease Monkey
|
|
OP
Grease Monkey
Joined: Sep 2020
Posts: 19 |
Thanks, everything you mentioned is very useful, Most of all items have been covered. When looking at the engine from passenger side I assume noon is against the engine. I have looked at multiple pictures and some have #6 st 11 o'clock position and some show it at 5 o'clock mine I was setting up with #1 at five and Grease Knob almost against engine at 1 o'clock
|
|
|
|
|
Joined: Dec 2007
Posts: 4,024 Likes: 99
ChatMaster - 4,000
|
|
ChatMaster - 4,000
Joined: Dec 2007
Posts: 4,024 Likes: 99 |
Don't confuse the orientation of the distributor cap with the wires in the correct firing order with the orientation of the distributor body.
Either one can be in a different orientation as long as the relationship among these key events is correct.
-The timing mark on the flywheel should be in the correct position. This means that both #1 and #6 pistons are just before Top Dead Center.
-Both valves should be closed on #1 cylinder.
-The points have to be on the distributor cam and have just opened.
-The rotor is pointing to the terminal in the distributor cap that is connected to the wire that goes to #1 spark plug.
-The remaining spark plug wires are in the cap and connected in the correct firing order as the rotor rotates clockwise.
The location of the #1 wire can be in any of the 6 positions in the distributor cap as long as the points open when #1 is near TDC. I agree with you that most diagrams for firing order that I have seen show #1 at the 5 o'clock position.
You can also install the distributor body in multiple orientations. The key is for the gear on the distributor shaft to engage the gear on the cam shaft in the correct position. Then you can rotate the distributor body to make the points open when they should, Once again, there are 6 positions for the distributor body that will allow the engine to run. You probably cannot use all them due to physical interference with things like the grease cup and the terminal for the wire to the points.
Rusty
VCCA #44680
|
|
|
|
|
Joined: May 2012
Posts: 4,374 Likes: 30
ChatMaster - 4,000
|
|
ChatMaster - 4,000
Joined: May 2012
Posts: 4,374 Likes: 30 |
as noted and agree with Rusty
position to number 1 on the distributor is relative !!
have to set up and ensure where number 1 is based on above. then wire from there
also remember that once you find number one, the distributor does NOT go in sequential order, 1,2,3,4,5,6 it goes in firing order so make sure 1 on distributor goes to plug 1, front closest to radiator. going clockwise from one on the distributor next is number 5 then, 3-6-2-4
and did you put in all new parts as noted ?? especially the condenser, that thing will drive you nuts if it is bad.
AACA - VCCA - Stovebolt - ChevyTalk
Love the Antique Chevrolet's from 1928-1932
The Beauty, Simplicity, History, and the Stories they Tell
|
|
|
|
|
Joined: Sep 2020
Posts: 19
Grease Monkey
|
|
OP
Grease Monkey
Joined: Sep 2020
Posts: 19 |
Thanks guys I will let you know
|
|
|
|
|
Joined: Sep 2020
Posts: 19
Grease Monkey
|
|
OP
Grease Monkey
Joined: Sep 2020
Posts: 19 |
Hello everyone, I got it started up tonight. Many nights of frustration . Ultimately I must not have had strong enough spark, Replaced Condenser and it fired right up. Keep it stock, Keep it original, I'm going to have a lot of fun with this car. little leak at bottom of radiator. Cruisen the neighborhood I go
|
|
|
|
|
Joined: May 2012
Posts: 4,374 Likes: 30
ChatMaster - 4,000
|
|
ChatMaster - 4,000
Joined: May 2012
Posts: 4,374 Likes: 30 |
that is great, glad you got it fired up....
drive it enjoy it and listen to it
make sure it is happy and running happy
small leak in radiator, I would wait till its time to park for the winter, then drain it and pull it and have a local radiator shop braze it and fix it up. removing radiator is pretty easy task.
AACA - VCCA - Stovebolt - ChevyTalk
Love the Antique Chevrolet's from 1928-1932
The Beauty, Simplicity, History, and the Stories they Tell
|
|
|
|
|