|
|
Joined: Oct 2010
Posts: 1,005 Likes: 5
ChatMaster - 1,000
|
OP

ChatMaster - 1,000
Joined: Oct 2010
Posts: 1,005 Likes: 5 |
After a very long delay, my next step is to install the wiring harness I purchased some time ago. I would like to talk with those individuals who actually installed their own harness. Where is the best place to start? Any short cuts, tips or no-no's that you encountered? Any specific or unusual tools that were helpful? Any and all input from an actual installation would be appreciated especially from a 1950. Thank You.
|
|
|
|
|
Joined: Jun 2007
Posts: 1,894
ChatMaster - 1,500
|
|
ChatMaster - 1,500
Joined: Jun 2007
Posts: 1,894 |
Are you replacing an existing harness that is installed and working or is the old harness already gone?
1938 Canadian Pontiac Business Coupe (aka a 1938 Chevy Coupe with Pontiac shaped front sheet metal - almost all Chevy!)
1975 4-speed L82 Vette
|
|
|
|
|
Joined: Nov 2001
Posts: 19,758 Likes: 64
ChatMaster - 15,000
|
|
ChatMaster - 15,000
Joined: Nov 2001
Posts: 19,758 Likes: 64 |
Normally the first place to start is the dashboard. That is the most complicated and requires the most attention. If your wires are not identified on both ends before you start to install is the time to verify the ends are properly marked. It is exasperating to have something not work when you think your are finished.
How Sweet the roar of a Chevy four!
|
|
|
|
|
Joined: Oct 2011
Posts: 337 Likes: 4
Backyard Mechanic
|
|
Backyard Mechanic
Joined: Oct 2011
Posts: 337 Likes: 4 |
Hawkeye, I installed a complete harness into a '50 convertible many years ago that I purchased from Y&Z's. The first thing I did was to find an area in my barn that was clean and dry, and carefully unpack it on the floor so that it was laid out in the pattern it would be found in the car. With the package I received an excellent sheet detailing what wire went where, and the letter/number coding used to identify each wire.
If I remember correctly I believe I started at the dashboard and installed all the front end wiring first. Then I did the gauges and ignition and dash options (radio, heater etc.). Then I did the rear end last. The seats were out of the car then, so that made it much easier for some things.
I can't recall any problems or snags I hit, other than not cleaning some connections at the lights properly hence having no power at those connections at first.
I found the package as sent to me to be manufactured completely and accurately with easy-to-follow directions. Brewster has the car now with the same wiring in it, and it hasn't caught fire or died on him yet so I must have got it right. This would have been in the mid-'70's or early '80's. Hope this helps.
|
|
|
|
|
Joined: Dec 2007
Posts: 4,024 Likes: 99
ChatMaster - 4,000
|
|
ChatMaster - 4,000
Joined: Dec 2007
Posts: 4,024 Likes: 99 |
I follow a process similar to the one kaygee described. I have done 2 vehicles with great results. One was my '37 Master coupe and the other was a '49 3100 pickup.
Laying the harness out on a flat surface and making sure that each and every terminal is identified is very important. Don't even try to install it in the vehicle until you have done that.
The bigger challenge is properly routing the harness and various wires. I was very fortunate that the original harness was still in my '37 so I took lots and lots of pictures. On the 3100 we had the old harness but it had been removed from the truck. That did give us some clues about routing but we still visited other owners of AD trucks and took lots of pictures.
Routing is critical to make sure the harness is supported correctly and does not rub against other parts or get caught in moving parts. Plus you have to determine which goes above or below which for things like the speedometer cable, choke and throttle cables, and oil and temperature gauge connections.
We had the seat out in both vehicles. I would not even attempt to do it with the seat installed. And of course do not connect anything to the battery until you are done. In fact we used some jumper wires and a simple test light to check portions of the circuit before putting power to the whole system.
Patience is key! It is not technically difficult. Organize and sequence your work to complete a circuit or area at a time. I quickly learned to only work on it about 2 or 3 hours at a time.
Rusty
VCCA #44680
|
|
|
|
|
Joined: Oct 2010
Posts: 1,005 Likes: 5
ChatMaster - 1,000
|
|
OP
ChatMaster - 1,000
Joined: Oct 2010
Posts: 1,005 Likes: 5 |
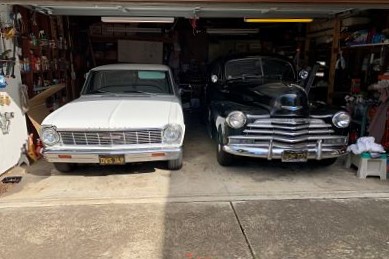
Canadiantim, The old wire harness is no longer in the car. Chipper, the harness is marked at both ends with a code. I added a description next to the code on masking tape so I could visualize where the wire will be going. Kaygee, This harness is from Y & Z. The entire interior is completely removed from the car so there should be pleanty of room. Rusty37, my biggest challenge will be laying out the largest section of the harness on a flat surface. My garage is "barn" shaped, but it is not a barn. It's a 2 car garage with two cars residing. I will probably lay out a piece of plywood on some horses and lay the main harness on it. It should stop raining here any year now. I do have some photos of other finished cars for a good visual. Thanks to everyone who gave some advise. I will keep you posted as soon as I get started. Probably will have some more questions
|
|
|
|
|
Joined: Oct 2010
Posts: 1,005 Likes: 5
ChatMaster - 1,000
|
|
OP
ChatMaster - 1,000
Joined: Oct 2010
Posts: 1,005 Likes: 5 |
Rusty 37 Master, could you explain how/where you used the jumper wires and test light. What did you test for - continuity? I did use a multi-meter to to test the original dimmer switch and the new stop light switch before I installed and wired them. Thanks
|
|
|
|
|
Joined: Dec 2007
Posts: 4,024 Likes: 99
ChatMaster - 4,000
|
|
ChatMaster - 4,000
Joined: Dec 2007
Posts: 4,024 Likes: 99 |
If you know how to use a multimeter then you have a real advantage to make sure everything works as expected.
First of all, a test light is really nothing but a "visual" voltmeter. I made my own plus someone gave me a commercial one. They work the same. All you are doing is grounding one lead and touching to other lead to a contact or wire to determine if you have voltage at that point in the harness.
Like you, I use the ohm function on the multimeter to check continuity. This is typically not an issue when a harness is properly labeled at each end. If you add circuits (like I did for turn signals) or the label falls off, I use the meter to confirm the circuit.
Sometimes you need a jumper wire as a lead extension just because the leads on the meter or test light are not long enough. Or I will use a jumper and connect directly from the battery to a light to make sure the light works. That indicates I have a good ground and a good bulb properly installed. So if the light does not come on when I activate the switch I know it is wiring or switch issue.
You are also doing the right thing by checking the functions of each switch before you start connecting wires to it. Otherwise if something does not work as expected you do not know if it is a wiring issue or a switch issue.
Rusty
VCCA #44680
|
|
|
|
|
Joined: Sep 2020
Posts: 2
Grease Monkey
|
|
Grease Monkey
Joined: Sep 2020
Posts: 2 |
Thanks a lot for your answers. I just wanted to put the same question as Hawkeye. For my 1950 conv. I want to do the rewiring myself. Only question is where to buy the wiring harness. Y & Z? Filling station? Eckler? Chevrolets of the 40's? Price doesn't tell all. Maybe you can give me a suggestion.
Maartenswarts
|
|
|
|
|
Joined: Dec 2007
Posts: 4,024 Likes: 99
ChatMaster - 4,000
|
|
ChatMaster - 4,000
Joined: Dec 2007
Posts: 4,024 Likes: 99 |
I recommend that you go to sources that actually make the wiring harnesses. YNZ and Rohde Island wiring are 2 sources that many on this forum have used and are very satisfied with the results . The other sources you mentioned all buy from those manufacturers.
You eliminate the middle person and can get great technical support from either of them.
Neither is inexpensive but they offer great value. The alternative is to build it yourself. That takes a lot of time and patience. You will have more material costs than you might realize by the time you purchase all the different gauges and colors of wire, the various size harness looms, and the many different types of end terminals. Your material costs will be somewhat lower if you do not want to reproduce the original harness and simply use vinyl insulated wire.
Rusty
VCCA #44680
|
|
|
|
|
Joined: Oct 2010
Posts: 1,005 Likes: 5
ChatMaster - 1,000
|
|
OP
ChatMaster - 1,000
Joined: Oct 2010
Posts: 1,005 Likes: 5 |
Maarten, I did purchase my harness from Y & Z. The quality of the harness is very good. Chris in customer service was very helpful. BUT, I did experience missing wires for the rear quarter dome light switch that you should have in your car. Y & Z does not have this wire in their master diagram so be prepared to ask them to install it. If you wait more than 60 days from purchase to inform them of their mistakes, the shipping cost to return that portion of harness will be on you. The wire for the heater switch was also not included. One of the wires for the license plate light was too short and I had to splice some additional wire to make it work. The wires that go to the voltage regulator were also short so I had to do some creative bending. The most important item that you should invest in is a genuine Chevrolet wiring diagram. Not Motors or Chilton's but a real Chevrolet diagram. I took mine down to Staples and had them enlarge it. Get the biggest that they offer. It really helps when you are laying on your back under the dash and have a question. The wiring instructions that came with my harness were just okay. I called Y&Z at least 8 times for some clarification. Send me a private message if you need any specific help.
|
|
|
|
|
Joined: Jan 2002
Posts: 1,069 Likes: 9
ChatMaster - 1,000
|
|
ChatMaster - 1,000
Joined: Jan 2002
Posts: 1,069 Likes: 9 |
I used a YnZ on my 48. Make sure to ask them to add turn signal wires if you are adding them. Didn't have any short wires for my 48. Had to call them once on the ammeter wireing. Very happy with it.
1946 Chevy 3100 1/2 Ton Pickup Purchased 11/18/17 Sold 9/20
1948 Chevy Fleetmaster Coupe, Purchased 6/20/2010
1965 Chevy ll 350 Purchased Feb 2021. 3-speed Saginaw Hurst Floor Shifter 3.08 Rear End
2019 Ford Ranger Lariat Super Crew
|
|
|
|
|
Joined: Sep 2020
Posts: 2
Grease Monkey
|
|
Grease Monkey
Joined: Sep 2020
Posts: 2 |
Thanks gentlemen, useful information. It's going to Y & Z.
A last question: behind the glove box are two iron boxes on the backside of the firewall. Think it has something to do with the (non functional radio - custom deluxe-). Nothing to find in the radio shop manual. Any idea?
Best Wishes,
Maarten Swarts
Maartenswarts
|
|
|
|
|
Joined: Feb 2002
Posts: 562 Likes: 1
Oil Can Mechanic
|
|
Oil Can Mechanic
Joined: Feb 2002
Posts: 562 Likes: 1 |
The stock 50 radio has two sections, one mounts behind the radio dial, the other behind the speaker grille. Nothing behind the glove box. Maybe you have some aftermarket item.
Dick
|
|
|
|
|