|
|
Joined: Oct 2018
Posts: 134
Shade Tree Mechanic
|
OP

Shade Tree Mechanic
Joined: Oct 2018
Posts: 134 |
Yes...me again.
After the brakes, I'm obligated to do something about the radiator. The lower RH rad corner is greener than jade and it has been dripping into a pan purposely placed beneath it since I brought it home.
So, I have a couple questions about it. Is it a "sealed" coolant system, or does it just find its happy place vented to the atmosphere?? I wonder if I can switch it to a sealed system if its not already and what might be mechanically involved in doing so...
Thanks, as always
Ken O'Connor - kens94s@hotmail.com
1936 Chevrolet Standard Coupe
|
|
|
|
|
Joined: Nov 2001
Posts: 29,863
Tech Advisor ChatMaster - 25,000
|
|
Tech Advisor ChatMaster - 25,000
Joined: Nov 2001
Posts: 29,863 |
The Mangy Old Mutt
"If It's Not Junk.....It's Not Treasure!"
|
|
|
|
|
Joined: Dec 2013
Posts: 161
Shade Tree Mechanic
|
|
Shade Tree Mechanic
Joined: Dec 2013
Posts: 161 |
Do yourself a favor and pull it out and have it rebuilt. That way your done with it and that's one problem you will not have to worry about. I recommend this place if you want a good job. https://www.thebrassworks.net/
|
|
|
|
|
Joined: Oct 2018
Posts: 134
Shade Tree Mechanic
|
|
OP
Shade Tree Mechanic
Joined: Oct 2018
Posts: 134 |
Wow. Thats a lot of cake, compounded by my 75 cent dollar!...They obviously take their work very seriously.
As I am building this car to finance my coupe build, I'll just take it to my local shop.
I guess the biggest question is how do I get it out?? I've heard that the front fenders and grill surround all come off in one piece by simply removing the two bolts under the rad cradle and the bolts from the fenders to running boards, then lifting it all off as one unit????
Last edited by OLDREK; 11/15/18 05:07 PM.
Ken O'Connor - kens94s@hotmail.com
1936 Chevrolet Standard Coupe
|
|
|
|
|
Joined: Sep 2017
Posts: 237
Backyard Mechanic
|
|
Backyard Mechanic
Joined: Sep 2017
Posts: 237 |
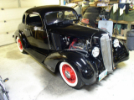
Brassworks does make a nice radiator. I had them build me one for my '37 Ford Pickup with its 327 Chev motor and 200-4R 4 speed auto trans. There is no need to go to sealed pressurized system with the low HP the original motors made, and it just complicates things. Doug ![[Linked Image from i.imgur.com]](https://i.imgur.com/meyisVg.jpg) ![[Linked Image from i.imgur.com]](https://i.imgur.com/cF3gCZA.jpg)
Last edited by DMelton; 11/15/18 05:27 PM.
|
|
|
|
|
Joined: Feb 2018
Posts: 191
Shade Tree Mechanic
|
|
Shade Tree Mechanic
Joined: Feb 2018
Posts: 191 |
Brassworks does make a nice radiator. I had them build me one for my '37 Ford Pickup with its 327 Chev motor and 200-4R 4 speed auto trans. OMG that is beautiful. I had looked at some pickups with 350s and one recently that had a 327 in it. The 327 was one of the most innovative engines of it's time, surprising they only made them for a few years. It was the first of what would be fuel injection as I understand it. A friend of mine who is a real wrench, not like me who plays one on the Internet, always tells me how the 283/327 is much better than the 350, but since crate engines are so plentiful, 350 conversions are like candy... You sure shoe horned that 327 in that engine compartment. Beautiful job, if it runs half as good as it looks it's probably a treat to drive! Alan
|
|
|
|
|
Joined: Oct 2018
Posts: 134
Shade Tree Mechanic
|
|
OP
Shade Tree Mechanic
Joined: Oct 2018
Posts: 134 |
That IS a real beauty, for certain...
Can you confirm for me....To access the rad, I've heard that the front fenders and grill surround all come off in one piece by simply removing the two bolts under the rad cradle and the bolts from the fenders to running boards, then lifting it all off as one unit????
Thank you...
Ken O'Connor - kens94s@hotmail.com
1936 Chevrolet Standard Coupe
|
|
|
|
|
Joined: Nov 2011
Posts: 3,292
ChatMaster - 3,000
|
|
ChatMaster - 3,000
Joined: Nov 2011
Posts: 3,292 |
you may or may not be able to do that after disconnecting, head light wires, horn wires, rad hoses, rad support rod to firewall. But your going to need two others to help, one on each fender at the end and somebody center on rad shell.
You will need a 6 x 6 space to put it.
My 35 standard I always take the individual parts off , less chance of damage.
mike lynch
|
|
|
|
|
Joined: Oct 2018
Posts: 134
Shade Tree Mechanic
|
|
OP
Shade Tree Mechanic
Joined: Oct 2018
Posts: 134 |
Thanks Mike. I guess I'll have to evaluate the situation when I have wrench in hand.
Good Call on the 6x6 space too. I normally never think of that 'till I'm looking for a place to put it down!!! Ha!!
Ken O'Connor - kens94s@hotmail.com
1936 Chevrolet Standard Coupe
|
|
|
|
|
Joined: Dec 2013
Posts: 161
Shade Tree Mechanic
|
|
Shade Tree Mechanic
Joined: Dec 2013
Posts: 161 |
The grill shroud and fenders DO NOT come off in one piece.
For starters go this route:
1. Remove the hood by removing the bolts at the top of the grill shroud and at the top of the cowl. Be careful the hood will come off in one piece and it's pretty crazy with 4 pieces flapping
around. Get a friend
2. You should probably remove the shroud adjusting bar. Both ends. the radiator side and the cowl side.
3. Remove the headlight lenses and headlight reflectors and disconnect the headlights.
4. Remove the radiator hoses and let the radiator drain out.
5. Their are 3 or 4 screws (on each side) that bolt the grill shroud to each fender that will have to be removed.
6. Their are 2 bolts at the bottom of the radiator (one on each side) that hold the radiator on a cradle that will have to be removed.
7. The radiator and grill shroud should come off as one unit. Be careful of the headlight wiring. You'll have to snake it thru the shroud as you remove this assembly.
8. The radiator is bolted to the shroud. Remove the bolts and nuts and then it's all yours.
9. Hopefully your car has some fender welting between the fender and the radiator shroud. Save it if you can. If not it's easily replaceable. Save all the nuts and bolts as well and mark them
in small bags for re-installation.
10. Hope yo an find a good radiator shop because you probably won't want to do this again. Enjoy it. If you like tools and working with you hands it's kinda neat.
WELCOME TO ANTIQUE CAR WORLD
|
|
|
|
|
Joined: Oct 2018
Posts: 134
Shade Tree Mechanic
|
|
OP
Shade Tree Mechanic
Joined: Oct 2018
Posts: 134 |
Holy cow, thanks THH!
As I was reading your instruction it was pretty easy to visualize. The only thing you left out was actually doing the job for me!!!
My sedan has had a somewhat recent repaint, and new welting was used throughout. None of the bolts are even rusty.
I appreciate your encouragement, tho I'm an old hand at auto mechanics. Previous projects were mainly 50's hotrods, you know, where anything goes. Working with something this old and original is a real eye-opener and FAR more satisfying, I'm beginning to realize.
Ken O'Connor - kens94s@hotmail.com
1936 Chevrolet Standard Coupe
|
|
|
|
|
Joined: Dec 2007
Posts: 4,024 Likes: 99
ChatMaster - 4,000
|
|
ChatMaster - 4,000
Joined: Dec 2007
Posts: 4,024 Likes: 99 |
A couple of ideas to consider. I do agree that getting the radiator re-cored is the way to go.
Take a look to see if there is a way to remove the radiator by going to the rear and then up and over the front of the engine. You will need to remove the fan, water pump, and thermostat/water outlet to get clearance.
Someone else on this forum gave me the cure for the "floppy " hood. With the hood in the open position wrap it in bungee cords to keep it folded open. I was able to re-install the hoof on my '37 car by myself with that method.
Even if you have a couple of people helping with the hood the bungee cords are a plus.
Rusty
VCCA #44680
|
|
|
|
|
Joined: Oct 2018
Posts: 134
Shade Tree Mechanic
|
|
OP
Shade Tree Mechanic
Joined: Oct 2018
Posts: 134 |
One of the very first things I did when I got the car home was remove the hood. I noticed pretty quickly how carelessly opening the hood would scratch hell out of the headlight buckets. Like you suggest, Rusty, I folded the hood up on both sides, got a nice fuzzy blanket from my wife and tossed it over the whole thing, then standing in front of the grill I reached one arm over each side and grabbed the center hinge around the middle and lifted the hood out in one fall swoop. It DOES help when you're 6-3" like me. Its now standing in a corner of the downstairs rec room, still wrapped in the blanket.
Ken O'Connor - kens94s@hotmail.com
1936 Chevrolet Standard Coupe
|
|
|
|
|
Joined: Nov 2011
Posts: 3,292
ChatMaster - 3,000
|
|
ChatMaster - 3,000
Joined: Nov 2011
Posts: 3,292 |
Its more difficult getting it back on, get another pair of hands. I speak thru experience.
mike lynch
|
|
|
|
|
Joined: Oct 2018
Posts: 134
Shade Tree Mechanic
|
|
OP
Shade Tree Mechanic
Joined: Oct 2018
Posts: 134 |
Ken O'Connor - kens94s@hotmail.com
1936 Chevrolet Standard Coupe
|
|
|
|
|
Joined: Jul 2009
Posts: 1,478
ChatMaster - 1,000
|
|
ChatMaster - 1,000
Joined: Jul 2009
Posts: 1,478 |
I found that in addition to the above placing a board across the front bumper and standing on it I could get a better hold on the rad. to pull it up and back (I removed the fan, and water pump to get better clearance.) You will need two additional friends to help handle it, too.
|
|
|
|
|
Joined: Oct 2018
Posts: 134
Shade Tree Mechanic
|
|
OP
Shade Tree Mechanic
Joined: Oct 2018
Posts: 134 |
It would be nice not to pull the front sheetmetal apart to get the rad out, but I was scoping it out on the weekend, and I discovered a broken bumper mount on the RH side frame...the part the big bolt goes into?? Its badly cracked and may have been repaired before. The only way to get a good look at it is to pull the fender and frame horn cover off. I guess they're one piece??
If I have to take the fender off it will make access to the rad much easier tho...
Ken O'Connor - kens94s@hotmail.com
1936 Chevrolet Standard Coupe
|
|
|
|
|
Joined: Nov 2011
Posts: 3,292
ChatMaster - 3,000
|
|
ChatMaster - 3,000
Joined: Nov 2011
Posts: 3,292 |
take the broken bumper mount to a welder who knows what he is doing with cast iron, requires a specific rod for ARC welding. The crack will need to be V ground.
You may be able to re-use the mount by re-tapping it to same size. If not your most likely going to need a HELI COIL insert. Had to do that to both of my fronts.
If you take both fenders off, it becomes real easy to access everything. Also gives you a chance to buy and use brand new bolts, washers, nuts.
mike lynch
|
|
|
|
|
Joined: Oct 2018
Posts: 134
Shade Tree Mechanic
|
|
OP
Shade Tree Mechanic
Joined: Oct 2018
Posts: 134 |
Thanks Mike. By your description it almost sounds like the mount comes off the frame??? Is that true?? Perhaps I can fabricate a replacement from steel??
Ken O'Connor - kens94s@hotmail.com
1936 Chevrolet Standard Coupe
|
|
|
|
|
Joined: Nov 2011
Posts: 3,292
ChatMaster - 3,000
|
|
ChatMaster - 3,000
Joined: Nov 2011
Posts: 3,292 |
I can tell you about 34-35 standard Chevrolets, am unfamiliar with 35 master 36 master std, never owning one, but am assuming they are the same/similar cast bumper mount.
The casting is held in a 34-35 std frame with 3/8" rivets . Grind top of rivet off even with frame surface, then take heavy hammer and whack rivet right in the center. I would want to spray the rivet with rust buster of some kind and make sure it soaks in.
Once you get it off , makes it easy to put in a vice and repair.
Once everything is repaired and ready to re-install, get a BUTTON HEAD ALLEN HEAD 3/8" correct length allowing for a nylock below or you can put it in the top. The button head looks like a rivet.
I took all 186 rivets out of my 35 standard chassis, took frame apart into 11 parts. Sandblasted inside and out, primed and painted and re-assembled using 1"long...3/8" button heads with steel washers and lock nuts inside. All pre painted. I used drifts to align the holes and insert the bolts. Chassis was perfectly square. Am currently doing this again to a 35 chev std frame for another car.
mike lynch
|
|
|
|
|
Joined: Oct 2018
Posts: 134
Shade Tree Mechanic
|
|
OP
Shade Tree Mechanic
Joined: Oct 2018
Posts: 134 |
Holy crap! Someone is going to thank you a hundred years from now for all your hard work. I only had to replace the bottom plate in the rear 12" both sides of the frame, and that was not an enjoyable job with the body still on. I'll be taking the body off my coupe and may have to replace the rear 1/2 of the bottom plate, but frame upside down will be much easier.
Thanks for all your advice on the mount. I believe it is cast.
Ken O'Connor - kens94s@hotmail.com
1936 Chevrolet Standard Coupe
|
|
|
|
|
Joined: Nov 2011
Posts: 3,292
ChatMaster - 3,000
|
|
ChatMaster - 3,000
Joined: Nov 2011
Posts: 3,292 |
Forgot to say, when you get the cast bumper mount off and place it in your vice or machinists vice, drill a 1/8" hole or slightly larger , right at the end of the crack, this will stop it from running.
mike lynch
|
|
|
|
|
Joined: Oct 2018
Posts: 134
Shade Tree Mechanic
|
|
OP
Shade Tree Mechanic
Joined: Oct 2018
Posts: 134 |
Ken O'Connor - kens94s@hotmail.com
1936 Chevrolet Standard Coupe
|
|
|
|
|