|
|
Joined: Feb 2008
Posts: 3,801 Likes: 1
ChatMaster - 3,000
|

ChatMaster - 3,000
Joined: Feb 2008
Posts: 3,801 Likes: 1 |
1951 Chevy Styleline Deluxe 2 door sedan / purchased from second owner 6-19-2000.
|
|
|
|
|
Joined: Nov 2002
Posts: 7,472 Likes: 26
ChatMaster - 7,000
|
|
ChatMaster - 7,000
Joined: Nov 2002
Posts: 7,472 Likes: 26 |
From a PM I learned that the rear end is assembled and installation in the car will happen this weekend.
Steve D
|
|
|
|
|
Joined: Feb 2008
Posts: 3,801 Likes: 1
ChatMaster - 3,000
|
|
ChatMaster - 3,000
Joined: Feb 2008
Posts: 3,801 Likes: 1 |
It certainly turned into a big buck job, a valid reason to be certain a "mechanic" is capable of doing a specific job, on our OLD cars, when being hired.
1951 Chevy Styleline Deluxe 2 door sedan / purchased from second owner 6-19-2000.
|
|
|
|
|
Joined: Apr 2009
Posts: 107
Shade Tree Mechanic
|
|
Shade Tree Mechanic
Joined: Apr 2009
Posts: 107 |
I am holding an original Hyatt 1506 bearing and it measures .748 as stated. I also have a GM pinion in my hands and it measures .820 between the pinion face and snap ring groove so if he has a 1/4 gap it is too much. I rebuilt my rear-end using all NOS GM parts including a 3:55 set and it works perfect. Sounds like his mechanic wasn't familiar with the old style pinion set-up. Makes you appreciate tapered roller bearings. Sounds like he recieved the right info. here. John
|
|
|
|
|
Joined: Nov 2002
Posts: 7,472 Likes: 26
ChatMaster - 7,000
|
|
ChatMaster - 7,000
Joined: Nov 2002
Posts: 7,472 Likes: 26 |
While 1/4" sounds like a lot the snap ring only serves to keep the inner race in place. Where did you get the 1/4" measurement from? I would be more concerned if the rear bearing was up against the pinion. Without seeing the tooth pattern and knowing the backlash it's tough to judge if it's set up properly. The rear bearing is not critical to lateral (axial? ) thrust movement but rather spherical. Hopefully I have correctly interpreted the terminology as posted above by Mark.
Last edited by m006840; 01/21/17 05:00 PM.
Steve D
|
|
|
|
|
Joined: Apr 2009
Posts: 107
Shade Tree Mechanic
|
|
Shade Tree Mechanic
Joined: Apr 2009
Posts: 107 |
In his first post he says he had a 1/4 play on the bearing. His pictures show alot.
|
|
|
|
|
Joined: Nov 2002
Posts: 7,472 Likes: 26
ChatMaster - 7,000
|
|
ChatMaster - 7,000
Joined: Nov 2002
Posts: 7,472 Likes: 26 |
Sorry I did not go back that far as there has been lots of discussion since then including it is back together and being installed this weekend. The first photo shows the bearing may be up against the pinion and the snap ring is visible and the gap does not look like 1/4". Tough to tell from a photo.
Steve D
|
|
|
|
|
Joined: Feb 2010
Posts: 549
Oil Can Mechanic
|
|
OP
Oil Can Mechanic
Joined: Feb 2010
Posts: 549 |
Only got about 3 hours in the rear end re install this weekend
Got the front end drive shaft in
Got the leaf springs and shocks re attached to the axle
Any clues tips on how to flatten the leaf springs so I can attach the rear shackles?
I'm thinking about blocking between the spring and the frame on the rear half and then jacking up the center below the axle. Should force it to fatten out?
"Frame Off" restoration, its a journey not a destination
|
|
|
|
|
Joined: Feb 2010
Posts: 549
Oil Can Mechanic
|
|
OP
Oil Can Mechanic
Joined: Feb 2010
Posts: 549 |
In the first mechanics defense, he did admit that he screwed up and forgot to screw in the third member bolts
Where he went wrong is not tearing it down after the initial extremely loud cluck, cluck and instead said just drive it after setting them and the gears should stop humming and sink.
He had to have known how bad that moment must have been internally.
Last edited by dads51; 01/23/17 09:15 PM.
"Frame Off" restoration, its a journey not a destination
|
|
|
|
|
Joined: Jan 2002
Posts: 30,701 Likes: 141
ChatMaster - 25,000
|
|
ChatMaster - 25,000
Joined: Jan 2002
Posts: 30,701 Likes: 141 |
I will give you a lot of credit for fighting through all the problems you had AFTER the restoration of that car. I hope it will give you many miles of pleasure in the future 
Last edited by Chev Nut; 01/23/17 11:16 PM.
Gene Schneider
|
|
|
|
|
Joined: Feb 2010
Posts: 549
Oil Can Mechanic
|
|
OP
Oil Can Mechanic
Joined: Feb 2010
Posts: 549 |
It's a test from my dad and grand pa for selling the original as a stupid high school kid.
Any idea how to flatten out those leaf springs?
I was thinking of undoing the fronts hooking up the rear shackles and then jack up the rear end which would force the front part of the spring up to the frame. Then the more you jack the flatter the spring would get forcing it to slide forward on the underside of the frame till it hits the front bracket, the negotiate it into position?
"Frame Off" restoration, its a journey not a destination
|
|
|
|
|
Joined: Oct 2016
Posts: 485 Likes: 3
Backyard Mechanic
|
|
Backyard Mechanic
Joined: Oct 2016
Posts: 485 Likes: 3 |
Here is a thought! Take the leaf springs apart and just install the one main spring to the shackles and the axel and then use a long bolt to reattach the remaining leaf springs then just cut off the extra length bolt.
Rory
|
|
|
|
|
Joined: Feb 2008
Posts: 3,801 Likes: 1
ChatMaster - 3,000
|
|
ChatMaster - 3,000
Joined: Feb 2008
Posts: 3,801 Likes: 1 |
It's a test from my dad and grand pa for selling the original as a stupid high school kid.
Any idea how to flatten out those leaf springs?
I was thinking of undoing the fronts hooking up the rear shackles and then jack up the rear end which would force the front part of the spring up to the frame. Then the more you jack the flatter the spring would get forcing it to slide forward on the underside of the frame till it hits the front bracket, the negotiate it into position? Read this thread. http://www.chevytalk.org/fusionbb/showtopic.php?tid/283800/
1951 Chevy Styleline Deluxe 2 door sedan / purchased from second owner 6-19-2000.
|
|
|
|
|
Joined: Feb 2010
Posts: 549
Oil Can Mechanic
|
|
OP
Oil Can Mechanic
Joined: Feb 2010
Posts: 549 |
Not sure about attaching the leaf and then stacking the additional leafs? then the axle? Kind of all one piece and the axle mounts above the leafs etc.
Not the thread with the pictures is what I was thinking I might have to do. I like the "C" clamp idea as I was wondering how to keep blocks in place.
Saturday or Sunday morning I'll give it a whirl
Hook up the e-brake cables, bleed the breaks, pray for a dry road and its time for a test drive!
Yes I filled the rear with gear oil.
"Frame Off" restoration, its a journey not a destination
|
|
|
|
|
Joined: Feb 2008
Posts: 3,801 Likes: 1
ChatMaster - 3,000
|
|
ChatMaster - 3,000
Joined: Feb 2008
Posts: 3,801 Likes: 1 |
Not sure about attaching the leaf and then stacking the additional leafs? then the axle? Kind of all one piece and the axle mounts above the leafs etc.
Not the thread with the pictures is what I was thinking I might have to do. I like the "C" clamp idea as I was wondering how to keep blocks in place.
Saturday or Sunday morning I'll give it a whirl
Hook up the e-brake cables, bleed the breaks, pray for a dry road and its time for a test drive!
Yes I filled the rear with gear oil. FORGET about the leaves, the purpose of sending you this thread was to illustrate how to straighten the spring, so it will reach the rear shackle. Look at the post by 70 fierro ..... that is what you could do to get your spring attached. Read his words in that thread. You could zip tie the 2x4 to the frame, then cut the zip tie, once you have the spring reattached to the rear shackle. Keep in mind, the FRONT of the spring is attached to its frame bracket, while this jacking up procedure is being performed. I don't understand why you removed the spring from the shackle, but that's not the primary concern now. The 2 x 4 method will get your spring and your shackle reunited. You'll get this solved, keep the faith.
1951 Chevy Styleline Deluxe 2 door sedan / purchased from second owner 6-19-2000.
|
|
|
|
|
Joined: Feb 2010
Posts: 549
Oil Can Mechanic
|
|
OP
Oil Can Mechanic
Joined: Feb 2010
Posts: 549 |
I removed the rears to be able to drop and pull the rear end out
I guess if I had a lift and a football team we could have negotiated the rear end out slide to side and tipped it out?
"Frame Off" restoration, its a journey not a destination
|
|
|
|
|
Joined: Feb 2008
Posts: 3,801 Likes: 1
ChatMaster - 3,000
|
|
ChatMaster - 3,000
Joined: Feb 2008
Posts: 3,801 Likes: 1 |
Yes, we would LIFT AND MOVE the rear end to clear the springs, allowing the springs to remain in place.
We did, however, remove the torque tube and center section, before lifting and removing the rear end assembly from under the car.
Hoping all goes well and you get those springs reconnected.
1951 Chevy Styleline Deluxe 2 door sedan / purchased from second owner 6-19-2000.
|
|
|
|
|
Joined: Feb 2010
Posts: 549
Oil Can Mechanic
|
|
OP
Oil Can Mechanic
Joined: Feb 2010
Posts: 549 |
FYI the two stacked 2 x 4 s worked. Getting the bushings and side brackets on the shackles have proven to be a challenge however as the bolts get a little wacko in the spring hole with a little spring pressure on them.
WD 40 and twisting the leaf with a large pipe wrench seems to do the trick.
Need to finish up and hook up the e breaks and bleed the rears and pray the Oakie bushing holds this time or I'll need to do round two! Or I guess it would be round 3!
"Frame Off" restoration, its a journey not a destination
|
|
|
|
|
Joined: Feb 2010
Posts: 549
Oil Can Mechanic
|
|
OP
Oil Can Mechanic
Joined: Feb 2010
Posts: 549 |
The first mechanic is going to the parts bill of almost a $1000
Won't pay my labor or the second mechanics bill of $700 because he could have done the work and I didn't ask. I didn't trust so I didn't want to ask. Anyway bird in the hand deal. Look at it this way I learned a lot about my rear end!
"Frame Off" restoration, its a journey not a destination
|
|
|
|
|
Joined: Jan 2002
Posts: 30,701 Likes: 141
ChatMaster - 25,000
|
|
ChatMaster - 25,000
Joined: Jan 2002
Posts: 30,701 Likes: 141 |
I assume everything is working well now?
Gene Schneider
|
|
|
|
|
Joined: Feb 2008
Posts: 3,801 Likes: 1
ChatMaster - 3,000
|
|
ChatMaster - 3,000
Joined: Feb 2008
Posts: 3,801 Likes: 1 |
The first mechanic is going to the parts bill of almost a $1000
Won't pay my labor or the second mechanics bill of $700 because he could have done the work and I didn't ask. I didn't trust so I didn't want to ask. Anyway bird in the hand deal. Look at it this way I learned a lot about my rear end! No matter if the rear is yours or the cars, it's always an expensive repair. 
1951 Chevy Styleline Deluxe 2 door sedan / purchased from second owner 6-19-2000.
|
|
|
|
|
Joined: Feb 2010
Posts: 549
Oil Can Mechanic
|
|
OP
Oil Can Mechanic
Joined: Feb 2010
Posts: 549 |
Still have one side of a shackle to replace, e brake, and bleed breaks. Just can't seem to find the time. Sunday it's suppose to snow so at least I can get the car together.
"Frame Off" restoration, its a journey not a destination
|
|
|
|
|
Joined: Feb 2010
Posts: 549
Oil Can Mechanic
|
|
OP
Oil Can Mechanic
Joined: Feb 2010
Posts: 549 |
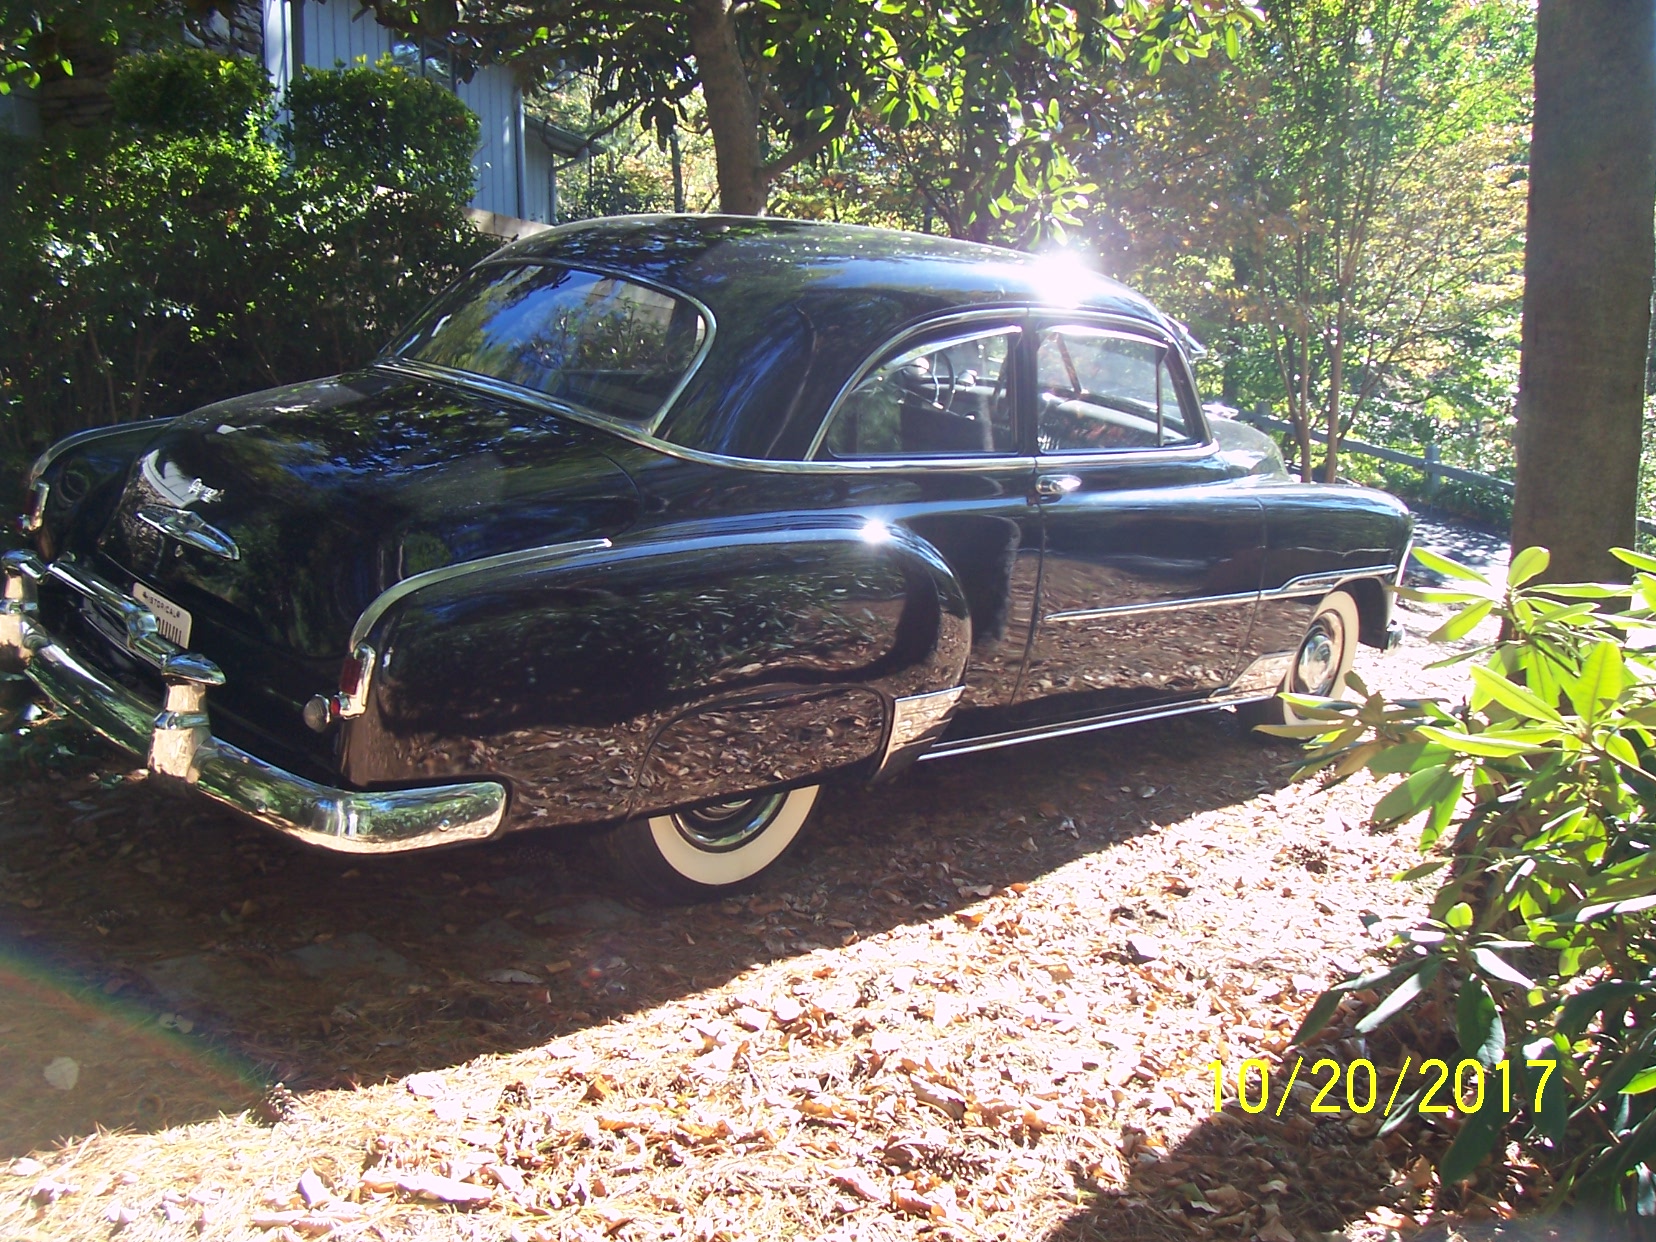
Ok finally got the other leaf spring attached and it was a fighter for sure. Nothing a 2 x 4 and a "C" Clamp can't handle. Still need a warm day to paint all the installation marks. And I took the car for brief ride and no rear end noise! thanks for all the help and encouragement ![[Linked Image from i1027.photobucket.com]](http://i1027.photobucket.com/albums/y336/nonidrinkers/IMG_62191.jpg) ![[Linked Image from i1027.photobucket.com]](http://i1027.photobucket.com/albums/y336/nonidrinkers/IMG_6303.jpg) ![[Linked Image from i1027.photobucket.com]](http://i1027.photobucket.com/albums/y336/nonidrinkers/IMG_6304.jpg)
"Frame Off" restoration, its a journey not a destination
|
|
|
|
|
Joined: Aug 2002
Posts: 114
Shade Tree Mechanic
|
|
Shade Tree Mechanic
Joined: Aug 2002
Posts: 114 |
Leaf springs I've done a number of times before using the 2x4 trick, though I don't recall having to fight nearly as much as you did to get those rear shackles hooked up!
On another note, when I did my '52 Fleetline over 20 years ago, I had the rear rebuilt using an NOS 3.70:1 R&P set for ('53 & '54), a swap meet, '54 gear case (the one for the 4.11 ring won't work with a 3.70 or 3.55) and all new bearings and seals fro Olcar. After reading your horror story, I'm glad I was still living in north Jersey at the time. I just took the whole mess to down to the shop at Fisher Auto Transmission (aka FATSCO), which was still a family-owned and operated business, and where there were still a bunch of mechanics in the shop that had been there since they were kids. They had both the know-how and all of the GM shop tools, and they turned the job around so fast, it made my head spin!
Recently, I began considering a switch to 3.55's, since I'm building a '54 235 to swap with the 216 to make the car a little less of a hazard in modern freeway traffic. However, after reading of your experiences, I'm reconsidering sticking with the 3.70:1 gears. I wouldn't even know where to turn in the Atlanta area to find a "real" mechanic these days!
Scott Andrews
Dacula, GA
#J25833
|
|
|
|
|
Joined: Jan 2002
Posts: 30,701 Likes: 141
ChatMaster - 25,000
|
|
ChatMaster - 25,000
Joined: Jan 2002
Posts: 30,701 Likes: 141 |
There is only a 5% advantage going to the 3.55 or 3 MPH at 65 MPH.
Gene Schneider
|
|
|
|
|