|
|
Joined: May 2015
Posts: 13
Grease Monkey
|
OP

Grease Monkey
Joined: May 2015
Posts: 13 |
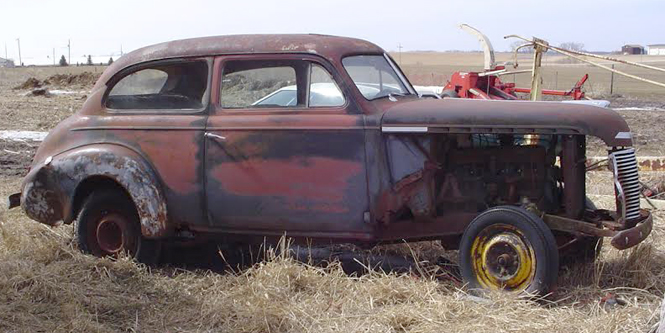
I just acquired another 40 Master Deluxe (a parts doner car) and I'm wondering if there is a step by step procedure for removing just the engine? With the car I'm working on now we took the body off the frame and got to the engine that way. Without removing the body does anyone have any suggestions?
|
|
|
|
|
Joined: Jan 2009
Posts: 935 Likes: 12
ChatMaster - 750
|
|
ChatMaster - 750
Joined: Jan 2009
Posts: 935 Likes: 12 |
Hood off, grill to rad pan off, rad & rad support off, disconnect all wires & batt cable going to engine, disconnect bell housing to tran, clutch linkage, motor mounts. Get engine hoist or 4 strong boys and a case of beer.
Not sure if the above is conclusive but will get you close to removal if it isn't.
Oh, I almost forgot; If you have a Fulton Sun Visor, Charlie would tell you to carefully remove it, place it on a pair of work horses ( not the kind with tails) then set the motor on the visor instead of an engine stand.
Good Luck
dick
Last edited by XLVIIdriver; 05/28/16 07:14 PM.
|
|
|
|
|
Joined: Oct 2007
Posts: 2,306
ChatMaster - 2,000
|
|
ChatMaster - 2,000
Joined: Oct 2007
Posts: 2,306 |
A true doner car is one that you will use to scavenge parts you need and is a reference for remembering how your car goes back together. Why do you want to take the engine out?
It is not that hard to take just the engine out. You need to remove the support for the top of the radiator frame, the radiator fan blade and belt, and all radiator hoses and the radiator. Disconnect all electrical wiring to the starter and generator; disconnect the choke and throttle cables, and vacuum line to the windshield wipers; disconnect the gas line at the gas pump; disconnect the exhaust pipe at the exhaust manifold; disconnect the universal joint at the back of the transmission; disconnect the speedometer cable on the transmission and all the transmission shift linkage attached at the transmission; remove the front and back motor mount bolts and the bolts to the mount holding the transmission to the frame; remove the battery tray and its support; and disconnect the linkage for the gas peddle.
You need to prop the hood open as far as you can get it, probably by removing the hood springs. Remove the valve cover and take out the left rear head bolt and the right front head bolt. With the bolts removed use an engine hoist with a leveler attachment to lift the engine using chains attached to the leveler and with the other ends of the chains screwed back into the head bolt holes.
This is all about taking your time and continuing to relevel your engine as you lift it up and out. Your biggest problem will most likely be your hood getting in the way of the arm on the engine hoist, because of the length of your chains. If his becomes a problem remove your hood. Other complications will soon be addressed by other VCCA Chat members.
Good luck, Mike
Last edited by Mike Buller; 05/28/16 06:55 PM.
Mike 41 Chevy
|
|
|
|
|
Joined: Jan 2002
Posts: 30,701 Likes: 141
ChatMaster - 25,000
|
|
ChatMaster - 25,000
Joined: Jan 2002
Posts: 30,701 Likes: 141 |
Good time to get a shop manual.
Gene Schneider
|
|
|
|
|
Joined: May 2015
Posts: 13
Grease Monkey
|
|
OP
Grease Monkey
Joined: May 2015
Posts: 13 |
Hey Mike thanks for the advice.
The reason I want to take the engine out of the donor car is because I noticed that it has welds down at the bottom above the oil pan. I'm thinking cracked block. I was hoping to salvage the engine.
I have very limited mechanical experience and the whole truth is that I have never restored anything before. I'm amazed at how much I am learning and how much I enjoy the skill building process.
I said all of that to say this, I am an extreme newbie so I will be asking questions that may be obvious to everyone... except me. All I ask for is patients and understanding... and to have things explained to me like I was 5. :)
So with the original question, is there an easy way to take it out, are there bolts that are hard to get to? What should I expect?
|
|
|
|
|
Joined: Oct 2007
Posts: 2,306
ChatMaster - 2,000
|
|
ChatMaster - 2,000
Joined: Oct 2007
Posts: 2,306 |
I want to let you know that with the enthusiasm you have for your 40 Chevy you can count on a lot of personal satisfaction. As long as you are patient and take one step at a time you should be able to remove your engine all by yourself. Only removing the hood is a two man job. You will need a good engine hoist with a load leveler, and an engine stand to put the engine on after getting it out of the car. Please feel free to ask any questions about tools used, and steps to all repairs. Normally, someone will have a response to your questions within about 12 hours. We can guide you through any problems you might have as you take the engine out. I do recommend that you document each step you take so you can reinstall the engine at some later date. I use a video camera to document all my work. I try to narrate my video even if I do not know the correct names of the parts I am dealing with. Your manual should be good at providing most part names. Here is a link to a post I wrote a few years ago Introduction to our hobby Please learn to search our old posts for information on what you are working on as well as read your manual. Here is a good article on searching for old posts Search Function TipsGood luck, Mike P.S. Give me a call if you want to visit about your project. 989-832-7634
Mike 41 Chevy
|
|
|
|
|
Joined: May 2015
Posts: 13
Grease Monkey
|
|
OP
Grease Monkey
Joined: May 2015
Posts: 13 |
Thank you
I'll look you up when I get home and have the time. I realize that all I'm doing will take a few years to complete. I've been wanting to do something like this for several years. (or more... OK alot more. Closer to 20)
|
|
|
|
|
Joined: Oct 2007
Posts: 2,306
ChatMaster - 2,000
|
|
ChatMaster - 2,000
Joined: Oct 2007
Posts: 2,306 |
I bought my 41 in 2003 and have been restoring it since. Not until 3 years ago have I not worked on it winters and driven it the rest of the year. 3 years ago I started a frame off restoration with the intent of having it back on the road this fall. I try to do most of the work myself.
The steps to remove the radiator are in your manual. Read it carefully. Here are some concerns when removing your radiator. I cover the fan side of the radiator with a piece of cardboard taped to it with masking tape. I do this to keep from damaging any of the fins on the radiator. I then remove the blade on the water pump. Always use only sockets that are 6 sided on all your mechanical work. Stripping a bolt head is a big deal when removing bolts that are rusted in place. A penetrating oil or a little heat from an acetylene torch can be very helpful. A lot of times you can twist off a bolt head so be careful. Tapping lightly on a bolt head with a hammer is helpful as is using a little tightening force before loosening a bolt. Fan bolts are easy to break off so take your time and work them a little both in a loosening and tightening motion. A lot of penetrating spray is helpful.
Be careful in removing the radiator brace rods. You do not want to disturb the positions of the nuts you see on the firewall holding the braces. This is important so you can reinstall the brace without loosing the correct alignment/distance of the radiator to the firewall. Most of the alignment of all the front sheet metal resides on the correct position of the radiator frame. Your inability to correctly realign the radiator frame will mean hours of fender alignment problems. There are nuts under the dash that must be removed to take out the brace. Be careful to not drop the nuts and their washers behind your interior firewall insulation. You don't want to remove it to find the parts. I would not use a socket wrench above 3/8" for any radiator or sheet metal work. A 1/2" socket set is best used on bolts 3/8" and above. There are going to be exceptions to which size ratchet is best depending on the location of a specific bolt or nut. At age 68 I am also using a pneumatic wrench to compensate for personal strength issues.
Good luck, Mike
P.S. If a picture is worth a thousand words then let me know and I can take one and post it. Front seats can be in the way when doing some transmission and firewall work. Don't be afraid of removing your seat for convenience sake. Be extra careful on what you through out.
In the process of disassembling a car try not to through out any nuts bolts, water pumps, fuel pumps, brake shoes, clutch parts, carburetors, starters, generators, etc. A lot of parts can be referenced when you put things back together. Bolts remind you of the correct size when you replace them with new ones. Shock absorbers, carburetors, clutch parts, brake shoes, etc. are often re-manufactured so companies will buy them from you.
Last edited by Mike Buller; 05/29/16 08:08 AM.
Mike 41 Chevy
|
|
|
|
|