|
|
Joined: May 2012
Posts: 4,374 Likes: 30
ChatMaster - 4,000
|
OP

ChatMaster - 4,000
Joined: May 2012
Posts: 4,374 Likes: 30 |
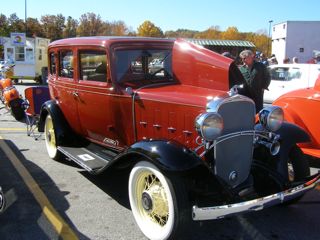
OK, I am venturing into the realm of possibly pulling my Engine & Transmission as a Complete Assembly to clean it up, check it over, and repaint it. Can I easily remove the Assembly as a whole with the body/ cowl in place with out any issues ?? Figure Remove Hood, Radiator, Light Bar, Maybe Front Fenders ?!? Or is it easier just to remove Engine w/o Transmission ?!? I Also have to consider the EASE of putting it back in when done with OUT causing damage to it or the Body/ Cowl !! here is where I am at NOW: 1929 Front EndFigure remove Fuel Line, Starter, Generator, Fan Blade, Oil Pressure Line, Splash/Under Pans, ??? Manifolds & Carb already off as you can see...
AACA - VCCA - Stovebolt - ChevyTalk
Love the Antique Chevrolet's from 1928-1932
The Beauty, Simplicity, History, and the Stories they Tell
|
|
|
|
|
Joined: Nov 2001
Posts: 19,758 Likes: 64
ChatMaster - 15,000
|
|
ChatMaster - 15,000
Joined: Nov 2001
Posts: 19,758 Likes: 64 |
Removing and installing as a unit is easier in most cases than just the engine. Major difference is in the installation. Aligning the transmission to engine can be a real pain. Slipping the ball housing onto the torque tube and aligning the splines is much easier.
You don't have to remove the front fenders. Do have to remove the top of the transmission, engine side pans and all connections to engine and transmission (speedo cable). I put a piece of cardboard doubled between the engine and firewall. That keeps from scratching the paint. Of course the headlight bar, radiator, hood, radiator brace need to be removed.
How Sweet the roar of a Chevy four!
|
|
|
|
|
Joined: Nov 2001
Posts: 29,863
Tech Advisor ChatMaster - 25,000
|
|
Tech Advisor ChatMaster - 25,000
Joined: Nov 2001
Posts: 29,863 |
The Mangy Old Mutt
"If It's Not Junk.....It's Not Treasure!"
|
|
|
|
|
Joined: May 2012
Posts: 4,374 Likes: 30
ChatMaster - 4,000
|
|
OP
ChatMaster - 4,000
Joined: May 2012
Posts: 4,374 Likes: 30 |
Awesome...
What day you guys coming over to assist :!)
Chipper... I figured I would have to at least remove Gear Shift Lever (PN 590290) , should i remove the TOP cover (PN 590280 as well) ?? Guessing every INCH counts on getting it out with OUT hitting, scratching, tearing something up !! Probably drain it first, all that FRESH NEW CLEAN 600WT Oil.
In disconnecting the Driveline/ Torque Tube & Shaft from the Transmission. All I need to do is remove the 4 Screws in the Universal Ball Joint Collar (PN 348131). Then the shaft should slide freely out of the ball joint when I pull the Assembly Forward. Assume to install a NEW gasket (PN 328684), should I have to replace the Seal (PN 348259) or should it be OK ?? Also should or will the Universal stay IN the Transmission End or should/ will it stay on the Shaft / Torque Tube ?!?
AACA - VCCA - Stovebolt - ChevyTalk
Love the Antique Chevrolet's from 1928-1932
The Beauty, Simplicity, History, and the Stories they Tell
|
|
|
|
|
Joined: Feb 2006
Posts: 2,262 Likes: 6
ChatMaster - 2,000
|
|
ChatMaster - 2,000
Joined: Feb 2006
Posts: 2,262 Likes: 6 |
All correct. The u-joint will stay with the transmission, it's bolted to the output shaft.
I would remove the entire top cover of the transmission with the shifter and then cover the opening with a piece of plywood or sheet metal bolted down using the bolts from the cover to keep FOD out.
While you have it out, I would replace the seal in the mushroom (a/k/a ball joint collar) with an o-ring kit, available from the Filling Station.
Definitely drain both engine and transmission before you start. The transmission will definitely pour 600W out the back end if you tilt the engine up in the front (which you must to to get it out). How do I know that? Exactly.
As Chipper said, a couple of layers of cardboard between the firewall and the rear of the engine (and a couple of layers over the fenders) are a great idea.
Good luck with it!
All the Best, Chip
"It's wise to choose a SIX"
|
|
|
|
|
Joined: Nov 2001
Posts: 19,758 Likes: 64
ChatMaster - 15,000
|
|
ChatMaster - 15,000
Joined: Nov 2001
Posts: 19,758 Likes: 64 |
Yes, remove the transmission top cover. The shift lever tower is too tall to pass under the firewall.
It is not necessary to remove the ball housing unless you want to change the gaskets or seals. The ball housing and U-joint will slip off the torque tube (best to support it above the brake cross shafts but they will hold it up). The ball housing will slip back on the torque tube but you will need to raise the torque tube above the cross shafts to get the splines on the U-joint and propeller shaft to align. Might have to rotate the transmission output shaft a bit to achieve alignment. I have removed and installed engine/transmission assemblies many times. Much easier than the alternative.
It will be necessary to move the clutch housing and clutch/brake pedal shaft around the steering column. Gets a bit tricky if doing the removal and installation alone but can be done without damaging anything.
How Sweet the roar of a Chevy four!
|
|
|
|
|
Joined: May 2012
Posts: 4,374 Likes: 30
ChatMaster - 4,000
|
|
OP
ChatMaster - 4,000
Joined: May 2012
Posts: 4,374 Likes: 30 |
OK, so complete top cover & shift lever to be removed. Also like Chips Idea of the Cover Plate. Can make a quick cheap DUST cover out of either Cardboard (Cereal Box) or Thin Sheet of Plastic. Since I have a Gasket Template made, I can use that and just NOT cut out the Inside :) Make a Blank Cover Plate. Plan on removing the pedals from the shaft. for more clearance, guess If I understand Chipper Correctly I will need to maneuver the pedal shaft to get pass the steering column, but should NOT be an BIG problem. Chip are you referring to TFS part No FS-4356 Assume this replaces Seal (PN 348259) Gasket Set FS-125 looks to be a variety of U-Joint Gaskets for various years, assuming would only USE one of them, then the CORKS (well one of them) would be replaced by the Above o-Ring FS-4356. The other Cork would be for other Years ? or Goes somewhere else ??
AACA - VCCA - Stovebolt - ChevyTalk
Love the Antique Chevrolet's from 1928-1932
The Beauty, Simplicity, History, and the Stories they Tell
|
|
|
|
|
Joined: May 2012
Posts: 4,374 Likes: 30
ChatMaster - 4,000
|
|
OP
ChatMaster - 4,000
Joined: May 2012
Posts: 4,374 Likes: 30 |
Sorry Guys, Just want to make sure I do this RIGHT and NOT mess up anything !!  As YOU ALL KNOW I PERSONALLY & GREATLY As YOU ALL KNOW I PERSONALLY & GREATLY
APPRECIATE ALL THE GUIDANCE and HELP you PROVIDE !!
AACA - VCCA - Stovebolt - ChevyTalk
Love the Antique Chevrolet's from 1928-1932
The Beauty, Simplicity, History, and the Stories they Tell
|
|
|
|
|
Joined: Sep 2006
Posts: 1,255 Likes: 10
ChatMaster - 1,000
|
|
ChatMaster - 1,000
Joined: Sep 2006
Posts: 1,255 Likes: 10 |
Hello Bearsfan, You are probably making the right decision if you are going into your engine that far. I got to thinking about it later but that plate is behind the cam/crank gear set. If it is not leaking that bad then just run it, but if it is REALLY leaking then it will be easier to fix in the long run out of the car. Make sure the oil spinner is still in place and facing the right direction before you make a final decision. Please keep everyone posted as to your progress.
|
|
|
|
|
Joined: Feb 2006
Posts: 2,262 Likes: 6
ChatMaster - 2,000
|
|
ChatMaster - 2,000
Joined: Feb 2006
Posts: 2,262 Likes: 6 |
Chip are you referring to TFS part No FS-4356 Assume this replaces Seal (PN 348259) Gasket Set FS-125 looks to be a variety of U-Joint Gaskets for various years, assuming would only USE one of them, then the CORKS (well one of them) would be replaced by the Above o-Ring FS-4356. The other Cork would be for other Years ? or Goes somewhere else ?? No, the cork and the O-ring are for different spots. The O-ring goes between two steel rings in the rear end of the mushroom (Ball, Universal Joint, P/N 353894) -- the torque tube slides in and out when the rear suspension springs flex, and the O-ring seals that sliding joint. This o-ring does replace one of the cork rings in the kit. The OTHER cork ring in the kit goes in the pressed steel "Collar, Universal Joint Ball, P/N 348131" to seal the mushroom as it changes its alignment with the transmission housing. The rest of the gaskets are there to allow you to shim the tightness of the fit of the collar where it clamps the ball. Hope that helps. All the Best, Chip
"It's wise to choose a SIX"
|
|
|
|
|
Joined: May 2012
Posts: 4,374 Likes: 30
ChatMaster - 4,000
|
|
OP
ChatMaster - 4,000
Joined: May 2012
Posts: 4,374 Likes: 30 |
I am looking at getting a 2 Ton Engine Hoist, do Not own one currently. Found out i can get a Steal on one for CyberWeek. Found a Torin 2 Ton SetUp out the Door for $152, regular $250. Most of the local autopart stores here sell them for $250-300, some are rebranded but same hoist. Harbor Freight sells the Pittsburgh for $175.
Question...
Should I spring for the Load Leveler $36 or Just Sling it ?!? Think last time i just used a sling, but there was NO cowl in the way. Would a Load Leveler help and or pay for itself in this situation !?!
AACA - VCCA - Stovebolt - ChevyTalk
Love the Antique Chevrolet's from 1928-1932
The Beauty, Simplicity, History, and the Stories they Tell
|
|
|
|
|
Joined: Nov 2011
Posts: 3,292
ChatMaster - 3,000
|
|
ChatMaster - 3,000
Joined: Nov 2011
Posts: 3,292 |
I have used the load lever device and it was a lot easier to pull the motor out and put it back in. mike 
|
|
|
|
|
Joined: Oct 2007
Posts: 558
Oil Can Mechanic
|
|
Oil Can Mechanic
Joined: Oct 2007
Posts: 558 |
I have used both over the years and the land leveler is the thing to use....
Mac
|
|
|
|
|
Joined: Sep 2014
Posts: 2,566 Likes: 14
ChatMaster - 2,000
|
|
ChatMaster - 2,000
Joined: Sep 2014
Posts: 2,566 Likes: 14 |
I used to mess with Mercedes 300 diesels and you absolutely needed the engine leveler to get one out. What's nice about them is you can tip the rear of the motor with the trans down towards the floor as you working the motor out. It will help to clear everything yet allow you to keep positive control of the motor's angle. Once clear, you simply crank on the handle to put it level.
Best way of course is to come straight in from the front with the hoist if possible and if the hoist has extendable legs, extend them as far as you can while still allowing you to maneuver it where you need. The more stability the better especially when using the leveler.
|
|
|
|
|
Joined: May 2012
Posts: 4,374 Likes: 30
ChatMaster - 4,000
|
|
OP
ChatMaster - 4,000
Joined: May 2012
Posts: 4,374 Likes: 30 |
Ok, check me off on my logic here, see if I understand Correctly: The Filling Station O-Ring #FS-4356 replaces Chevrolet #348132 Packing, Universal Joint Ball [GREEN]. This goes in between two Chevrolet #348133 Universal Joint Ball Packing Washer [RED]. Assume that you keep the 2 washers when replacing the packing with the O-Ring, figure THEY would keep the O-Ring in line as well as keep it from getting snagged on the edged Chevrolet #353894 Universal Joint Ball , "Mushroom" [ORANGE] Would the other Cork replace Chevrolet #348259 Universal Joint Ball Collar Oil Seal ?? Where does this go ? based on my color diagram below ?!? Also Assume that the Gasket goes between Chevrolet #348131 Universal Joint Ball Collar [CYAN] and Chevrolet #590406 Retainer w/ Speedo & Universal Joint Ball [MAGENTA] 1929 Chevrolet Trans to ShaftSo I would basically need to remove the four 5/16-18 x 7/8 LG Hex Head Bolts Chevrolet #106325 & Lockwashers Chevrolet #103320 that hold Chevrolet #348131 Universal Joint Ball Collar [CYAN] to Chevrolet #590406 Retainer w/ Speedo & Universal Joint Ball [MAGENTA], slide the Collar [CYAN] back on the Torque Tube [BLUE] and should be good to go to pull Engine & Transmission.
AACA - VCCA - Stovebolt - ChevyTalk
Love the Antique Chevrolet's from 1928-1932
The Beauty, Simplicity, History, and the Stories they Tell
|
|
|
|
|
Joined: Nov 2001
Posts: 29,863
Tech Advisor ChatMaster - 25,000
|
|
Tech Advisor ChatMaster - 25,000
Joined: Nov 2001
Posts: 29,863 |
The Mangy Old Mutt
"If It's Not Junk.....It's Not Treasure!"
|
|
|
|
|
Joined: Dec 2001
Posts: 10,379 Likes: 1
Technical Advisor ChatMaster - 10,000
|
|
Technical Advisor ChatMaster - 10,000
Joined: Dec 2001
Posts: 10,379 Likes: 1 |
If you don't understand that you just don't know your numbers. 
RAY Chevradioman http://www.vccacolumbiariverregion.org/1925 Superior K Roadster 1928 Convertible, Sport, Cabriolet 1933 Eagle, Coupe 1941 Master Deluxe 5-Passenger Coupe 1950 Styleline Deluxe 4-Door Sedan 1950 Styleline Deluxe Convertible 2002 Pontiac, Montana, Passenger Van 2014 Impala, 4-Door Sedan, White Diamond, LTZ 2017 Silverado, Double Cab, Z71, 4X4, White, Standard Bed, LTZ If you need a shoulder to cry on, pull off to the side of the road. Death is the number 1 killer in the world.
|
|
|
|
|
Joined: May 2012
Posts: 4,374 Likes: 30
ChatMaster - 4,000
|
|
OP
ChatMaster - 4,000
Joined: May 2012
Posts: 4,374 Likes: 30 |
Well spent some time prepping to remove the drive train in my 1929. Already removed the Manifold assembly and the Carburetor.
First Removed the hood & Radiator. Then started to remove the surrounds. Removed both side Engine Splash Pans (What a Pain to remove the hardware) Also had to drop & remove the Exhaust to remove the drivers side pan. Also removed front bumper & apron, mainly to gain better access to the front. Also removed Starter & cable. Disconnected wires to generator and temp sensor.
Hoping to get some time to remove the oil pressure line & fuel line. Think that removes all connections to the engine. Need to cut out my blank off plate so i can remove the transmission top cover. then will need to Disconnect speedo cable, unbolt transmission from cross shaft, and then unbolt the rear cover of the u-joint housing.
Final step will be to unbolt the drive train from the frame. cardboard up the firewall for protection. and get ready to pull it out !!
A Lot of work but first time doing this so taking my time and trying to be safe and precarious !!
AACA - VCCA - Stovebolt - ChevyTalk
Love the Antique Chevrolet's from 1928-1932
The Beauty, Simplicity, History, and the Stories they Tell
|
|
|
|
|
Joined: Nov 2002
Posts: 7,472 Likes: 26
ChatMaster - 7,000
|
|
ChatMaster - 7,000
Joined: Nov 2002
Posts: 7,472 Likes: 26 |
On my 32 with mechanical brakes I find it easier and quicker to disconnect the brake rods on the rear (emergency and service) shocks and axle u-bolts and rear wheels and just slide the axle and torque tube back. Also easier (at least for me when working alone) when installing the engine and not having to line up the spline on the driveshaft or disassemble the u-joint.
Steve D
|
|
|
|
|
Joined: May 2012
Posts: 4,374 Likes: 30
ChatMaster - 4,000
|
|
OP
ChatMaster - 4,000
Joined: May 2012
Posts: 4,374 Likes: 30 |
Thought I would share some pictures... all I have to do is remove the distributor and the drivetrain is ready to come out ( I Hope ) 1929 Drivetrain Ready to Come Out Driver1929 Drivetrain Ready to Come Out Passenger
AACA - VCCA - Stovebolt - ChevyTalk
Love the Antique Chevrolet's from 1928-1932
The Beauty, Simplicity, History, and the Stories they Tell
|
|
|
|
|
Joined: May 2012
Posts: 4,374 Likes: 30
ChatMaster - 4,000
|
|
OP
ChatMaster - 4,000
Joined: May 2012
Posts: 4,374 Likes: 30 |
Ok, got it all strapped up and ready to pull... Strapped up 1 Strapped up 2Did an initial lift to see how the engine would raise... adjusted the straps to get the rear to lift first and more level.
AACA - VCCA - Stovebolt - ChevyTalk
Love the Antique Chevrolet's from 1928-1932
The Beauty, Simplicity, History, and the Stories they Tell
|
|
|
|
|
Joined: May 2012
Posts: 4,374 Likes: 30
ChatMaster - 4,000
|
|
OP
ChatMaster - 4,000
Joined: May 2012
Posts: 4,374 Likes: 30 |
Got the Driveline pulled out !! Slow and steady !! Driveline on HoistDriveline on StandSomething is Missing !!Something is Missing !!Now will build the Transmission Support for the stand, and get ready to do some work...
AACA - VCCA - Stovebolt - ChevyTalk
Love the Antique Chevrolet's from 1928-1932
The Beauty, Simplicity, History, and the Stories they Tell
|
|
|
|
|
Joined: Nov 2002
Posts: 7,472 Likes: 26
ChatMaster - 7,000
|
|
ChatMaster - 7,000
Joined: Nov 2002
Posts: 7,472 Likes: 26 |
The stand came out great. Plenty of access and nice and rugged.
Steve D
|
|
|
|
|
Joined: Sep 2014
Posts: 2,566 Likes: 14
ChatMaster - 2,000
|
|
ChatMaster - 2,000
Joined: Sep 2014
Posts: 2,566 Likes: 14 |
Nice Job. Those pictures look familiar. 
|
|
|
|
|
Joined: Oct 2014
Posts: 275
Backyard Mechanic
|
|
Backyard Mechanic
Joined: Oct 2014
Posts: 275 |
Hi Bearsfan,
Well done,
I know you are busy, but could I impose on you to send me pictures of the engine splash plates if and when you have a chance. I have a 29 Phaeton with the splash plates missing.
Regards
Chris
Cape Town
Regards,
Chris
Cape Town
28 Model A RPU, 29 Chevy Phaeton, 67 E Type FHC, 67 250SL Pagoda, 83 911 SC
|
|
|
|
|