|
|
Joined: Mar 2011
Posts: 249
Backyard Mechanic
|
OP

Backyard Mechanic
Joined: Mar 2011
Posts: 249 |
Have owned several 47 chevrolet however have never had to remove an oil pan as yet. Come to find out on 47 that I just purchased that the previous owner had bloched the oil plug drainage hole and had installed a rubber plug.
I have never removed the oil pan before - this is what I have done thus far - drained the oil - took off the flywheel cover and all the bolts holding on the oil pan.
However, is there more that I need to do before removal. I tried to budge the oil pan but it would not move even though the bolts are all removed.
Is there a secret to loosing the oil pan from the engine?
Thank you for your advice.
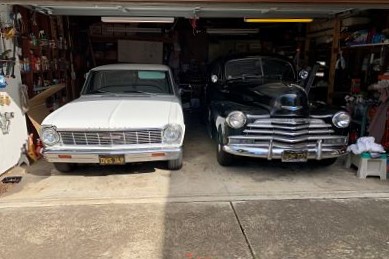
Member # 047137 - 1947 Chevrolet 4 door sport sedan
|
|
|
|
|
Joined: Oct 2007
Posts: 2,306
ChatMaster - 2,000
|
|
ChatMaster - 2,000
Joined: Oct 2007
Posts: 2,306 |
There are no secrets to removing an oil pan. Remember there are 4 bolts and 18 screws to remove. Take a screwdriver and pry between the pan and the block after the bolts and screws are removed. Start in a corner and work your way around. The pans always needs prying off. Always use the largest head screwdriver that fits in the groove of the head.
Use paper towels to clean out the buildup of gelled oil, etc.
When you get about 80% of it clean then use some old gas to begin rinsing the pan out. When it is as clean as you can get it then hook a garden hose up to the inlet for all the nozzles. Turn on your hose a little and a steady stream of water should flow from each nozzle. At this point you should make sure the aim of each nozzle is okay. This is done with a special tool. If you need more info let me know and I will provide it, some pictures, and information from previous posts.
Good luck, Mike
Mike 41 Chevy
|
|
|
|
|
Joined: Jan 2002
Posts: 30,701 Likes: 141
ChatMaster - 25,000
|
|
ChatMaster - 25,000
Joined: Jan 2002
Posts: 30,701 Likes: 141 |
The last personn that removed the pan used some kind of gasket dope and now its glued on.
One end od the tie rod will need to be removed also.
Gene Schneider
|
|
|
|
|
Joined: Mar 2011
Posts: 249
Backyard Mechanic
|
|
OP
Backyard Mechanic
Joined: Mar 2011
Posts: 249 |
Apart from the body and the interior I am running into all kinds of surprises.
!) Working to get the car running smoothly
2) Oil Plug problem
Is there any special tool needed to remove the tie rod of?
Member # 047137 - 1947 Chevrolet 4 door sport sedan
|
|
|
|
|
Joined: Nov 2001
Posts: 19,758 Likes: 64
ChatMaster - 15,000
|
|
ChatMaster - 15,000
Joined: Nov 2001
Posts: 19,758 Likes: 64 |
You may need to use a "pickle fork" or large screwdriver or metal chisel to wedge the stud from the socket in the rod.
How Sweet the roar of a Chevy four!
|
|
|
|
|
Joined: Apr 2005
Posts: 1,411 Likes: 7
ChatMaster - 1,000
|
|
ChatMaster - 1,000
Joined: Apr 2005
Posts: 1,411 Likes: 7 |
It may save you some nasty cuts to wear gloves and work slowly cleaning around the sheet metal nozzles. Don't ask how I know.
|
|
|
|
|
Joined: Mar 2011
Posts: 249
Backyard Mechanic
|
|
OP
Backyard Mechanic
Joined: Mar 2011
Posts: 249 |
I've got the 18 screws and the 4 screws from the flywheel cover.
Where do the 4 bolts come in?
Member # 047137 - 1947 Chevrolet 4 door sport sedan
|
|
|
|
|
Joined: Jan 2002
Posts: 30,701 Likes: 141
ChatMaster - 25,000
|
|
ChatMaster - 25,000
Joined: Jan 2002
Posts: 30,701 Likes: 141 |
Gene Schneider
|
|
|
|
|
Joined: Oct 2007
Posts: 2,306
ChatMaster - 2,000
|
|
ChatMaster - 2,000
Joined: Oct 2007
Posts: 2,306 |
If you want to replace your oil pan let me know. I have a nice one all cleaned up, and also have the tools to set the correct direction of the nozzles. If as Gene indicates the pan has sealant on its gasket I would recommend using a stiff putty knife to separate it from the block. You may have to lightly tap the end of the putty knife with a hammer to wedge it between the pan and block. The good news is that the above post topic will give you a lot of info on installing a new oil pan gasket. It is always interesting what you might find in your oil pan when you take it off. The first thing you will notice is the condition of the screen on your oil pump. It could be very plugged up. The next thing you might find is a lock nut off of one of your connecting rod nuts, or even the presence of a heavy gas odor, not a good sign. You can also run a magnet through the mess and see if you accumulate a bunch of metal shavings, another thing to worry about. I am sure others have been surprised to find other things. P.S. Just want to thank all the folks from the VCCA for giving me a life time membership for my 1000 post.  Best wishes, Mike
Mike 41 Chevy
|
|
|
|
|
Joined: Oct 2007
Posts: 2,306
ChatMaster - 2,000
|
|
ChatMaster - 2,000
Joined: Oct 2007
Posts: 2,306 |
Ouch!!!  ![[Linked Image from i1321.photobucket.com]](http://i1321.photobucket.com/albums/u560/41chevymike/IMG_0425_zps280461ee.jpg)
Mike 41 Chevy
|
|
|
|
|
Joined: Mar 2011
Posts: 249
Backyard Mechanic
|
|
OP
Backyard Mechanic
Joined: Mar 2011
Posts: 249 |
Thanks Mike - Nice to be of service to you - VCCA and its members have certainly helped me.
Member # 047137 - 1947 Chevrolet 4 door sport sedan
|
|
|
|
|
Joined: Mar 2011
Posts: 249
Backyard Mechanic
|
|
OP
Backyard Mechanic
Joined: Mar 2011
Posts: 249 |
Mike I think I just sent you a PM
Member # 047137 - 1947 Chevrolet 4 door sport sedan
|
|
|
|
|
Joined: Mar 2011
Posts: 249
Backyard Mechanic
|
|
OP
Backyard Mechanic
Joined: Mar 2011
Posts: 249 |
Mike-send me a PM with the price of the pan that you have just in case my fix does not work out.
Thanks!
Member # 047137 - 1947 Chevrolet 4 door sport sedan
|
|
|
|
|
Joined: Oct 2007
Posts: 2,306
ChatMaster - 2,000
|
|
ChatMaster - 2,000
Joined: Oct 2007
Posts: 2,306 |
rangerart71,
I sent you a P.M.
Thanks, Mike
Mike 41 Chevy
|
|
|
|
|
Joined: Jan 2002
Posts: 1,069 Likes: 9
ChatMaster - 1,000
|
|
ChatMaster - 1,000
Joined: Jan 2002
Posts: 1,069 Likes: 9 |
1946 Chevy 3100 1/2 Ton Pickup Purchased 11/18/17 Sold 9/20
1948 Chevy Fleetmaster Coupe, Purchased 6/20/2010
1965 Chevy ll 350 Purchased Feb 2021. 3-speed Saginaw Hurst Floor Shifter 3.08 Rear End
2019 Ford Ranger Lariat Super Crew
|
|
|
|
|
Joined: Mar 2011
Posts: 249
Backyard Mechanic
|
|
OP
Backyard Mechanic
Joined: Mar 2011
Posts: 249 |
Well - the oil pan has been fixed. Now I am going to clean off the engine gasket material that was left when I took the pan off. And then - work to install the new gaskets as recommended above. Any added input to doing this right would be helpful. I did take the tie rod down. The screen looked clean on the engine - took it off and cleaned it up a bit more.
Hopefully the install will happen without incident. I really don't know what to expect in that this process is all new water to me. Thanks for all the help.
One question - the gasket side gaskets I seem to have read go on the engine side and not on the pan side to start the process?
Member # 047137 - 1947 Chevrolet 4 door sport sedan
|
|
|
|
|
Joined: Oct 2007
Posts: 2,306
ChatMaster - 2,000
|
|
ChatMaster - 2,000
Joined: Oct 2007
Posts: 2,306 |
One question - the gasket side gaskets I seem to have read go on the engine side and not on the pan side to start the process? Please carefully read the third post topic at the top of the 1946-48 Forum and tell us the answer to your question. Good luck, Mike
Mike 41 Chevy
|
|
|
|
|
Joined: Mar 2011
Posts: 249
Backyard Mechanic
|
|
OP
Backyard Mechanic
Joined: Mar 2011
Posts: 249 |
Thanks Mike - I have read that posting over and over. Think I am prepared for the Oil Pan wars.
Member # 047137 - 1947 Chevrolet 4 door sport sedan
|
|
|
|
|
Joined: Mar 2011
Posts: 249
Backyard Mechanic
|
|
OP
Backyard Mechanic
Joined: Mar 2011
Posts: 249 |
That was fun - putting on the oil pan gasket. All went well and to this point - two hours later - there are no leaks showing. Thanks for all the help with this project.
Member # 047137 - 1947 Chevrolet 4 door sport sedan
|
|
|
|
|


![[Linked Image from i1321.photobucket.com]](http://s1321.photobucket.com/user/41chevymike/media/IMG_0425_zps280461ee.jpg.html)