|
|
Joined: Mar 2013
Posts: 12
Grease Monkey
|
OP

Grease Monkey
Joined: Mar 2013
Posts: 12 |
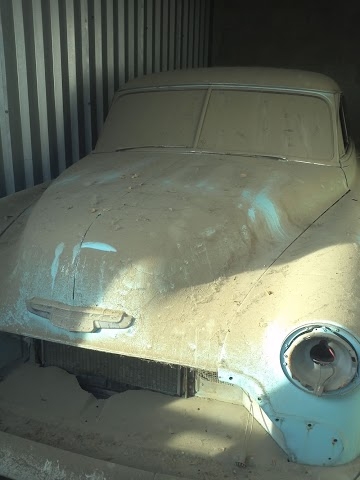
I'm in the process of replacing the master cylinder on my 1949 sedan and I was just checking to see if the members had a preferred method for removing the old one. After my preliminary inspection it looks like it might be easier to cut an access panel in the floor board and go in from the top rather than attempt to remove it from underneath. If you prefer coming from underneath, maybe you have a few suggestions as to make the job a little easier. Thanks for any help.
Last edited by Sandwichery; 08/03/13 11:19 AM.
When it stops being fun, I don't want to do it anymore.
1942 Pickup
1949 Deluxe Sedan
1990 Lumina Coupe
|
|
|
|
|
Joined: Nov 2001
Posts: 29,863
Tech Advisor ChatMaster - 25,000
|
|
Tech Advisor ChatMaster - 25,000
Joined: Nov 2001
Posts: 29,863 |
The Mangy Old Mutt
"If It's Not Junk.....It's Not Treasure!"
|
|
|
|
|
Joined: Apr 2008
Posts: 1,194
ChatMaster - 1,000
|
|
ChatMaster - 1,000
Joined: Apr 2008
Posts: 1,194 |
I would start off by taking the splash shield off that is under the toe board on the drivers side and go to a car wash and spray things underneath. Then maybe start soaking the bolts and brake line nuts with some good penetrating oil.
|
|
|
|
|
Joined: Nov 2002
Posts: 7,472 Likes: 26
ChatMaster - 7,000
|
|
ChatMaster - 7,000
Joined: Nov 2002
Posts: 7,472 Likes: 26 |
I think having the car on a lift would be a big help. Because I don't have a lift when mine needed to be removed I farmed it out to a brake shop. I try to do most of my own work but this looked like more aggravation than it was worth.
Steve D
|
|
|
|
|
Joined: Dec 2009
Posts: 1,072
ChatMaster - 1,000
|
|
ChatMaster - 1,000
Joined: Dec 2009
Posts: 1,072 |
wow dont cut anything it might seem like its a lot of work but its not just take your time soak the bolts take the pedals off the small insert that holds the pedals in might be a pain but like said spray that area with wd-40 and take something like a paper clip and fish it out thats my 2 cents worth
|
|
|
|
|
Joined: Oct 2010
Posts: 1,005 Likes: 5
ChatMaster - 1,000
|
|
ChatMaster - 1,000
Joined: Oct 2010
Posts: 1,005 Likes: 5 |
I just went thru this on my 1950. A tip that was given to me was to take apart the clutch pedal arm first. There is one bolt that you remove. The clutch pedal stays in the toe kick and the remaining arm that pivots in the master cylinder will come out after you remove the shaft lock pin. Remove the plug bolt on the front on the mc. Put a piece of wire (I used about 6" of coat hanger wire) into the center hole and try to pull the pin out. When you get the pin out, remove the clutch pivot arm and that will give to a few more inches of room. I also removed the emergency brake rod at the front connection and moved that out of the way. Remove the brake pivot shaft from the master cylinder. It will not move very far away - just get it out of the mc. At this point I removed the brake lines and then I removed the bolts. DO NOT cut the toe kick. Good Luck.
|
|
|
|
|
Joined: Sep 2009
Posts: 6,689 Likes: 21
ChatMaster - 6,000
|
|
ChatMaster - 6,000
Joined: Sep 2009
Posts: 6,689 Likes: 21 |
Also, be sure to use a good line wrench. Else you may strip the edges off the fitting. Charlie 
|
|
|
|
|
Joined: Sep 2013
Posts: 17
Grease Monkey
|
|
Grease Monkey
Joined: Sep 2013
Posts: 17 |
I did this a not very long ago on my 52 hardtop and all I can say is, we two had a lot of fun together. I would discourage you from cutting into the car, it can be done without that... promise.
The hardest part (aside from me being special and having a bent bolt!) was getting the lines off WITHOUT twisting them. I used a whole lot of penetrating oil and just working them back and forth. It was really slow going.
Deep into restoring my grandfathers 1952 Chevy Hardtop.
'Don't do that, set the bar that low and it's pretty easy to step over' - ME
|
|
|
|
|
Joined: Nov 2012
Posts: 604
Oil Can Mechanic
|
|
Oil Can Mechanic
Joined: Nov 2012
Posts: 604 |
'Wish someone would invent an economical, practical way to prevent these ol' master cylinders from having to be vented to atmosphere. Air contains moisture. That is why they don't last very long. Moisture is the enemy! Being under the floor only makes if worse (and harder to get at).
We must love these ol' Chevys! Otherwise, why?????
|
|
|
|
|
Joined: Jan 2008
Posts: 828 Likes: 6
ChatMaster - 750
|
|
ChatMaster - 750
Joined: Jan 2008
Posts: 828 Likes: 6 |
If you change the fluid every few years the wheel cylinders and master cylinder will last longer. Be sure and use brake fluid from a sealed container.
Dens Chevys 1927 Speedster 1928 coupe 1941street rod 1947Fleetline 4 door 1949 1/2 ton Pickup (sold) 1954 210 4 door 1972 Monte Carlo 2003 Corvette convt..
|
|
|
|
|
Joined: Nov 2012
Posts: 604
Oil Can Mechanic
|
|
Oil Can Mechanic
Joined: Nov 2012
Posts: 604 |
Yep, brake fluid loves moisture. Moisture caused most of the problems. The newer "sealed" systems with the diaphram type gaskets last much, much longer - year longer.
Also, anytime I bleed brakes, I try to move the pedal only an inch or so. Takes much longer but it prevents the M cyl seals from moving into the portion of the bore that may well damage the seals (rust and crud in the M cyl bore).
|
|
|
|
|
Joined: Jul 2004
Posts: 21
Grease Monkey
|
|
Grease Monkey
Joined: Jul 2004
Posts: 21 |
All I Can say is good luck and patience is the answer?
I just went thru taking the master cylinder out of my 53. It is not easy ,but it can be done.PB Blaster helps loosen the rust.
mac085
|
|
|
|
|