|
|
Joined: Feb 2010
Posts: 549
Oil Can Mechanic
|
OP

Oil Can Mechanic
Joined: Feb 2010
Posts: 549 |
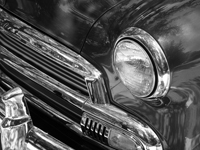
Ok I'm a tad bit lost on the installation of this ebay bought radio and repop mounting brackets. I see where they would mount on the side of the radio? then what? where does the threaded end go??? perhaps they are not the right brackets? see before and after rehab too. what a mess! ![[Linked Image from i1027.photobucket.com]](http://i1027.photobucket.com/albums/y336/nonidrinkers/radio001.jpg) ![[Linked Image from i1027.photobucket.com]](http://i1027.photobucket.com/albums/y336/nonidrinkers/radio015.jpg) [IMG] http://i1027.photobucket.com/albums/y336/nonidrinkers/radio015.![[Linked Image from i1027.photobucket.com]](http://i1027.photobucket.com/albums/y336/nonidrinkers/radiobrackets.jpg) jpg[/IMG] ![[Linked Image from i1027.photobucket.com]](http://i1027.photobucket.com/albums/y336/nonidrinkers/radio021.jpg) ![[Linked Image from i1027.photobucket.com]](http://i1027.photobucket.com/albums/y336/nonidrinkers/radio009.jpg) ![[Linked Image from i1027.photobucket.com]](http://i1027.photobucket.com/albums/y336/nonidrinkers/radio008.jpg) also does the above threaded 5/8ths tall "spacer nut" go behind the dash? Then the cover plate on the outside of the dash towards the seat and then the washer and then the thinner "nut" then the knobs? If so the radio seems a bit inset to far?? any help? (PS: yes I refinihed the plate and nuts too. FYI) thanks
"Frame Off" restoration, its a journey not a destination
|
|
|
|
|
Joined: Dec 2009
Posts: 1,072
ChatMaster - 1,000
|
|
ChatMaster - 1,000
Joined: Dec 2009
Posts: 1,072 |
on my 50 that bracket you have goes behind the driver side fender on the panel that seperates the firewall from the fender it is used to support the radio antennae there should be two of those i think the threaded stem that is on the radio bolts to a small bracket that should be behind the lower part of the dash where the radio sits you need that part to support the weight of the radio hope this helped you out andy
|
|
|
|
|
Joined: Dec 2009
Posts: 1,072
ChatMaster - 1,000
|
|
ChatMaster - 1,000
Joined: Dec 2009
Posts: 1,072 |
my mistake on the threaded part i thought iwas looking at the side of the radio is it the volume or tuner either one it is the radio comes thru the dash and the the washer and nut draw the radio tight against the dash maybe someone else will give you some more info andy
|
|
|
|
|
Joined: Feb 2010
Posts: 549
Oil Can Mechanic
|
|
OP
Oil Can Mechanic
Joined: Feb 2010
Posts: 549 |
thanks Andy,
It did dawn on me last night that those brackets pictured did come with the antena (years ago)? It seems to me I bought radio brackets on e-bay as well (years ago), that were flat, I'll look.
"Frame Off" restoration, its a journey not a destination
|
|
|
|
|
Joined: Feb 2010
Posts: 549
Oil Can Mechanic
|
|
OP
Oil Can Mechanic
Joined: Feb 2010
Posts: 549 |
no brackets found in my inventory. anyone got a picture of one? or a pair for sale?
I will make them if I have to. My guess is they would mount to the top of the dash where the chrome grill bolts go?
"Frame Off" restoration, its a journey not a destination
|
|
|
|
|
Joined: Dec 2009
Posts: 1,072
ChatMaster - 1,000
|
|
ChatMaster - 1,000
Joined: Dec 2009
Posts: 1,072 |
you are right on the brackets going towards the top your is is a little different tan mine 50 radio is a 2 part deal the threaded part holds the lower part of unit then 1 or 2 L shaped brackets (1 side being slotted)should secure the top portion of the radio
|
|
|
|
|
Joined: Dec 2001
Posts: 10,379 Likes: 1
Technical Advisor ChatMaster - 10,000
|
|
Technical Advisor ChatMaster - 10,000
Joined: Dec 2001
Posts: 10,379 Likes: 1 |
There are two "V" shaped brackets that go on each end of the radio that are attached to the studs on each end. You may have trouble installing the radio with the truck rubber gasket you have installed. It is shaped wrong and is too thick and hard. The first thing that goes on the two shafts is the very thin washer. Next is the tall nuts. The radio is installed from the rear and the face plate is installed, another very thin washer and then the thin nut. You did not mention electrical connections. If you don't have the dual electrical pad where the radio connects, I have them. Send me a PM if you need them.  
RAY Chevradioman http://www.vccacolumbiariverregion.org/1925 Superior K Roadster 1928 Convertible, Sport, Cabriolet 1933 Eagle, Coupe 1941 Master Deluxe 5-Passenger Coupe 1950 Styleline Deluxe 4-Door Sedan 1950 Styleline Deluxe Convertible 2002 Pontiac, Montana, Passenger Van 2014 Impala, 4-Door Sedan, White Diamond, LTZ 2017 Silverado, Double Cab, Z71, 4X4, White, Standard Bed, LTZ If you need a shoulder to cry on, pull off to the side of the road. Death is the number 1 killer in the world.
|
|
|
|
|
Joined: Oct 2007
Posts: 211
Backyard Mechanic
|
|
Backyard Mechanic
Joined: Oct 2007
Posts: 211 |
Your dash looks great! What color Gray did you paint it?
1951 Chevrolet Fleetline Deluxe
1972 Chevrolet Chevelle Malibu Convertible
|
|
|
|
|
Joined: Feb 2010
Posts: 549
Oil Can Mechanic
|
|
OP
Oil Can Mechanic
Joined: Feb 2010
Posts: 549 |
thanks,
the truck radio pad was all i could find and make work?
do you have the "V" brackets and where does the "non radio" part of the "V" attach to the dash?
also not sure what you are talking about on your last sentence about the radio pads?
thanks
"Frame Off" restoration, its a journey not a destination
|
|
|
|
|
Joined: Feb 2010
Posts: 549
Oil Can Mechanic
|
|
OP
Oil Can Mechanic
Joined: Feb 2010
Posts: 549 |
The "gray" is 446 shadow gray and the lighter color is 444 thistle gray for cars before March 24th 1951. Since my car was born in April the Shadow Gray 30872 was revised to a new shade of shadow gray 30889 or 459 Ditzler Codes
Or it may look "great" because I painted it 20 times? till I was satisfied with the outcome.
"Frame Off" restoration, its a journey not a destination
|
|
|
|
|
Joined: Jan 2002
Posts: 30,701 Likes: 141
ChatMaster - 25,000
|
|
ChatMaster - 25,000
Joined: Jan 2002
Posts: 30,701 Likes: 141 |
Shadow and Thistle gray were not the colors used on the 1951 Deluxe dash. The colors were merely refered to as light gray #202-55619 and dark gray # 202-32547. They are simular to the exterior colors and not the same + the dark gray did not change during the production year as the exterior color did.
Gene Schneider
|
|
|
|
|
Joined: Jan 2002
Posts: 30,701 Likes: 141
ChatMaster - 25,000
|
|
ChatMaster - 25,000
Joined: Jan 2002
Posts: 30,701 Likes: 141 |
An accessory installation manual for 1951 is available from the Filling Station for only $8.00. Will show the brackets, etc.
Gene Schneider
|
|
|
|
|
Joined: Jan 2008
Posts: 366 Likes: 1
Backyard Mechanic
|
|
Backyard Mechanic
Joined: Jan 2008
Posts: 366 Likes: 1 |
Dean 50 - VCCA #44675
|
|
|
|
|
Joined: Dec 2001
Posts: 10,379 Likes: 1
Technical Advisor ChatMaster - 10,000
|
|
Technical Advisor ChatMaster - 10,000
Joined: Dec 2001
Posts: 10,379 Likes: 1 |
After you get to that site, select radio Model 986517. Go to figure 16. This shows the electrical splitter pan in the upper left. Following pages show the "V" shaped braces that go on each side of the radio. If interested in the electrical pad, send me a PM.
RAY Chevradioman http://www.vccacolumbiariverregion.org/1925 Superior K Roadster 1928 Convertible, Sport, Cabriolet 1933 Eagle, Coupe 1941 Master Deluxe 5-Passenger Coupe 1950 Styleline Deluxe 4-Door Sedan 1950 Styleline Deluxe Convertible 2002 Pontiac, Montana, Passenger Van 2014 Impala, 4-Door Sedan, White Diamond, LTZ 2017 Silverado, Double Cab, Z71, 4X4, White, Standard Bed, LTZ If you need a shoulder to cry on, pull off to the side of the road. Death is the number 1 killer in the world.
|
|
|
|
|