|
|
|
DAC
Unregistered
|
|
DAC
Unregistered
|
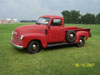
Can anyone advise me as the color of the following engine components for my 1951 PU: 216 CID engine. Here is what I believe to be true with a few questions.
1) Starter-Black (gloss, satin or flat?)
2) Generator - Black (gloss, satin or flat?)
3) Horn- flat black
4) Fan blade- flat black
5) Water pump - gray or black?
6) Harmonic balancer - gray or natural metal
7) Timing cover - gray
8) Oil discharge tube- gray or black?
9) Air cleaner/oil bath type - black (gloss/satin/flat)
Thank you very much
D@C
|
|
|
|
|
Joined: Dec 2006
Posts: 837
ChatMaster - 750
|

ChatMaster - 750
Joined: Dec 2006
Posts: 837 |
1.underhood satin black
2.underhood satin black
3.underhood satin black
4.underhood satin black
5.gray (painted with engine assembly)
6.gray (painted with engine assembly)
7.gray (painted with engine assembly)
8.underhood satin black
9.underhood satin black
Denny Graham
Sandwich, IL
|
|
|
|
|
Joined: Jun 2006
Posts: 104
Shade Tree Mechanic
|
|
Shade Tree Mechanic
Joined: Jun 2006
Posts: 104 |
1,2,3,4,8 and 9 satin to semi gloss
5,6 and 7 will be gray
51 [3100] Deluxe 5 window
Four generations and still not for sale
David
|
|
|
|
|
|
DAC
Unregistered
|
|
DAC
Unregistered
|
Dennis
Thank you so very much, you always know whats going on.
Does the paint need to be "high temp". enamel?
D@C
|
|
|
|
|
|
DAC
Unregistered
|
|
DAC
Unregistered
|
Thank you drb51truck
Do you have a pic of your engine color scheme?
The information was helpful.
Im pulling the harmonic balancer off today with a puller
is it just pressed back on? There are no bolts or screw
that I can see?
D@C
|
|
|
|
|
Joined: Jun 2006
Posts: 104
Shade Tree Mechanic
|
|
Shade Tree Mechanic
Joined: Jun 2006
Posts: 104 |
If you do not need to pull off the pulling I would leave it on or at least press back on before painting. The engine was assembled first then painted. Every thing that would be gray was on the engine. Bolts and even the gasket edges.
Have to look see what pictures I have. Im not very good at posting pictures.
DG is a very good source of information and others on this site. Now that I have my truck done I hope to be on the site more often.
Last edited by drb51truck; 11/28/10 01:02 PM.
51 [3100] Deluxe 5 window
Four generations and still not for sale
David
|
|
|
|
|
Joined: Apr 2002
Posts: 3,008 Likes: 1
ChatMaster - 3,000
|
|
ChatMaster - 3,000
Joined: Apr 2002
Posts: 3,008 Likes: 1 |
For the Satin Black our son put me onto Dupli-Color Acrylic Enamel. It tooks and work well and looks good. He tells me it holds up well also. It hasn't been very long since I used it so I don't have a life test to report. I'm just trusting our son. He has been around this hobby all his life.
See you Touring the Back Roads
Joined VCCA June 1, 1961
|
|
|
|
|
|
DAC
Unregistered
|
|
DAC
Unregistered
|
Ok, great, Im assuming that is the rattle can paint and not the pint/quart/gallon mixed. right..
Is this a satin finish?
Thank your for your recommendation..
D@C
|
|
|
|
|
|
DAC
Unregistered
|
|
DAC
Unregistered
|
Dennis
If you were me would you pull the harmonic balance off,
to inspect,clean and paint, also the timing cover, which will need a new seal to paint and inspect.
It does have a any bolts or screws, just pressed on. HOW DOES IT GOT BACK ????? help!!!
Ive got the radiator out and everything is clear to do it.
What say you, I hold your advise in high regard.
I can send you a pic if you think that will help?
Pls advise.
D@C
|
|
|
|
|
Joined: Dec 2006
Posts: 837
ChatMaster - 750
|
|
ChatMaster - 750
Joined: Dec 2006
Posts: 837 |
This one will get you to my gallerys, select the one you want to look at: http://www.pbase.com/dennygraham/1950_3604_chevy_truck This is the ”˜underhood’ gallery and should have a bunch of pics that should answer you question about the paint scheme. I’ve tried to stay as true to correct as is practicle. “A picture is worth a thousand words”: http://www.pbase.com/dennygraham/under_hood&page=1 The only place that you have to worry about a high temp paint is the exhaust manifold. Just think about it, your cooling system keeps the engine between 160°-180° depending on what thermostat you’re using. I bake (when my big old wife isn’t around) my small painted parts in the oven at around 200° . I’ve used Rustolium Satin Black for the underhood black and it looks very close to the original black. East wood sells several satin black underhood paints. I’ve been using their Extreme Chassis Black in the Satin Finish lately, it seems to dry harder than the Rustolium and think the appearance is about the same. Do something like your horn to see if you like it. Should you pull the balancer and timing cover???? Well that’s up to you. I’d bet the seal hasn’t been replaced since it was new and that it’s leaking pretty badly. Since you have the front offen’er then it would be a good time to do it. Just keep in mind that you may be in for more than you anticipated. You will need a substantial puller. One of the few usable tools that Harbor Freight sell are their puller sets. Compared to the US made pullers they are a bargain. Even with a good puller the balancer may be on so tight that you strip the 3/8”NC threads in the hub. You might include in your plan the possibility of the holes being re-tapped to 7/16”NC before you can get it off. If you have to do that, stay with a course thread because it offers more area to pull against. CAUTION: What ever you do don’t try pulling on the outside balancer ring, it is suspended in rubber and you will ruin the balancer if you do that. The oil pan will have to be dropped to get at the lower two timing cover bolts inserted from the inside. There should be a washer plate with locking tabs bent over to secure the bolts. Here are some pics of the process you’re in for: http://www.pbase.com/dennygraham/engine_54 Denny Graham Sandwich, IL
Last edited by Denny Graham; 11/29/10 09:03 AM.
|
|
|
|
|
|
DAC
Unregistered
|
|
DAC
Unregistered
|
Dennis
Incredibly helpful. Digesting it all. The pic are very very helpful.
We do have a harbor freight store in Phx that I get to from time to time. So I will pick up a puller like in the photo.
Darn I painted the oil pan and put it in place.
Note that I have the 216 engine, so do I still have the two bolts near the main bearing like the 235 photo that needs to be removed??
Its also going to be a chore for me to re-thread from 3/8 course to 5/8 course. The grill is still on at this point.
Also, how does the blancer go back on? hammered, pressed?
I know I must replace the seal as you show.
BTW Ive written you prior but have lost your direct email, if you would be so kind to provide it.
If I were still living in Bloomington Normal, I would certain come up to see the you and the 50.
David
|
|
|
|
|
Joined: Dec 2006
Posts: 837
ChatMaster - 750
|
|
ChatMaster - 750
Joined: Dec 2006
Posts: 837 |
Yes Dave, the 216 will be bolted thru the back also. I common modification that some of the guys perform is to tap the holes in the front main cap and open up the two lower holes in the timing cover. This way all of the fasteners can be accessed from the outside of the engine. Not original but after you’ve changed a few you can understand why they made the mod. Another way to look at it is, if the front crankshaft seal is leaking chances are the pan gaskets at the front and rear are dried out also and are leaking. So your killing two birds with one stone so to speak when you need to replace the lip seal.
Harbor Freight, what can I say! 90% of the stuff from HF is pure crap. The pullers and the jack stands are about the only tools that I’ve bought from them that wasn’t screwed up/unfinished/had to be fixed before you could use them or flat out didn’t do the job the way they were supposed to. Watch out what you buy from them.
7/16”-14 NOT 5/8”! The tap drill for a 7/16-14 thread is a U or .368”. The tapped holes in the hub are 3/8-16 so that’s only .007” larger than the 7/16-14 tap drill which is a U or .368”. You may get lucky and the balancer might just pop off, so re-tapping is only necessary if you damage the existing threads in the hub by pulling them out.
GM instructions for replacing the balancer to use the puller center bolt to drive it back on till it bottoms on the crank flange. Also when installing the timing cover it has to be held concentric to the crankshaft and balancer sealing surface or the seal will leak. Chevrolet had a centering sleeve used for this purpose; some guys use the balancer hub for this. I have an aluminum sleeve that slides over the crank nose and centers the seal while I tighten down the cover. This sleeve also is used for drill bushings so I can drill the end of the crank for a bolt. I like to use the bolt to pull the damper on rather than drive it on with a hammer.
I don’t hide my name and the same goes for my email address, it’s in my profile, just left click my name.
My “big old wife” just got back from Phoenix, went out to eat turkey with her in-laws. To dang hot for me out there, I think people live longer in the cold climates because meat lasts longer when kept cold.
Take care, and good luck if you tackle that level of maintenance.
Denny Graham
Sandwich, IL
|
|
|
|
|