|
|
Joined: Apr 2009
Posts: 1,966
ChatMaster - 1,500
|
OP

ChatMaster - 1,500
Joined: Apr 2009
Posts: 1,966 |
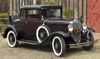
I see the Filling Station now has the Fischer body aluminum roof molding matching the original, in 8' straight lengths. Has any one installed this on their car, and is there a secret to bending it around the tight radius at the back corners of the roof? Can I assume that if one gradually nails it in small increments going around the corner, that the aluminum will be flexible enough to follow the curve like the original moldings?
Secondly, I have the vinyl trim now (and may use it instead), including the black vinyl hide-em strip for the front edge over the windshield. Some photos of cars show this trim finished with a chrome end piece screwed to the sheet metal just above the top hinge. Is this chrome "ferule" available at FS?
|
|
|
|
|
Joined: Apr 2010
Posts: 734 Likes: 14
Oil Can Mechanic
|
|
Oil Can Mechanic
Joined: Apr 2010
Posts: 734 Likes: 14 |
Hello Gunsmoke,
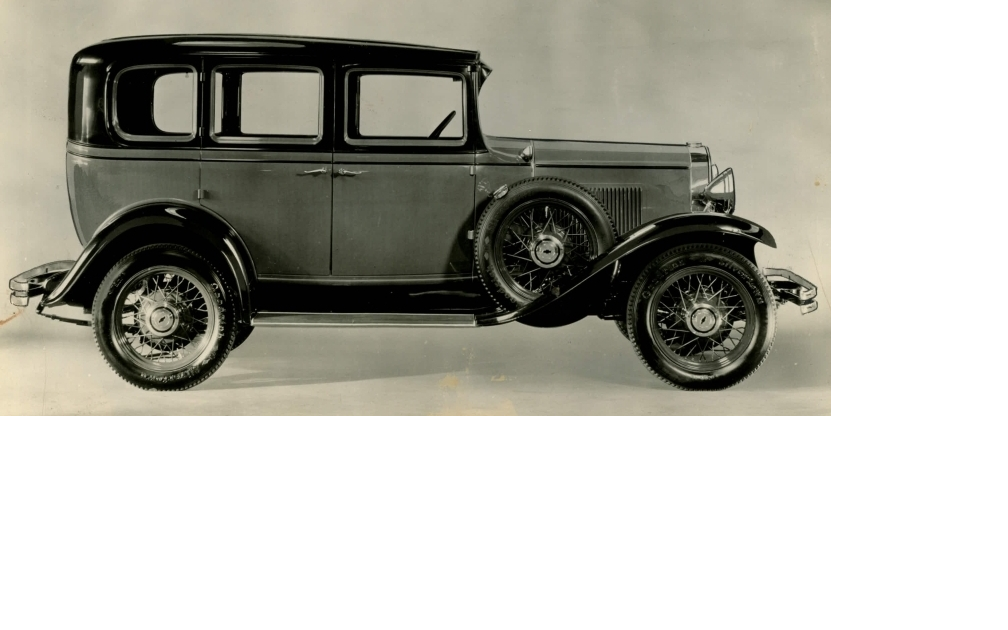
I too have the 1931 Coach and am in need of re-topping the roof. The old deteriorated material has not been taken off yet. The trim/molding along the material edge was painted long ago before it became mine. Some paint has peeled, revealing bright metal, assuming aluminum. I'll be watching to read what the experts advise you of, so I will know also. What is the Filling Station Part Number of the trim? Not knowing the proper terms/names of parts can make the search difficult sometimes. Thanks
|
|
|
|
|
Joined: Apr 2009
Posts: 1,966
ChatMaster - 1,500
|
|
OP
ChatMaster - 1,500
Joined: Apr 2009
Posts: 1,966 |
The item is RW-465, and is called Roof Molding. It looks very much like the original I removed from my car, and in my experience you cannot reuse it because it gets very bent up in trying to pry off as it usually has tons of nails through it, and the top half has to be pryed up to access the nails. I bought the FS "Roof Kit" which includes the vinyl fabric, back-up padding, a fold-over wired vinyl trim and a similar piece to go across the front edge. Not exactly like original, but for a survivor/driver, should look great. As for the aluminum original, I am not sure if it was left natural aluminum or painted. Mine was painted black, but perhaps by a subsequent owner..
|
|
|
|
|
Joined: Nov 2001
Posts: 29,863
Tech Advisor ChatMaster - 25,000
|
|
Tech Advisor ChatMaster - 25,000
Joined: Nov 2001
Posts: 29,863 |
The Mangy Old Mutt
"If It's Not Junk.....It's Not Treasure!"
|
|
|
|
|
Joined: Nov 2001
Posts: 19,758 Likes: 64
ChatMaster - 15,000
|
|
ChatMaster - 15,000
Joined: Nov 2001
Posts: 19,758 Likes: 64 |
The roof trim can be successfully bent using a wood form. We made ours from a piece of plywood that had the radius cut in. Because of a little spring back we cut more that just the 90 deg of the bend. It is critical for the form to be installed on a flat surface and have the provision to hold the trim down flat to the surface. As you bend the trim it will try to lift and rotate. If you are careful and go slow you can relatively easily counteract that and make a smooth flat bend. If I remember correctly we bent with the fold over part facing outside. Once bent it can be nailed down, top part tapped down and painted black.
How Sweet the roar of a Chevy four!
|
|
|
|
|
Joined: Apr 2009
Posts: 1,966
ChatMaster - 1,500
|
|
OP
ChatMaster - 1,500
Joined: Apr 2009
Posts: 1,966 |
Thanks Chipper, I may order some and give it a go. Always like a little challenge.
|
|
|
|
|
Joined: Mar 2004
Posts: 1,290
ChatMaster - 1,000
|
|
ChatMaster - 1,000
Joined: Mar 2004
Posts: 1,290 |
When I did my 31 coupe, I removed the molding carefully trying not to break it. I used a small pry bar and it came up pretty easy. I bought new molding from a place near me that does not sell it any longer. The new material is very rigid compared to the old stuff. I thought that the molding was aluminum color when on the car. When I found out that it was painted black I decided to try to use the old molding. I did not try to open the old molding, I clipped the nails from the bottom and then took my grinder to what was left. I then flattened the molding and started to drill and countersink holes from the top. I used small countersunk wood screws about one inch long. I put down a bed of caulking and then started with the front piece screwing it down. Then went to the side pieces and did the same. Once it was down I cleaned up any excess caulk. Then I used masking tape (blue) and masked both sides of the molding. Using an epoxy filler I went along and filled all the screw holes. After it set up it was sanded down and painted black. If you want to see pictures of it send me a PM with your email address and I will send you some pictures. Good luck with your projects.
Sal Orlando
Chat Group Region Member
|
|
|
|
|
Joined: Nov 2008
Posts: 227
Backyard Mechanic
|
|
Backyard Mechanic
Joined: Nov 2008
Posts: 227 |
When I tried to order item number RW-465 from FS it came back as "currently unavailable". I didn't call, so not sure when, or if, it will become available.
---------------------------------------------------------
Thanks much,
Ralph
"Roll Tide"
|
|
|
|
|
Joined: Nov 2001
Posts: 74 Likes: 1
Shade Tree Mechanic
|
|
Shade Tree Mechanic
Joined: Nov 2001
Posts: 74 Likes: 1 |
Steve from The Filling Station here. I'm sorry but our supplier discontinued making the roof trim awhile ago. We have no other source for this item. If we get enough call for the trim we may decide to have it made again. If you call or email us we will put you on our "Wish List" and contact you when/if it becomes available again.
|
|
|
|
|