|
|
Joined: Nov 2001
Posts: 29,863
Tech Advisor ChatMaster - 25,000
|
OP

Tech Advisor ChatMaster - 25,000
Joined: Nov 2001
Posts: 29,863 |
Yep...when a car sits for a long period of time (in this case 35 years and 20 years in a barn prior to that) a lot of things need to be done. It is always a good idea to make a list of things that need attention before the car is returned to the road. Even with a list made, as you go along you will find other things that are added to the list. I have crossed items off of my list as I have completed them, and right now my list is half done.   
The Mangy Old Mutt
"If It's Not Junk.....It's Not Treasure!"
|
|
|
|
|
Joined: Nov 2001
Posts: 29,863
Tech Advisor ChatMaster - 25,000
|
|
OP
Tech Advisor ChatMaster - 25,000
Joined: Nov 2001
Posts: 29,863 |
Today I spent several hours working on my dome light problem. Since I had continuity everywhere, including through the dome light switch, I concentrated on the light socket and the connector. Carefully removed the dome light assembly from the roof area and took it to my electrical test bench. Upon investigation I discovered the the connector inside of the socket was loose. Fixed the connector and attached a jumper wire to the connector. Installed the light bulb. Attached the positive cable from my DC power supply to the connector wire and attached the negative cable to the dome light housing. Turned on the power supply and set it for 6 volts. The dome light worked great! Mounted the dome light assembly with jumper wires to the two wires hanging down from the headliner in the car. One wire goes to the light switch and the other wire goes to the dome light switch on the door pillar, which is actually the ground. Turned on the switch and nothing! The dome light didn't work. Figured that it might be a bad ground so one end of a jumper wire was connected to the terminal on the dome light switch that goes to ground and the other end was connected to a known good ground. Tried it again and the dome light worked. Okay, definitely a bad ground. Removed the jumper wire on the ground terminal of the dome light switch and cleaned the terminal. Tried the dome light again and it worked as it should. Cool! Assembled everything and retested. The dome light works. Okay, that job is completed so now back to the headlight problem.
The Mangy Old Mutt
"If It's Not Junk.....It's Not Treasure!"
|
|
|
|
|
Joined: Nov 2001
Posts: 29,863
Tech Advisor ChatMaster - 25,000
|
|
OP
Tech Advisor ChatMaster - 25,000
Joined: Nov 2001
Posts: 29,863 |
Next update: I spent this weekend working on the headlights since they also have not worked in about 50 years. The first order of business was to correct the wiring problem on the side of the dimmer switch. One wire was broken off at the wiring harness and the other two wires were completely bare. Removing the dimmer switch was a pain due to its location up under the cowl support. Anyway, finally got the wiring harness out far enough to work on the wires. Spent about an hour working on the wires and after getting them back in their correct positions on the dimmer switch, I ran a continuity test on each terminal of the dimmer switch to make sure that the dimmer switch was working correctly. It was. Hooked up the battery and turned on the headlights to see what other issues I was dealing with. Instantly blew the fuse on the back of the light switch. Disconnected the battery and did some further digging. Removed the headlight rim, lens and reflector from both headlights since I figured that my short circuit problem was probably in one or the other headlight. Found that the problem was in both headlights. The pigtails going from the headlight socket to the reflector were bare and uninsulated and the pigtails on both headlights were touching the headlight shell. For some reason the factory opted to use rubber covered wire on the pigtails instead of cloth covered wire and the rubber coating turned brittle over the years and fell off. Removed both reflectors and pigtail assemblies and took the parts to my soldering station. Made new wiring pigtails and installed them on the reflectors. Checked both headlight bulbs with my power supply and one bulb had a defective low beam filament. Replaced the defective bulb with a new old stock bulb. The other headlight bulb tested fine. Installed both headlight reflectors in the headlight shells and hooked up the battery once again. Turned on the headlights and they both worked! Cool! However...I noticed that one headlight was on high beam and the other headlight was on low beam. Depressed the dimmer switch and the situation was reversed. Ran a power test on the pigtail terminals in each reflector socket. The same terminal on both lights were on low beam at the same time as they should be. The bayonet plug on the back of the headlight assembly has off-set pins so that the socket can only be inserted one way so that was not the problem. Figured that the bayonet base on the headlight bulb was the same way with off-set pins.....it wasn't. The headlight bulb can be inserted either way, so obviously one bulb was inserted 180 degrees out from the other bulb. Turned the bulb 180 degrees and everything worked fine....both lights on low beam as they should be and both lights on high beam as they should be. Kinda sorta makes ya wonder how many old Chevys way back when were running around with one headlight on high beam and one headlight on low beam when a headlight bulb was replaced. Don't think that many dudes would pay attention to the filament location in the bulb when the headlight bulb was inserted into the socket. After fixing the headlights I figured that I was on a roll so I tackled the horn next...since it hasn't worked for about 50 years either. Since the horn wire going to the mast jacket bushing was broken off up inside of the mast jacket, I decided to install a replacement horn button down on the lower mast jacket. Removed the trumpet horn and took it to the test bench to check out. Using jumper wires I connected the horn to my 24 volt DC power supply and tested the horn. It wanted to work but didn't. Disassembled the horn, cleaned the contacts on the points, sprayed the contacts with contact cleaner, reassembled the horn. Tried it again and it did honk but poorly. Turned the adjustment screw on the back of the horn and the horn then worked great. Installed the horn back on the car and, using jumper wires, I connected one end of the new horn button to the horn wire connector at the bottom of the mast jacket and connected the other jumper wire to ground. Depressed the horn button and the horn worked! Installed the horn button on the lower mast jacket and wired everything as it should be. Connected the battery and depressed the horn button. Sounded loud and clear! Another job completed! Since I was feeling brave, I then set to work on the driver's door window because it would no longer go up or down. Found that the metal channel on the door hinge side had broken loose from the factory tack welds and it was laying in the bottom of the door. Removed the window regulator assembly and the window glass. Installing the metal window channel was interesting. I heard about some new metal to metal glue that was supposed to be fantastic. Figured that I would give that a try. Bead blasted the back of the metal channel to make it was super clean, mixed some glue as per the instructions (the glue is in two parts), smeared the glue on the back of the channel in the proper locations and clamped it into place using a thin piece of wood inside of the metal channel and some "C" clamps. The instructions stated that the glue would set up in about 3 minutes. I left the clamps on for about three hours. Removed the clamps and the metal channel was in place as part of the door....just like it had been welded to the door frame! This stuff is amazing! Okay, next I cut a new piece of rubber window channel with the fuzzies to length. Purchased this stuff from the Filling Station. The rubber channel went right in place and I glued the top half of the channel to the door as it should be using the 3M black weatherstrip adhesive. That stuff also worked great. Next tried to install the old window glass...."tried" is the key word here! The glass would not go in! Now..keep in mind that I only installed new rubber window channel on the hinge side of the door since it was missing. The latch side of the driver's door still has the original rubber window channel and, due to age, it is pretty much compressed flat, so I figured that the window glass would go right in....not! It appeared that the new rubber window channel was a little thicker than the original. It took a lot of work but I was finally able install the window glass correctly, and now the driver's side window goes up and down as it should. And, another job completed. Got a couple more things to do on this barn survivor '32 and then I will move it out into the sunshine to take some photos. I will then post them here. To be continued.......
The Mangy Old Mutt
"If It's Not Junk.....It's Not Treasure!"
|
|
|
|
|
Joined: Nov 2001
Posts: 29,863
Tech Advisor ChatMaster - 25,000
|
|
OP
Tech Advisor ChatMaster - 25,000
Joined: Nov 2001
Posts: 29,863 |
Another Update: This evening I decided to pull the windshield regulator board since the windshield has not gone up or down in about five decades. I pretty much figured what the problem was before I started. Removed the wiper motor, the sun visor and the rest of the windshield regulator board screws and the regulator board came off easily. Sure enough...just as I suspected...mud dauber nests....and lots of them! Some were so big that they were blocking the movement of the windshield. Found at least 20 of the buggers. Obviously, the mud dabuers had a field day while the car was parked in the old barn for 20 years before I purchased the car 38 years ago. Cleaned all of the mud dauber nests and then vacuumed the upper windshield area with a shop vac. After that, I carefully worked the windshield up and down until it moved freely. With the windshield regulator board on the work bench I cleaned and oiled the regulator. It then worked great. Reinstalled the windshield regulator board and it actually went back in fairly easily. Tested the regulator and the windshield now goes up and down as it should. Cool! Before reinstalling the wiper motor, I attached it to my vacuum pump to see if it worked. The motor did work but very slowly. Put some very fine oil inside of the wiper housing and then reattached the vacuum pump. That did the trick...the wiper motor now works great...considering that it is almost 80 years old. All that is left to do now is to reinstall the rear view mirror and the job is complete. Next, I can take the '32 down off of the jack stands and move the old girl outside into the sunshine....that is when we get some nice weather.
The Mangy Old Mutt
"If It's Not Junk.....It's Not Treasure!"
|
|
|
|
|
Joined: Feb 2007
Posts: 860
ChatMaster - 750
|
|
ChatMaster - 750
Joined: Feb 2007
Posts: 860 |
JYD-Your updates and clear descriptions almost make me feel like I`m there watching you and it`s sorta like the late Paul Harvey`s "and now for the rest of the story". This long awaited revival probably makes you feel like a doctor who has miraculously brought someone back to life!!!
hoppy
"Four-Doors-Forever"
|
|
|
|
|
Joined: Nov 2001
Posts: 29,863
Tech Advisor ChatMaster - 25,000
|
|
OP
Tech Advisor ChatMaster - 25,000
Joined: Nov 2001
Posts: 29,863 |
Ha ha! Ya, I gotta admit that bringing this old '32 back to life is a lot of fun, and ya, it is kinda sorta like being a doctor. I also have to admit that this is a lot easier and way less expensive than restoring a complete car. Besides, it is nice to see an all original "barn survivor" back on the road again. Glad that you are enjoying the updates. Another update will be coming along soon with a few photos as well.
The Mangy Old Mutt
"If It's Not Junk.....It's Not Treasure!"
|
|
|
|
|
Joined: Nov 2001
Posts: 29,863
Tech Advisor ChatMaster - 25,000
|
|
OP
Tech Advisor ChatMaster - 25,000
Joined: Nov 2001
Posts: 29,863 |
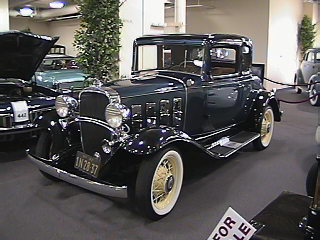
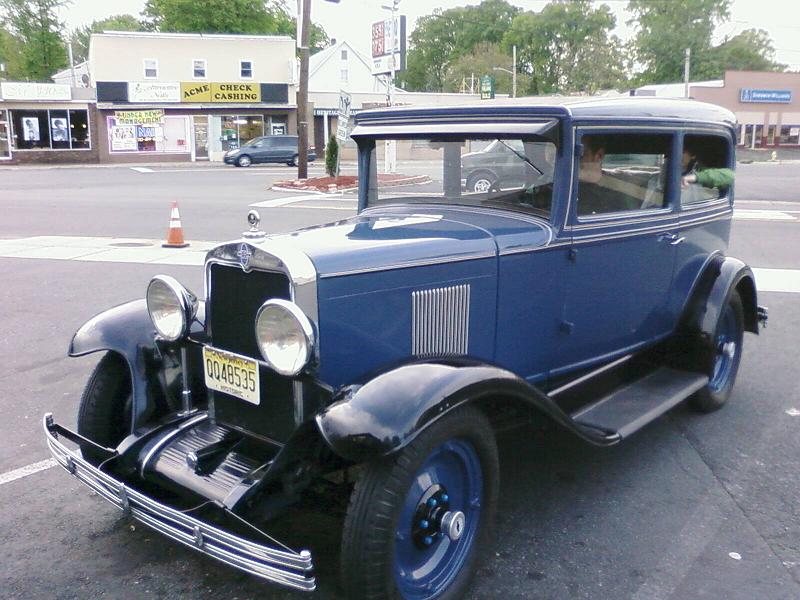
Saved the best for last! When I first started to work on the '32 to bring it out of its 35 years of hibernation, I made a list of things that had to be done before the car could be moved out of the shop. Of course, as I went along I discovered a few more items that needed attention so I added them to the list as well. Initially, one of the items that was on the list of things to do was the original accessory Eagle radiator cap. The bayonet base of the cap had rusted away over the years and it needed replacing. So, I decided to save that project for last....kinda sorta as the "grand finale" of the project if you will. Today was the day to work on the Eagle radiator cap. I remembered that I had a new Eagle radiator cap base repair kit on the shelf that I had put there some 30 years ago. Went to my inventory card file and it was shown as being on shelf 13. Checked out shelf 13 and sure enough....there it was! Removed the repair kit from stock and took it to the work bench. The bayonet part of the Eagle base was totally rusted away. I removed the bayonet assembly and installed the new bayonet assembly that was part of the repair kit. Went over to the '32 and mounted the original Eagle cap onto the radiator filler neck. It fit like a dream! The original Eagle cap is now back on the car and that installation officially marked the end of the project to get the old girl back on the road! Cool! Now, the car will be taken off of the jack stands and driven out onto the driveway under her own power. The interior will be cleaned and the car will be washed. Then, some photos will be taken and posted here. After that....the test drive!!!     
The Mangy Old Mutt
"If It's Not Junk.....It's Not Treasure!"
|
|
|
|
|
Joined: Jul 2002
Posts: 205
Backyard Mechanic
|
|
Backyard Mechanic
Joined: Jul 2002
Posts: 205 |
Hey Skip what great news,hope all is well with you and your family also.
|
|
|
|
|
Joined: Nov 2001
Posts: 29,863
Tech Advisor ChatMaster - 25,000
|
|
OP
Tech Advisor ChatMaster - 25,000
Joined: Nov 2001
Posts: 29,863 |
The Mangy Old Mutt
"If It's Not Junk.....It's Not Treasure!"
|
|
|
|
|
Joined: Sep 2003
Posts: 4,951
ChatMaster - 4,000
|
|
ChatMaster - 4,000
Joined: Sep 2003
Posts: 4,951 |
Interesting story Skip. Sal called a couple of weeks ago. Among other things, he wondered if I was following all this. Seeing as how we'd seen the car on the 05 Junk YD tour, etc. etc.
I'll be watching for the test drive post.....
|
|
|
|
|
Joined: Oct 2005
Posts: 509
Oil Can Mechanic
|
|
Oil Can Mechanic
Joined: Oct 2005
Posts: 509 |
Junkyard Dog,
Care to share the brand of "I heard about some new metal to metal glue that was supposed to be fantastic".
This is a great thread. It would make another great G&D article. Me, I'm going to print it out and keep it with my 1929 Service News.
Thanks!
|
|
|
|
|
Joined: Nov 2001
Posts: 29,863
Tech Advisor ChatMaster - 25,000
|
|
OP
Tech Advisor ChatMaster - 25,000
Joined: Nov 2001
Posts: 29,863 |
The "fantastic" glue is "SEM" and it is made by SEM Products Inc. I purchased it at my local NAPA Auto Parts Store. I was told that many of the body shops use this glue. It is a two-part epoxy glue and it sets up in 1 to 3 minutes so you have to get the job done fast! 42bill: Glad that you are enjoying the stories about "Charlotte Mae". There will be another update again when the '32 goes on a test drive.
The Mangy Old Mutt
"If It's Not Junk.....It's Not Treasure!"
|
|
|
|
|
Joined: Oct 2005
Posts: 509
Oil Can Mechanic
|
|
Oil Can Mechanic
Joined: Oct 2005
Posts: 509 |
Hi Again JYD,
Regarding this "Before reinstalling the wiper motor, I attached it to my vacuum pump to see if it worked. The motor did work but very slowly. Put some very fine oil inside of the wiper housing and then reattached the vacuum pump."
What type of vacuum pump do you huse? I have wiper issues too. Finally on a '29 sedan does the wiper motor need to come off before the windshield riser board can come out?
You may see me at your June show at the old house if I can convince the wife it will be fun to drive up there.
Jim
|
|
|
|
|
Joined: Jan 2008
Posts: 523
Oil Can Mechanic
|
|
Oil Can Mechanic
Joined: Jan 2008
Posts: 523 |
no the wiper motor does not have to come off to remove the header board. at least it didn`t on my 30.
|
|
|
|
|
Joined: Jan 2002
Posts: 2,073
ChatMaster - 2,000
|
|
ChatMaster - 2,000
Joined: Jan 2002
Posts: 2,073 |
Great story Skip!
As I was reading along, I got a little homesick as I sold my 32 last summer. Your story brought back a lot of memories and reminded me of countless days in the garage trying to figure out which "little job" to tackle next.
Thanks for sharing and post those pictures of Mable. I can't wait for the latest episode...
Hey, you didn't mention anything about the gas tank and sending unit. My 32 had a bladder in it for 25 years and it never leaked. I never did get the gas gauge working since the bladder screwed up the sending unit. I just used the old dip stick method, ya know? 4" equals about 1/2 a tank.
RayG
Last edited by RGwiz; 03/12/10 05:52 PM.
Chat Group Chapter Member
Current rides;
1968 Camaro rs/SS 350 4spd
2000 Blazer LT
2005 Malibu Maxx
2007 Acura TDX
Last total restoration;
1932 Sport Coupe
|
|
|
|
|
Joined: Sep 2003
Posts: 4,951
ChatMaster - 4,000
|
|
ChatMaster - 4,000
Joined: Sep 2003
Posts: 4,951 |
The "fantastic" glue is "SEM" ..... 42bill: Glad that you are enjoying the stories about "Charlotte Mae". There will be another update again when the '32 goes on a test drive. Good deal Skippy. I'll be watching for it. Also, interesting info about the glue....
|
|
|
|
|
Joined: Nov 2001
Posts: 29,863
Tech Advisor ChatMaster - 25,000
|
|
OP
Tech Advisor ChatMaster - 25,000
Joined: Nov 2001
Posts: 29,863 |
Hey Jim! Actually, I have two vacuum pumps....one on my Sun distributor machine and the other is a big commercial unit. We would be glad to have you at our car show at the old Wood House in June. The date is Saturday, June 5th. Ray: Glad that you are enjoying the stories. By the way, my 1932 is "Charlotte Mae". "Mabel" was our 1969 Impala Sport Coupe that was totaled last September. On the gas tank, when I first bought the car back in 1972 I dropped the gas tank at that time and had it professionally boiled out. It was spotless inside when I got the tank back. Also checked out the sending unit at the same time as well. When I stored the car 35 years ago I drained the tank and it was still clean. Never used any sealer in the tank and I never will. I hate that stuff! If the tank ever gets to the point that it requires sealer then I will replace the gas tank instead. At any rate, the sending unit in the gas tank and the gas gauge both still work great after the 35 years in storage.
The Mangy Old Mutt
"If It's Not Junk.....It's Not Treasure!"
|
|
|
|
|
Joined: Oct 2005
Posts: 509
Oil Can Mechanic
|
|
Oil Can Mechanic
Joined: Oct 2005
Posts: 509 |
|
|
|
|
|
Joined: Jan 2002
Posts: 2,073
ChatMaster - 2,000
|
|
ChatMaster - 2,000
Joined: Jan 2002
Posts: 2,073 |
Skip, sorry about the name mix up. I don't name my cars so I'm not used to that sort of thing. Anyway Charlotte Mae is a pritty cool name. My Mom's name was Mary but everyone called her Mae.
By the way, once you got the headlights working, did you use that garage door aiming trick that the 32 owner's manual shows?
...oh yeah, and I was one of those guys that had a high and low beam at the same time. LOL.
Chat Group Chapter Member
Current rides;
1968 Camaro rs/SS 350 4spd
2000 Blazer LT
2005 Malibu Maxx
2007 Acura TDX
Last total restoration;
1932 Sport Coupe
|
|
|
|
|
Joined: Nov 2001
Posts: 5,906 Likes: 8
Former ChatMaster ChatMaster - 5,000
|
|
Former ChatMaster ChatMaster - 5,000
Joined: Nov 2001
Posts: 5,906 Likes: 8 |
|
|
|
|
|
Joined: Nov 2001
Posts: 29,863
Tech Advisor ChatMaster - 25,000
|
|
OP
Tech Advisor ChatMaster - 25,000
Joined: Nov 2001
Posts: 29,863 |
Hey Ray! Yep, I did use the garage door trick to check the aim on my headlights and the headlights are still dead on target from the factory. Didn't have to adjust a either headlight! Billy Boy Barker: Actually, I did name my two daughters...but....to be honest.....I can't remember their names! 
The Mangy Old Mutt
"If It's Not Junk.....It's Not Treasure!"
|
|
|
|
|
Joined: Nov 2001
Posts: 19,758 Likes: 64
ChatMaster - 15,000
|
|
ChatMaster - 15,000
Joined: Nov 2001
Posts: 19,758 Likes: 64 |
I know the daughters names. "Hey You" and "Get me another beer".
Both come to the same name depending which is closer.
How Sweet the roar of a Chevy four!
|
|
|
|
|
Joined: Jan 2002
Posts: 2,073
ChatMaster - 2,000
|
|
ChatMaster - 2,000
Joined: Jan 2002
Posts: 2,073 |
Amazink, that those headlights are still factory set. I guess Charlotte Mae never saw any dirt roads.
Yep, and I know my daughter's name...it's...Howmuch?
Chat Group Chapter Member
Current rides;
1968 Camaro rs/SS 350 4spd
2000 Blazer LT
2005 Malibu Maxx
2007 Acura TDX
Last total restoration;
1932 Sport Coupe
|
|
|
|
|
Joined: Nov 2001
Posts: 29,863
Tech Advisor ChatMaster - 25,000
|
|
OP
Tech Advisor ChatMaster - 25,000
Joined: Nov 2001
Posts: 29,863 |
The Mangy Old Mutt
"If It's Not Junk.....It's Not Treasure!"
|
|
|
|
|
Joined: Jan 2002
Posts: 2,073
ChatMaster - 2,000
|
|
ChatMaster - 2,000
Joined: Jan 2002
Posts: 2,073 |
Hey Skip,
See that Charlotte Mae used to be a milk truck, she was probably a Cat house too!
...meooowww!
Chat Group Chapter Member
Current rides;
1968 Camaro rs/SS 350 4spd
2000 Blazer LT
2005 Malibu Maxx
2007 Acura TDX
Last total restoration;
1932 Sport Coupe
|
|
|
|
|