|
|
Joined: May 2012
Posts: 4,374 Likes: 30
ChatMaster - 4,000
|
OP

ChatMaster - 4,000
Joined: May 2012
Posts: 4,374 Likes: 30 |
Ok, need to replace the Oil Pan Gasket on the 1929. Engine was totally tore down and rebuilt a few years back by previous owner, I am trying to tune it up and get it running smoothly. Previous owner said that he removed the oil pan gasket and replaced it with a rtv type compound hoping to raise the oil pan and provide more oil flow to the dippers. From listening it sounds like at a high idle that one of hte dippers may be hitting the trough ?? Car has NOT been driven since the rebuild. It fires right up and idles with out problem, just sounds rough. So I am going to drop the pan, clean it up and put in the BEST Gasket 26002 that everyone seems to sell for the 1929.
1-Can I replace the Oil Pan Gasket with the Engine & Transmission Components Installed ??
2-Anything Else I should look for or replace while I am in there ??
I have seen procedures on how to replace the gasket, and see that some people have recommended using a compound (glue) to hold the gasket to the one surface, seems the short straights go to the engine, and the side gaskets go to the pan. Also want to make sure that there is NO leak in the seams where the gasket materials meet. Figure this is a prime location for a leak to show up.
AACA - VCCA - Stovebolt - ChevyTalk
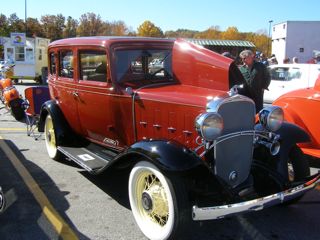
Love the Antique Chevrolet's from 1928-1932
The Beauty, Simplicity, History, and the Stories they Tell
|
|
|
|
|
Joined: Jan 2002
Posts: 980
ChatMaster - 750
|
|
ChatMaster - 750
Joined: Jan 2002
Posts: 980 |
You can replace the pan gasket with the engine and transmission in place. To hold the new gasket in place and guide the oil pan into the correct position, temporarily thread some 1/4-20 screws from the top down on each side so that about 3/4 inch of thread extends below the block.
If you have old Chevrolets, other old Chevrolets will find out where you live.
|
|
|
|
|
Joined: Oct 2007
Posts: 558
Oil Can Mechanic
|
|
Oil Can Mechanic
Joined: Oct 2007
Posts: 558 |
My Dad was a mechanic from the 20s to the 70s and I worked my way through college turning wrenches. He used Permatex to aid in placing gaskets on pans and valve covers. It will get a bit hard and I have used a bit of bearing grease just to hold the gasket in place. In addition, you can use some small twine to tie the gasket in place and cut it before you tighten the fasteners up as the gaskets will press into place at the contacts between the sides and the ends as you tighten it down. Be sure to use a good pattern in tightening down as seen in your service manuals. I do not like the rtv products and used the bearing grease method on my 32 and it worked great.
|
|
|
|
|
Joined: Jan 2008
Posts: 828 Likes: 6
ChatMaster - 750
|
|
ChatMaster - 750
Joined: Jan 2008
Posts: 828 Likes: 6 |
For years I have used the 3M 8001 yellow weatherstrip to glue the gaskets to the block, and seal the corners. RTV is a great product but gets a bad rap because most people use way to much, like most things if used properly they work well.
Dens Chevys 1927 Speedster 1928 coupe 1941street rod 1947Fleetline 4 door 1949 1/2 ton Pickup (sold) 1954 210 4 door 1972 Monte Carlo 2003 Corvette convt..
|
|
|
|
|
Joined: May 2010
Posts: 402
Backyard Mechanic
|
|
Backyard Mechanic
Joined: May 2010
Posts: 402 |
I will also need to change my pan gasket soon. Just wondered if there is any need to check the position of the spray nozzles before reinstalling the oil pan?
|
|
|
|
|
Joined: May 2012
Posts: 4,374 Likes: 30
ChatMaster - 4,000
|
|
OP
ChatMaster - 4,000
Joined: May 2012
Posts: 4,374 Likes: 30 |
Awesome, thanks for the info...
I have ordered the Gasket Kit and should be here next week sometime. Looking at instructions it seems that installation methods vary based on WHO you are. Should you install the 2 end strips first or the side rails ?? Or do you install the side rails then the 2 end strips ?? seems there are varying opinions on sealing the gasket or holding in in place, lovers & haters of gasket sealers.
Also seems that the placement varies as well. Should you install the 2 end strips in the block, and the side rails on to the pan, then put it together.
I know that everyone says you should roll the 2 end strips around a can and secure for a bit to take shape BEFORE trying to install. Also everyone has recommended the stud method for assistance in aligning hte pan and setting gaskets properly, which i like and totally agree with.
Just want to make sure that the areas where the side rails meet the end rails on the gasket that there is NO GAP and that it seals properly and securley. Seen people say they should interlock or overlap, some say a dallop of gasket sealant...
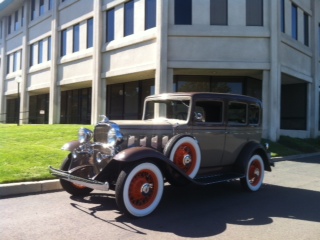
AACA - VCCA - Stovebolt - ChevyTalk
Love the Antique Chevrolet's from 1928-1932
The Beauty, Simplicity, History, and the Stories they Tell
|
|
|
|
|
Joined: Jan 2002
Posts: 30,701 Likes: 141
ChatMaster - 25,000
|
|
ChatMaster - 25,000
Joined: Jan 2002
Posts: 30,701 Likes: 141 |
The side pieces must be installed first as the end of the end corks but up against them. The only place I would use a sealer is on the ends of the end corks.
I use grease to hold the gaskets in place. If you use a sealer and have to replace the gasket again it is difficlt to clean up the surface. Also I make 4 studs about 1" long. Screw two on each side. They keep the gasket in place while installing the pan. Make studs by cutting the heads of of a 1 1/2" cap screw.
Gene Schneider
|
|
|
|
|
Joined: Nov 2001
Posts: 29,863
Tech Advisor ChatMaster - 25,000
|
|
Tech Advisor ChatMaster - 25,000
Joined: Nov 2001
Posts: 29,863 |
The Mangy Old Mutt
"If It's Not Junk.....It's Not Treasure!"
|
|
|
|
|
Joined: May 2012
Posts: 4,374 Likes: 30
ChatMaster - 4,000
|
|
OP
ChatMaster - 4,000
Joined: May 2012
Posts: 4,374 Likes: 30 |
Ok, any particular type of the grease to use ?? so install the two side rails, then the end ails (short pieces) and use a sealer between the where the end pieces butt up against the side rails.
and do you install ALL gaskets to the block ?? then slide up and install the pan ??
AACA - VCCA - Stovebolt - ChevyTalk
Love the Antique Chevrolet's from 1928-1932
The Beauty, Simplicity, History, and the Stories they Tell
|
|
|
|
|
Joined: Nov 2001
Posts: 19,758 Likes: 64
ChatMaster - 15,000
|
|
ChatMaster - 15,000
Joined: Nov 2001
Posts: 19,758 Likes: 64 |
Thick grease so it will hold the gaskets to the metal on the block. Yes install gaskets on engine block then push up the pan. I use Permatex #2 on the corners not silicone. Has worked for me for 40+ years. Tried silicone a few times and always went back to #2.
How Sweet the roar of a Chevy four!
|
|
|
|
|
Joined: Oct 2009
Posts: 1,294
ChatMaster - 1,000
|
|
ChatMaster - 1,000
Joined: Oct 2009
Posts: 1,294 |
Wet the end corks and wrap them around a beer can and let dry. Helps them stay in place. Only use permatex #2 in the corners. I tie the gasket to the pan with thin thread to hold it in place. up it goes,done.
|
|
|
|
|
Joined: Nov 2001
Posts: 19,758 Likes: 64
ChatMaster - 15,000
|
|
ChatMaster - 15,000
Joined: Nov 2001
Posts: 19,758 Likes: 64 |
I have used the thread method several times. Just be careful not to tug too hard on the cork gasket as the thread can cut it in a heart beat.
How Sweet the roar of a Chevy four!
|
|
|
|
|
Joined: May 2012
Posts: 4,374 Likes: 30
ChatMaster - 4,000
|
|
OP
ChatMaster - 4,000
Joined: May 2012
Posts: 4,374 Likes: 30 |
Thanks a million, gasket set will be here, well should be here thursday, just in time for the weekend. Now if I have time to remove and install.
Will try the can trick to pre curl/ roll the end strips. Bout how long for the cork to dry back out ?!?
trying to do this ONCE and do it RIGHT !!
AACA - VCCA - Stovebolt - ChevyTalk
Love the Antique Chevrolet's from 1928-1932
The Beauty, Simplicity, History, and the Stories they Tell
|
|
|
|
|
Joined: Sep 2006
Posts: 1,255 Likes: 10
ChatMaster - 1,000
|
|
ChatMaster - 1,000
Joined: Sep 2006
Posts: 1,255 Likes: 10 |
If you follow the owners manual it says there are two longer screws that are used temporarily to be threaded from the flange down as alignment pins. I suspect this was to insure no damage or debris would be introduced into the tubes directing oil into the pan troughs. Remember the oil is relatively low pressure and may not flush out a plug of pan gasket material. After getting a few other screws started these screws are to be threaded in from the bottom. I hide mine in hard to see areas like behind the generator on one side and the starter on the other. I too use the thread method to hold the gasket to the pan and glue the end gaskets to the block.
|
|
|
|
|
Joined: May 2012
Posts: 4,374 Likes: 30
ChatMaster - 4,000
|
|
OP
ChatMaster - 4,000
Joined: May 2012
Posts: 4,374 Likes: 30 |
Well UPS Tracking says My gaskets and filters should arrive today. So hopefully soon I will be able to get out there and get underneath and drain the oil, and drop the pan. Also going to follow the above recommendations and check the internal components make sure there is NOTHING loose or out of place/ sync.
Give it a good visual inspection and twice over. Better to safe then sorry !!
AACA - VCCA - Stovebolt - ChevyTalk
Love the Antique Chevrolet's from 1928-1932
The Beauty, Simplicity, History, and the Stories they Tell
|
|
|
|
|
Joined: May 2012
Posts: 4,374 Likes: 30
ChatMaster - 4,000
|
|
OP
ChatMaster - 4,000
Joined: May 2012
Posts: 4,374 Likes: 30 |
OK, got my gasket set in on friday, looks great.
Now on the end gasket, some say to wet them, wrap them around a can, and let them dry back out to ease installation and fit. are these end gasket square or rectangular ?? hard to tell !!
As for wetting them, how do I wet them, should they soak in water (how long, cold, warm, hot water), or just spray/ mist them with water, or how to go about this as not to destroy them. them just wrap them around a standard drink can ?? hold in place with a rubber band, then let dry out completely >?? or dry out most of the way ? figure overnight or a few days ??
Sorry, but only want ot do this once, and want to do it right !!
AACA - VCCA - Stovebolt - ChevyTalk
Love the Antique Chevrolet's from 1928-1932
The Beauty, Simplicity, History, and the Stories they Tell
|
|
|
|
|
Joined: May 2012
Posts: 4,374 Likes: 30
ChatMaster - 4,000
|
|
OP
ChatMaster - 4,000
Joined: May 2012
Posts: 4,374 Likes: 30 |
Ok, forgot to ask, what type of "GREASE" do you all recommend to sue for this application ?? Looking for something that I could pick up at my local auto parts store if possible !!
Saw my local stores carry this stuff:
Valvoline General Multipurpose Grease for GM
…Use on disc brake wheel bearings, steering linkages, chassis, suspension, universal joints
…Provides extreme high-temperature protection from 0°F to 375°F
…NLGI #2 Grade Lithium Complex Grease
…Meets GM 1051344, ASTM D-4950 GC-LB and MACK GC-G performance requirements
…Drop point is 500°F minimum
Valvoline General Multipurpose Grease for Automotive and Industrial Use
…Use on nondisc wheel bearings (drums), chassis and suspensions
…Provides enhanced water resistance and lubricating protection from 0°F to 275°F
…NLGI #2 Grade Lithium 12-Hydroxystearate EP Grease
…Meets GM 4733-M, GM 6031-M, Chrysler MS-3701, ASTM D-4950 LB and MACK GC-G performance requirements
…Not recommended for disc brake wheel bearings
…Drop point is 350°F
Valvoline SynPower Full-Synthetic Multipurpose Grease
…Use on disc brake wheel bearings, steering linkages, chassis, suspension, universal joints, and constant velocity (CV) joints
…Extreme-temperature protection from -40°F to 400°F
…NLGI #2 GC-LB Complex Lithium EP Grease
…Moly-fortified formula increases film strength
…Meets GM 1051344, Mack GC-G,
Lucas Oil Products Red 'N Tacky Grease
Lucas Red 'N Tacky Grease is a smooth, tacky, red, lithium complex grease fortified with rust inhibitors and oxidation inhibitors. This product has good water resistance and washout properties as well as enhanced mechanical stability and storage life.
Lucas Oil Products X-Tra Heavy-Duty Grease 14.5 oz.
Lucas X-Tra Heavy-Duty Grease is a shear-stable product with enhanced extreme-pressure characteristics and water resistance. It has good mobility at low temperatures, is designed to last up to 3 times longer than ordinary grease, and is an excellent choice for use with high-speed bearings.
AACA - VCCA - Stovebolt - ChevyTalk
Love the Antique Chevrolet's from 1928-1932
The Beauty, Simplicity, History, and the Stories they Tell
|
|
|
|
|
Joined: Jan 2002
Posts: 30,701 Likes: 141
ChatMaster - 25,000
|
|
ChatMaster - 25,000
Joined: Jan 2002
Posts: 30,701 Likes: 141 |
I use a thin "coat" of any common chassis grease.
Gene Schneider
|
|
|
|
|
Joined: Nov 2001
Posts: 19,758 Likes: 64
ChatMaster - 15,000
|
|
ChatMaster - 15,000
Joined: Nov 2001
Posts: 19,758 Likes: 64 |
Soak the gaskets in warm water for a hour or so. Then wrap around a soda (pop or coke depending on your location) can with masking tape backwards holding it in place (that way tape does not stick to cork and pull any of it out). The end pieces should be rectangular. Check by fitting them into end cap slots. I let mine dry overnight but a couple of hours should be okay if the humidity is not too high.
How Sweet the roar of a Chevy four!
|
|
|
|
|
Joined: May 2012
Posts: 4,374 Likes: 30
ChatMaster - 4,000
|
|
OP
ChatMaster - 4,000
Joined: May 2012
Posts: 4,374 Likes: 30 |
ok, sounds like a plan. need to drain the oil, drop the pan and look at the end gasket to see which way the seat. Thin side down, or wide side down.
Also should they fit snug, needing some coercing or just slide in easily.
will prep the the day before i plan on installing, so they can dry out overnight.
AACA - VCCA - Stovebolt - ChevyTalk
Love the Antique Chevrolet's from 1928-1932
The Beauty, Simplicity, History, and the Stories they Tell
|
|
|
|
|
Joined: Oct 2005
Posts: 509
Oil Can Mechanic
|
|
Oil Can Mechanic
Joined: Oct 2005
Posts: 509 |
and provide more oil flow to the dippers I know this was the previous owner but has anyone given thought to the oil pumps sold by the Billy Possum folks? Billy Possum. I've wondered about this ever since I got my car. Jim
|
|
|
|
|
Joined: Jan 2002
Posts: 30,701 Likes: 141
ChatMaster - 25,000
|
|
ChatMaster - 25,000
Joined: Jan 2002
Posts: 30,701 Likes: 141 |
The original 1929 oil pump was of the vane type. This is sufficent for a 1929 engine if it is not "worn-out". The 1929 engine does not require the extra pressure of the gear type pump as NOTHING is lubricated by full pressure in a 1929 engine other that the oil pressure gauge. The four center rod troughs are filled by oil lines and the end troughs get filled by the overflow from the front and rear main bearing pockets. Speaking of main bearing pockets check to make sour the pocket above each main bearing is not filled with sludge. A test would be to dip your finger tip into each pocket. There is a short stand pipe in eack pocket also. The front pocket also gravity feeds the passage to the timing gears.
If your gauge has been reading at about 7 pounds or better with hot oil at say 40 MPH the pump is fine. At idle they wil drop down to almost xero.
Gene Schneider
|
|
|
|
|
Joined: May 2012
Posts: 4,374 Likes: 30
ChatMaster - 4,000
|
|
OP
ChatMaster - 4,000
Joined: May 2012
Posts: 4,374 Likes: 30 |
Jim...
I have actually looked at the C&P Automotive (Billy Possum) oil pumps & screens. Figured once i get it running right I can check to see if the oil pump is working effectively and efficiently. If not I will then upgrade to one of these and see how it goes. Do not want to replace a part, just because. Unless it is a part known to go bad and/ or cause problems.
ChevNut...
I will add that to my things to check while in there list. Want to make sure everything is as it is supposed to be, and owrking properly, and nothing is loose or missing. Once I get it all apart, I will take pictures and post them here.
Not sure what the pressure is while driving, as it has NOT been driven yet. I know at idle the pressure is around 2 lb. gonna get it running right, adjust and set the brakes then take it out for a test spin/ drive.
AACA - VCCA - Stovebolt - ChevyTalk
Love the Antique Chevrolet's from 1928-1932
The Beauty, Simplicity, History, and the Stories they Tell
|
|
|
|
|
Joined: Jan 2002
Posts: 30,701 Likes: 141
ChatMaster - 25,000
|
|
ChatMaster - 25,000
Joined: Jan 2002
Posts: 30,701 Likes: 141 |
Just a little added info. The 1929-1936 engines used a vane type pump. As the oiling systemwas improved through those years the capacity of the pumps was increased. The new 216 engine in 1937 changed to a gear type pump. It was said to put out a better constant volume at higher RPM's (probably higher than a 1929 engine could obtain). In the late 1930's Chevrolet quit selling the vane type pump for replacement in the earlier models. The adopted (or adapted) a 1937 gear type pump to fit the earlier models. The pump was sold as a kit and came with the plumbing parts, screen etc. The screen was oval shapped, same as a 1937. There were different kits for the various years. The aftermarket suppliers followed and did the same thing.
Gene Schneider
|
|
|
|
|
Joined: May 2012
Posts: 4,374 Likes: 30
ChatMaster - 4,000
|
|
OP
ChatMaster - 4,000
Joined: May 2012
Posts: 4,374 Likes: 30 |
Ok, picked up some Permatex No 2 Last night as well as a tub of both of these guys:
Valvoline General Multipurpose Grease for GM
Valvoline SynPower Full-Synthetic Multipurpose Grease
Got them on sale for a great deal, figured would not hurt to have them around just in case :)
Hopefully will get to this project this weekend, supposed to be a nice weekend here, now to find time to squeeze it in !!
AACA - VCCA - Stovebolt - ChevyTalk
Love the Antique Chevrolet's from 1928-1932
The Beauty, Simplicity, History, and the Stories they Tell
|
|
|
|
|