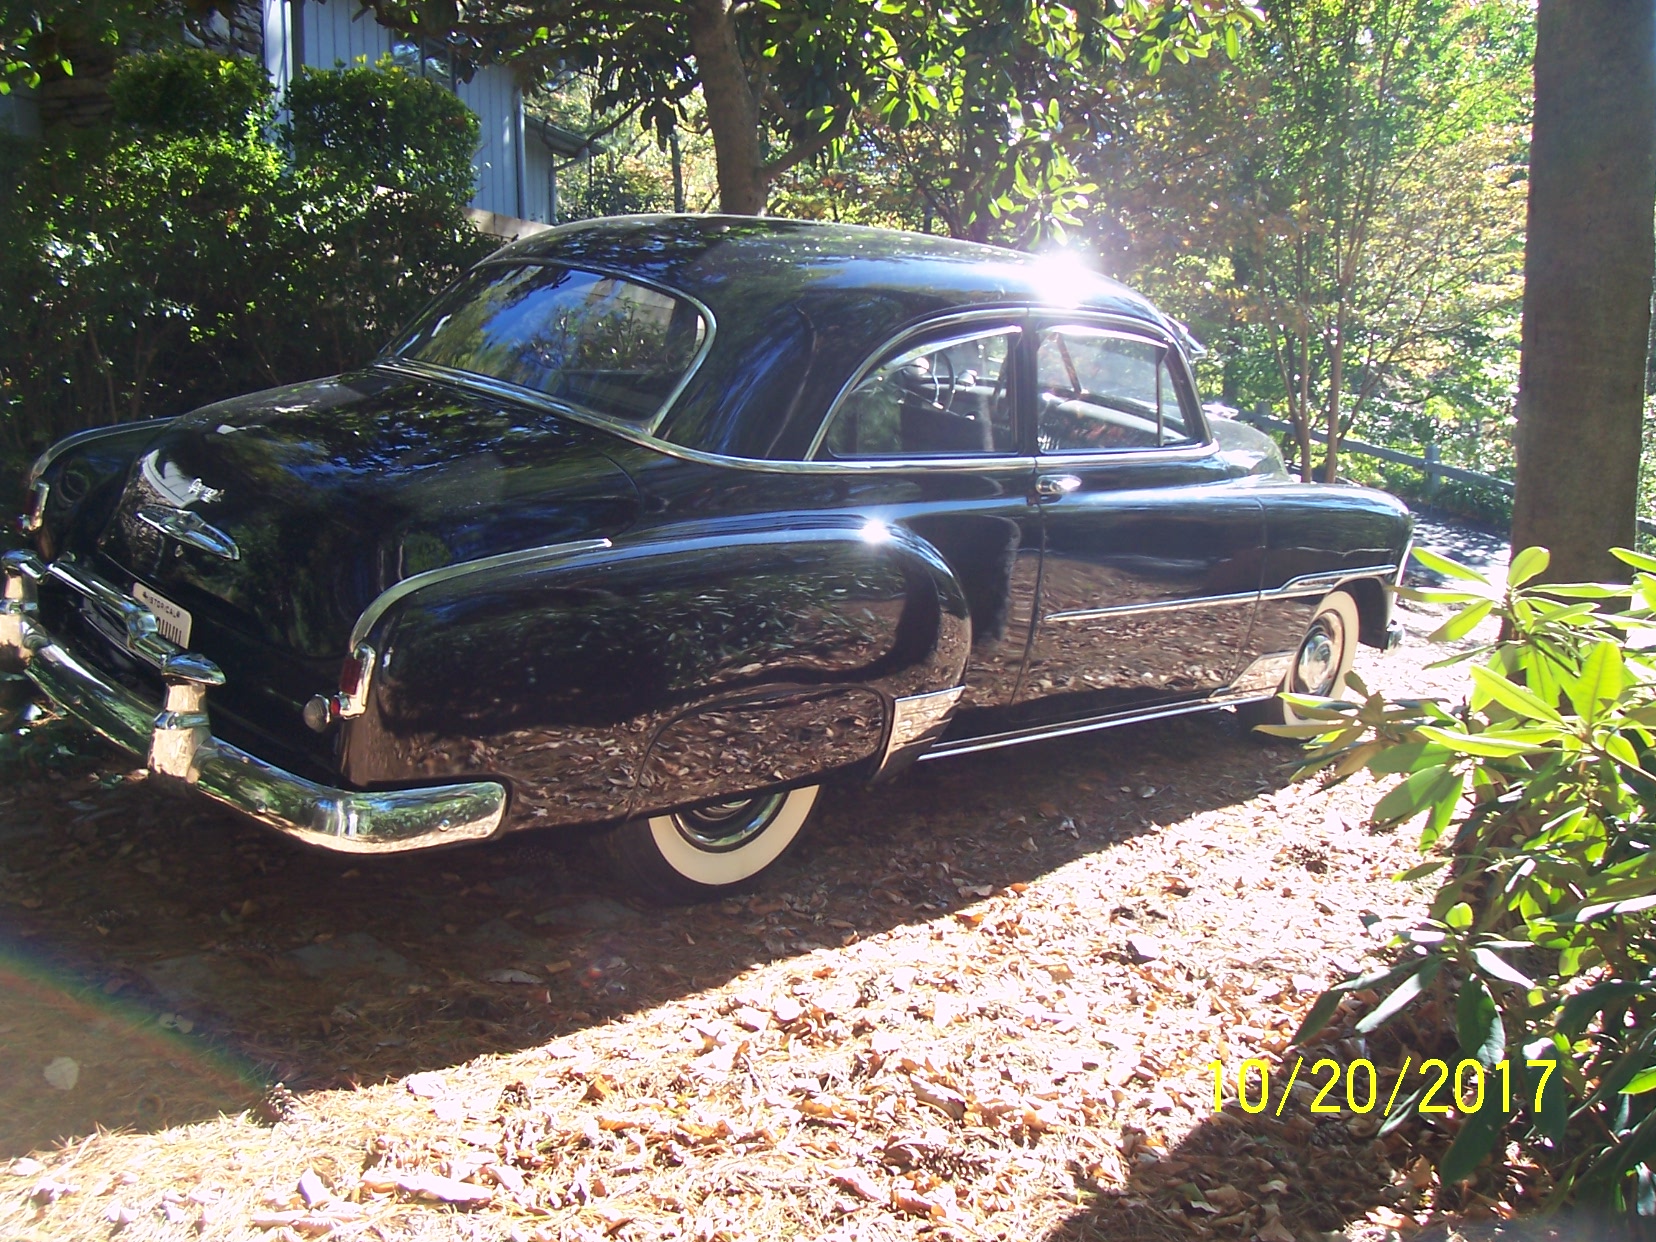
My kitchen remodel took longer than I was hoping. My wife is happy BUT, i lost the entire summer. Because of the cold weather, I moved the stainless steel buffing operation to the basement. As of today, I have removed dents, scratches and sanded and buffed over 1,200 inches of stainless steel trim from inside and outside of the car. Today I tackled a very interesting job. I removed VERY, VERY carefully the trim on the door panels. The good news is that none of the metal prongs were broken off. Hopefully they go back on as good as they came off. The bad news is now I have 194 more inches of trim to sand and buff.
Fortunately I have a spare door panel for each door., [url=https://postimg.cc/LJc9nPHN]
Here is an up date from the S/S polishing department. Those trim pieces from the door panels shown in the above post proved to be the toughest pieces to buff. The two straight pieces were easy. The first curved trim piece went through the buff wheel five times without any problems. The second one - not so much. On the fourth pass through, it decided to go left instead of right and I bent it slightly. After about 90 minutes of coaxing and tweaking, I was able to return it back to where it used to be. I decided to finish this one on the bench with a drill and the three buff wheels. I pressed the trim into a piece of Styrofoam and made five passes with the drill. It turned out great. No metal prongs or fingers were broken.
I attached both curved trim pieces to Styrofoam glued to cardboard, wrapped the whole thing in foam and placed it inside a box. They will be sleeping in storage until the interior is started.
The last pieces to be polished are the two rocker moldings. Even thought these are NOS still wrapped in factory wrappings, they are probably shop worn and will have to be sanded with 5 to 6 grits of sand paper and 5 passes on the buff wheel. But because they are 77" long, I will have to wait for warmer weather and do them outdoors. When these are finished, the total number of inches of stainless steel polished will be 1,660 inches.
Thanks for the great explanation on how to handle small stainless trim. I also have spent a lot of time on stainless polishing so appreciate the reminder of the work involved, 5 to 6 different paper grits of hand sanding, along with buffing.
It has been some time since I posted anything on this thread. Be doing a lot of things, but completing very few. Installing the new wiring harness has really slowed down any real progress. But that part of this project should be done in a couple more weeks. The one thing I am really happy with is restoring the firewall pad that was original to this car. The over all condition was good but the rubber edge that covers the carpet was cracked and needed some attention. So I purchased some rubber the same thickness as the original and an automatic sewing awl with thread. I never used a sewing awl before, but watching several videos online helped a great deal. Attached are photos showing the before and after condition.
How it came out of the car
Part of the piece traced out on the new rubber
This part goes over the transmission hump
The pad is still attached to the tiltable artist table BUT finished and ready to be installed
Restoring this car has been a real adventure. WAY too much backing up and only a little forward motion. I finally finished installing the wire harness. What a pain in the tool box. Dealing with missing wires, wrong wire lengths and some questionable responses from the manufacturer has made me come to a conclusion. For the next car I restore (if any) I will be going to Rhode Island and not back the California for a wire harness.
Now on a positive note, I did finish assembling and installing the front grille and the front splash pan. The dashboard is completed with the exception of the cigarette lighter. Not real sure if I really want it connected since I do not smoke. Still have to get the front end aligned and some miles on it so it can earn back my trust. By the way Bruce, you will notice that the speedometer is not under the hood anymore. I know that you were a little concerned.
It looks so much better there! The car is shaping up fantastic. By the time you're done, you'll have nowhere to go like the rest of us now! What wiring harness did you use? I used Y'n Z's, and thought they were awesome.
Those accustomed to the finest...find it in Chevrolet. 1953 Belair Convertible 1951 2dr Deluxe Sedan 2015 GMC SLE 4X4
Yes it was from YnZ. On a Bel Air & convertible, there is a light switch for the dome light mounted on the driver side rear quarter window panel - that wire was missing. I had to ship the tail light harness back to them to fix. I had to pay shipping both ways because the harness was out of their 90 day warranty. Next, the tail light wires were too short to make the proper connections in the trunk. One of the wires that connect to the voltage regulator was short. The wire for the glove box light was missing, they did supply one. The wire for the heater switch was also missing. When I asked why, I was told that wire is not on their instruction sheet and no one supplied them with an original pattern. That wire and connectors along with other supplies I needed came from Rhode Island Wiring. I asked YnZ where a particular wire went, they e-mailed me a copy of a Motors or Chilton's after market wire diagram. Fortunately I have a genuine Chevrolet wiring diagram that was vehicle specific and not generic. BUT other than that, the wire harness does look good. And, it only cost me just over $1,000 to have all that fun.
b. Good size vise and mount it where it will be handy.
c. Adjustable wrench.
d. Air compressor that has at least 125 lb. pressure.
e. 38 and 1/2 inch drive impact air guns.
f. Good drop light and other sources of light.
g. Fan to keep the air flowing around about you.
h. Good floor jacks. Get a small one and a heavy duty 3 ton one.
I. Four jack stands. Get the large heavy duty ones that ratchet up using teeth. Not the push-in pin ones.
j. Air chuck for blowing stuff.
k. Good pair of vise gripe tools. Milwaukee brand is best.
l. Some plastic gloves.
m. Shop towels. (You could save some money here by raiding the guest room)
n. Engine hoist. Get a good one.
o. Steering wheel puller.
p. Drill and bits. Get good ones.
q. Sack of oil dry.
r. Air blower and broom.
s. Mechanic's cap (no bream). A cap with a bream will get you killed. Well, almost.
t. Set of long pry bars.
u. An adjustable engine mounting tool/rack.
v. Torque wrenches.
w. Breaking bar.
x. Suitable set of ball-peen hammers.
y. Radio with a CD player for listening to talk shows (Rush, et al) and music. If you like old type country then let me know and I'll send you a few CDs.
Z. Small student refrigerator for keeping sodas and whatever cool.
The above is all I can think of right now. I assume you have plenty of the usual small tools. I have used all of the above while doing my 41 except raiding the guest room. I'm a married to an unforgiving missus , you think I'm nuts?
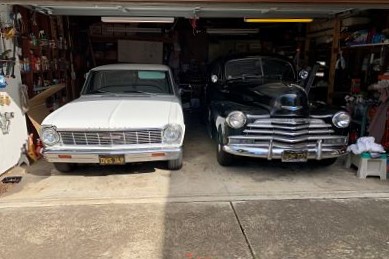
Charlie, in one month, it will be coming up to the 6 year mark since I started this project. A lot of people might ask why is it taking so long? I too, am married and to keep my wife happy, two years ago, we had our kitchen remodeled for our 40th wedding anniversary. My 20' x 20' two car garage (with one non Chevrolet resident) became a holding area for kitchen cabinets, moldings, flooring, lumber and several other needed items for the re-do. I could not even see my car let alone do anything to it. After more time than we thought it should take, I was back in car restoration mode. Then last year, she wanted the bathroom updated. Guess what happened to my garage? Anyway, I read though your list of tools and I have used most of them by now. I only have one floor jack BUT I have four car skates that really came in handy. I rented an engine hoist from the rental store and it was barely okay for the engine removal. I borrowed a great engine hoist (Bluepoint) from a club member and that was perfect to the engine install. I never had to use any oil dry - used a lot of cardboard and plastic drop cloths. My garage is so small, I keep my student sized refrigerator in the new kitchen - but it's the grown up model.
About 6 years ago, I posted my first message regarding this restoration. It has been a great deal of fun, frustration and backing up. I took my first ride in the Bel Air today, and all things considered, it ran pretty darn good. I have several adjustments to make and have to figure out why the speedometer does not work. Hopefully next week, I can get the front end alignment done and a correct tailpipe made for it. The goal is to get everything possible done before it goes to the upholstery shop. The car runs very well ESPECIALLY in reverse. It has had a lot of practice backing up!
Yes it was from YnZ. On a Bel Air & convertible, there is a light switch for the dome light mounted on the driver side rear quarter window panel - that wire was missing. I had to ship the tail light harness back to them to fix. I had to pay shipping both ways because the harness was out of their 90 day warranty. Next, the tail light wires were too short to make the proper connections in the trunk. One of the wires that connect to the voltage regulator was short. The wire for the glove box light was missing, they did supply one. The wire for the heater switch was also missing. When I asked why, I was told that wire is not on their instruction sheet and no one supplied them with an original pattern. That wire and connectors along with other supplies I needed came from Rhode Island Wiring. I asked YnZ where a particular wire went, they e-mailed me a copy of a Motors or Chilton's after market wire diagram. Fortunately I have a genuine Chevrolet wiring diagram that was vehicle specific and not generic. BUT other than that, the wire harness does look good. And, it only cost me just over $1,000 to have all that fun.
I also used the ynz harness on my 54 convert the harness had a couple of mistakes they called me one evening and I informed them,hopfully they corrected it for the next guy or gal.
Finally reached the last major step - UPHOLSTRY. I drove the '50 and my wife drove the parts vehicle to the shop on Friday. Spent a few hours going over what needs to be done with John, the owner of the shop. He does great work and the wait time to get your car in his shop is a minimum of 6 months. The only thing I can fault him on is making me park next to a f - - d. In a 1950 Bel Air, there are five different types of material used to upholster the interior. Headliner, leather, matching vinyl, seat/door cloth and carpeting. Andy, thanks for telling me about John.
Hawkeye, why are you rushing your restoration so fast. When my wife and I pulled the '50 convertible out of a farmer's field where it had been sitting for at least 5 years, I was beginning a project that would take 13 years to complete. Meanwhile, my wife was in the final months of completing a project as well - making Brewster!!. Both projects have turned out fantastic and I now get to see and enjoy both of them!!
Kaygee, I had a goal in mind when I started this restoration. To be able to take the car to the 60th Anniversary Meet. Well, now I have a little more time to work out the bugs and tweak the end product. I did slow down for about 5 months back in 2018. We had our kitchen remodeled for our 40th wedding anniversary. You know, happy wife - happy old car restoration. I could not get to my car because my garage was used to store cabinets, lumber and other non 1950 Chevrolet items. Working in a two car garage with two cars in it and no real heating system was a challenge. I'm very happy with the results.
Car is looking great! You sound very patient restoring that much stainless. It's not a hard job but I personally would get all twitchy doing more than a couple pieces.
The two car garage is a challenge. I have 4 sheds and a neighbours garage short term as well as my 2.5 car garage. Even a couple "car tents" in the yard for winter. Winter is annoying as everything gets stuffed into garages and sheds (normal stuff like tables and chairs lol) so work space gets cluttered. I do have heat and backup heat. Now that I have it, I will never have an unheated garage again. A mobile home downflow furnace is more economical to buy, efficient and better quality than garage heaters. It doesn't have to be 70 out there, just 35-40 makes a huge difference on a -20 winter day and then you warm it up an hour before going out.
1938 Canadian Pontiac Business Coupe (aka a 1938 Chevy Coupe with Pontiac shaped front sheet metal - almost all Chevy!) 1975 4-speed L82 Vette
Polishing S/S was actually an enjoyable task. Removing dents and deep scratches - not so much. BUT, I self taught myself because of the cost for a professional to do the work is just too expensive. When I started, the rate for the pro to do a 37" door spear was $1.00 an inch or $37.00. The price went up twice since. First to $1.50 and inch to the current number of $2.00 an inch. My rough calculations tell me that a 1950 Bel Air Hardtop has approximately 1,600 linear inches of S/S, both inside and out to polish. You do the math. That's why I purchased a buff wheel, polishing compounds, buffing wheels, tools and about 35 pounds of sand paper. I didn't know they made a 2000 grit sandpaper until I started doing this. Anyway, with my investment in polishing "stuff", I can afford to put gas in the car and enjoy it. The photo shows some of the grits of sandpaper and dent removing tools I used. If a dent was too deep for sandpaper to remove it, a file had to be used. Then you dig out the 60 and 80 grit paper to remove the file marks.
To straighten and polish all the stainless on my 1950 Convertible cost me $1,500.00. Then I had to purchase almost every mounting clip and mount the stainless myself. Isn't this fun?


![[Linked Image from i.postimg.cc]](https://i.postimg.cc/ygz8rZtk/004.jpg)
![[Linked Image from i.postimg.cc]](https://i.postimg.cc/cgMLqJGT/009.jpg)
![[Linked Image from i.postimg.cc]](https://i.postimg.cc/LJc9nPHN/010.jpg)
![[Linked Image from i.postimg.cc]](https://i.postimg.cc/7fP37S84/022.jpg)
![[Linked Image from i.postimg.cc]](https://i.postimg.cc/GBDGrQYF/023.jpg)
![[Linked Image from i.postimg.cc]](https://i.postimg.cc/4nPtJnKS/026.jpg)
![[Linked Image from i.postimg.cc]](https://i.postimg.cc/kB5SD9KX/027.jpg)

![[Linked Image from i.postimg.cc]](https://i.postimg.cc/bsQbDkFP/006.jpg)
![[Linked Image from i.postimg.cc]](https://i.postimg.cc/4K3hSM44/056.jpg)
![[Linked Image from i.postimg.cc]](https://i.postimg.cc/v1S6FzDr/060.jpg)
![[Linked Image from i.postimg.cc]](https://i.postimg.cc/HrdMQnfy/054.jpg)
![[Linked Image from i.postimg.cc]](https://i.postimg.cc/cKjk5bRb/020.jpg)
![[Linked Image from i.postimg.cc]](https://i.postimg.cc/ZCk26MXL/011.jpg)
![[Linked Image from i.postimg.cc]](https://i.postimg.cc/nM9NjJSz/012.jpg)
![[Linked Image from i.postimg.cc]](https://i.postimg.cc/y3RM0Nty/026.jpg)
![[Linked Image from i.postimg.cc]](https://i.postimg.cc/0Mhg6SWN/008.jpg)
![[Linked Image from i.postimg.cc]](https://i.postimg.cc/Ln7gR0DG/Voltage-Reg-Wires.jpg)
![[Linked Image from i.postimg.cc]](https://i.postimg.cc/ZCmXS409/001.jpg)
![[Linked Image from i.postimg.cc]](https://i.postimg.cc/NLmZS5Gq/003.jpg)
![[Linked Image from i.postimg.cc]](https://i.postimg.cc/q6sY3ZDM/005.jpg)
![[Linked Image from i.ibb.co]](https://i.ibb.co/8c737vT/008.jpg)
![[Linked Image from i.ibb.co]](https://i.ibb.co/sPY9S9S/014.jpg)

![[Linked Image from i.postimg.cc]](https://i.postimg.cc/0MJGFhNf/014.jpg)

![[Linked Image from i.postimg.cc]](https://i.postimg.cc/nXf2tydX/IMG-1937.jpg)
![[Linked Image from i.postimg.cc]](https://i.postimg.cc/0r60KkF6/IMG-1989.jpg)
![[Linked Image from i.postimg.cc]](https://i.postimg.cc/bdKHxXfm/IMG-1991.jpg)
![[Linked Image from i.postimg.cc]](https://i.postimg.cc/wRTvJjT1/005.jpg)
![[Linked Image from i.postimg.cc]](https://i.postimg.cc/zHRCs7Kw/IMG-1992.jpg)
![[Linked Image from i.postimg.cc]](https://i.postimg.cc/ftP7qptT/IMG-1994.jpg)
![[Linked Image from i.postimg.cc]](https://i.postimg.cc/47HHydys/IMG-2018.jpg)
![[Linked Image from i.postimg.cc]](https://i.postimg.cc/k2wbhzL3/IMG-2023.jpg)
![[Linked Image from i.postimg.cc]](https://i.postimg.cc/3ycD3pKt/IMG-2024.jpg)
![[Linked Image from i.postimg.cc]](https://i.postimg.cc/2bxyVZmp/009.jpg)