Coming up on fall/winter and I'm gearing up to begin work on repairing the body panels on my '41 Special Deluxe Sedan. I know there are plenty of you out there who have done either more or less work than I have to do, so I figure asking the experts is better than my usual trial and error methods (but I do end up learning how not to do things).
Looks like I'll need to be welding in new metal on the cowls, outer sections of the floor pans, braces, inner and outer rocker panels, inner metal on center door posts, and small parts of the fenders (small rust holes in each).
The Fisher Sheet Metal Service Manual seems fairly thorough in describing how to repair/replace each of the individual parts, but I'm wondering about the order of how the work should proceed.
I figure working from the inside out: replacing rusted sections of floor pans first and moving out to braces, rocker panels and door posts. Should the cowls be replaced before this or after this, or at some point in between?
Just don't want to get half-way into it and then realize I should have done things in a different order and end up re-doing the work.
Why do I spend more time under my car than in the driver's seat?
I can't remember which 41 you have. Is it a Master Deluxe or Special Deluxe and what is the body style?
I can better advise you on my suggestion after I have this information. That is, as to whether it is worth all the work and expense or not. Maybe there is a reason to be attached to this particular car, too.
OK!! If you have picked up the first tool to begin taking off the first body part in order to repair it, PUT THE TOOL DOWN!! Now, go get your camera - even a phone one will do. Take pictures of everything you plan to touch, and from as many angles as you can. Done that? Now you can take off one piece!. Then take more pictures of the "new" scene you see in front of you. Trust me, you'll think it's a waste of time as you already know what your car looks like. But when you go to reassemble specific pieces ( maybe years from now) you'll be so glad to have those pictures to remind/reeducate you how things go together. Good luck!! Oh! Another thought! If you have little children or lively pets around, make sure that all the wee pieces you take off (clips, nuts, bolts etc) that you plan to reuse are a) put into baggies and labelled properly, b) stored where the previously mentioned cannot find them, c) stored where you'll remember where to find them. Guess how I learned about doing all of the above! Brewster knows!
I completed a frame off restoration about 2 years ago. I took a lot of pictures and also videotaped with narration the work I did. I ended up with 47 one hour videos. As Keegee points out you never can have enough documentation (pictures,video). I did my cowls last, but in hindsight probably should have done them first. Floor pans, rocker panels, require a lot of bracing to maintain the integrity of the door openings. Don't remove a door or doors without bracing the firewall and door openings and before removing any body mount bolts. You will have to remove the doors and front fenders to do cowl work but the door pillars will keep everything stiff enough to replace a cowl. I would do the cowls first because it will give you a feel for how much massaging of the replacement cowl, and even the front of the rocker panel area that might need replacement. Do only one side at a time and remove only one door at a time. Any work dealing with door removal or reinstallation is major work especially realigning a door you have removed. After replacing the cowl rehang the door to check the fit and alignment of the door and new cowl. My cowl stuck out at least 1/8 of an inch farther than my door. So I cut out 1/8th of an inch in the seam of the door, pushed the cowl in and then had the seam rewelded. I didn't do any of the welding but did do all the prefitting and finish work (grinding, leading, bondo work). Likewise, the fit of the fender can be a problem. If you can replace both cowls without stressing out then work on the rocker panels and floor. If you need to do trunk work I would even do that before cowls, to see your tolerance for body work.
If you want to talk at any time send me a PM and I will give you my phone number. A lot of time and patience does into body work. You also should remember that all your mechanical work should precede extensive body work. You don't want to mess up a nice paint job by pulling an engine afterwards.
I have a driver's side NOS cowl that I have had for sale on the chat site. It will save you 20 or more hours verses installing an aftermarket cowl. I just BUMPED it up to the top of the PARTS FOR SALE FORUM.
Good luck, Mike
Here is an old post I did showing the work on one one of my cowls.
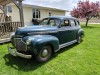
Thanks, everyone! Charlie, it's a '41 Special Deluxe sedan - the one in my avatar picture. She's mechanically sound now except I'm waiting on a new water pump.
Yep, I plan to take it slow, one piece at a time, with lots of pictures. Taking Denny's advice and my neighbor's - no frame-off restoration as I don't want it sitting in pieces for years. I want to start on one side first and replace what I can over the fall/winter and have it in derivable condition again by spring/summer. Then I can driver her around during the summer and continue the body work next fall/winter.
One trick I learned way back when, when I had to remove a hood, was to scratch all around the edges of the hinges - made positioning them again much easier and required a lot less tweaking to realign it. I think I did the same on a door once, too.
Mike, I'll check out your cowl, though I'm going to start on the passenger side first. Will have to look around for a NOS passenger side cowl. Have the outer rocker panels thanks to Denny. Have inner rocker panels coming. Just have to acquire the cowls, braces, and floor panel metal.
It will take some work and patience. Besides the lower part of the cowls, the rocker panels and braces need entirely replaced. The floor panels are rusted out to only about six inches in. Luckily, the firewall is fine and the fenders are good except for a quarter-size rust hole in each. The trunk is good. The door pillars are good but need a little new metal on the inside.
So, after the cowl on the passenger side, figure I can work back toward the rear from inside out, replacing what I need on the floor panels and braces, and then the pillars and rocker panels.
Why do I spend more time under my car than in the driver's seat?
I'm not restoring her to any kind of show condition. I just want a good, solid old car I can work on and cruise around in once in a while. But it would be nice if I could step on the rocker panels without my feet going through to the street. That's the only reason I'm working on the body.
I don't plan on selling it so I'm not worried about the investment. It doesn't really have any sentimental value other than I found it for sale on my birthday while I was looking online for a car for my daughter. It was in my favorite color, the price was right, and it was stored just 7 miles away.
As my daughter said at the time, "Well, I guess it's meant to be yours."
Why do I spend more time under my car than in the driver's seat?
As to the doing the work on it, I think you have been given good advice so far. Some important thing that have already been mentioned:
a. Getting some good quality plastic bags, putting the nuts, bolts, screws and washers in them with labeling as to from where they came is really a good idea and a time saver.
b. Buying new panels, if needed, that fit properly.
c. If you can get the rust sand blasted. This will help you weld in the panels, etc, and show the extent of the damage. Only thing is, sand blasting can destroy good metal that may not need to be replaced. Others here know and can give you better advice on the medium used, etc.
d. Get new body pads.
e. Use a bench grinder with a wire brush wheel to clean up the bolts, washers and nuts.
f. Start with the rockers and floor pan and door posts.
g. For the bottoms of the doors the replacement ones don't fit too well. At least that was my experience with the ones I bought. Ditto on the floor pans.
h. As to the start and first thing to do would be to pull the whole drive train (DT). That will give better access and enable the clean-up and painting of the DT.
Mike just finished a Town Sedan and I would surely follow his guidance on doing yours.
Kaygee's advice on the camera is an excellent suggestion. I'd follow that too.
I have replaced these body panels on four different bodies, two 41 coupes, a convertible, and a station wagon which is the same as a 4 dr. sedan. While GM parts would have been nice, I was only able to find NOS outer rocker panels for the station wagon. In lieu of NOS, EMS replacement panels are the best available but will require some massaging to fit. As Charlie mentioned, door bottom repair panels really need massaging much more than the other panels. In all cases, I left the body bolted to the frame during the replacement process and only removed it after the majority of the welding was complete. I found that the roof on the closed bodies prevented any undesired movement in the geometry of the front and rear body sections and didn’t brace the door openings. The convertible body on the other hand was more flexible and the temporary door bracing had to be adjustable to restore the openings to their correct dimensions during the repair process. Once welded however, I had the convertible body on a rotisserie without the supplemental bracing.
To answer the “order of work” question, here are my recommendations at a high level:
… Buy a set of cleco sheet metal fasteners which will allow you to hold the various panels in place during the initial fitting with a simple 1/8” hole. Instead of clecos, pop rivets will probably need be to used on top of the rocker panels while test fitting doors for the lower door gap. A spot weld removal tool is very handy to separate original body panels during the fitting process. For example, the floor braces are easily replaced from the top if the floor panels can be cut back far enough to expose good metal on the brace. To cut the floor back far enough, you’ll have to remove a few spot welds between the brace and the floor. There are also lap joints in the existing floor pans that replacement panels can be tied in to.
… The EMS rocker panel assembly is actually three separate pieces so you’ll need to assemble one using clecos. As mentioned, pop rivets are more suitable for the top.
… It made no difference to me whether I started with the cowl repair panel or the rear quarter repair panel as long as I could align them to existing sheet metal. With these panels temporarily in place, you’ll now have front and rear targets for the rocker panel assembly to be aligned to.
… Once the rocker assemblies are temporarily in place, you can fit the replacement braces. With the old floor pan out of the way and the old brace exposed, it’s fairly easy to drill the body mounting hole in the replacement brace, shorten or lengthen it to fit the new rocker panel and hold it in place with a new body mounting bolt. Use body shims and a new mounting pad so that one end can be fastened to the inner rocker panel with clecos and the other end has a tight gap for welding. Also make sure it is positioned high enough so the new floor can be welded to it.
… The door will need to go on and off more than once to assure the rocker to door bottom gap and other alignment is suitable. Once you have a good door fit, the replacement floor pans can be trimmed to fill in all sections that were removed. Take note of where there are existing lap joints in the floor pans because these are good places to join old and new panels.
… General--- I butt weld panels and finish both sides to replicate the factory look in most cases. Where panels were originally spot welded such as the existing lap joints in the floor pans or brace, I remove one cleco at a time, enlarge the hole in the most accessible surface and plug weld the two together.
… Put tools down, have an adult beverage, admire progress, start again tomorrow..
As Mike said, PM me and I’ll also give you my phone number to talk. I also have many pictures. Attached is a picture of the convertible body on the rotisserie. I blast after repair. The more silver sections are where metal was replaced.
This is really helpful. Going to cut and paste it into a doc on my '41 Chevy folder.
I wish I had a rotisserie and all the other cool tools, like a hydraulic life, etc. But I'm working out of a two-car garage, hence why I'm forced to do only one side at a time - not enough space on the other side. Once I get to the other side, I'll have to back the car in.
Why do I spend more time under my car than in the driver's seat?