I have a '25 Superior K that has a '28 engine in it. The driveshaft was disconnected when I purchased the car about 5 years ago. I'm trying to get it reconnected but I'm not having any luck. So I have a few questions.
Will the original drive shaft connect to the transmission with the '28 engine attached without pulling the engine forward? I've been told that it should but I'm having no luck doing it.
Should the drive shaft be disconnected on the rear end side first? If so, how do you disconnect it?
I know the "bell" will slide back, but when I slide it back as far as it will go I'm still short of enough space to reconnect.
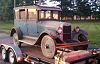
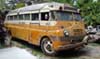
I've attached some pics of my dilemma. I have no knowledge at all with any of this, so anything is a help at this point.
Jeff
1925 Superior K 4 Dr Sedan 1966 C10 2003 Silverado 1500 HD
. Remove the 4 bolts and separate the U-joint. First, Place some bailing wire behind the portion of U-joint attached to the trans to hold it in place. Slide the rear half of the U-joint yoke on the propeller shaft. Align with front half of U-joint. Bolt U-joint together. Remove bailing wire. Slide bell back in trans and bolt in place. If you forgot the Bell gasket, split it at top and use gasket cement. Good luck, Lou . .
Thanks Lou, I'm ashamed to say just how long I've struggled with this. I wish I had had your directions a long time ago. I did not know that you had to separate the U-joint first, my lack of mechanical knowledge. I did not have a gasket readily available and truthfully I wasn't sure that this would have been so easy, I'll do as you mention though and split it at the top instead of taking it back off. Thanks again.
Jeff
1925 Superior K 4 Dr Sedan 1966 C10 2003 Silverado 1500 HD
Another trick is to move your jack stands at the back of the car to support the chassis, not the rear end.
This allows the rear end to hang lower and will give you more separation space at the u-joint.
If you have trouble getting the u-joint back together, a tool will help you hold the ring in place that has the studs in it, so that you can put the nuts on the studs. Here's a thread that talks about a couple of homemade tools that do the job: Homemade u-joint tools
;-) Dean
Last edited by Rustoholic; 07/23/2206:19 PM. Reason: added info
Dean 'Rustoholic' Meltz old and ugly is beautiful!
Without the tool for the ujoint I have found it easier and quicker on my 32 to disconnect the brake linkage and shocks and springs and slide the rear back. Then align the driveshaft and slide the rear back in place and reconnect the brake and spring/shock hardware. Whatever method you choose I suggest you first clean up the ball .
Last edited by m006840; 07/23/2208:39 PM. Reason: Fat fingers
Here are a couple of pics, if you notice the bolt that I'm pointing to, I believe there should be another one just like this on the other side, is that correct? If so, I'm missing it, does anyone know where I might get one?
Jeff
1925 Superior K 4 Dr Sedan 1966 C10 2003 Silverado 1500 HD
OK, great, so the other side probably won't have anything connected to it then because I don't have a working speedometer at the moment. Thanks Chipper!!
Jeff
1925 Superior K 4 Dr Sedan 1966 C10 2003 Silverado 1500 HD
Hey Lou, it was great meeting you to. So I guess you made it back home, was it an uneventful drive?
I haven't quite got it running yet, waiting on some 600 wt oil to show up at my doorstep. I've drained what was in the differential and cleaned it out with kerosene, just waiting to refill it, my u-joint, transmission and gear box. I've still got to fabricate some linkage to run from my column over to the distributor and the carb
Jeff
1925 Superior K 4 Dr Sedan 1966 C10 2003 Silverado 1500 HD
Well, I make some progress and then get slowed down by something I can't quite figure out. I put 600w in my U-joint and found out rather quickly that I hadn't yet put my speedometer cable on, then when I tried to put it on I found that I was missing the adapter that screws into the transmission and the cable connects to. I was able to obtain the adaptor and I put it on, then I noticed that the cap that covers the other side has the rod sticking out to far so the cap will not go on. Question is, where did I screw up and how can I fix this?
The images below show the just below the U-joint where the speedo gear is, it shows it both without the cap and one with the cap showing the distance I need to make up to get it to screw in
Jeff
1925 Superior K 4 Dr Sedan 1966 C10 2003 Silverado 1500 HD
The speedometer drive shaft fits into the end cap quite snugly. In fact, the hole in the cap is a bearing surface that supports that end of the speedometer drive shaft.
If the cap has too much oil in the hole when the shaft attempts to go in, the oil could provide a hydraulic resistance that prevents the shaft from going all the way into the cap. Thus, preventing the cap from tightening all the way down. This might be the case with a very thick oil like the Mobil 600W.
So, try with only a super tiny amount of oil smeared on the end of the shaft and no extra oil in the end cap hole.
Hope this helps. Dean
Dean 'Rustoholic' Meltz old and ugly is beautiful!
Perhaps the "pencil gear" has gone past the drive gear. Remove all three parts and then install the end cap first-then the gear and finally the gear retainer. As noted above the end cap needs to be void of gear lube. When installing the gear you may have to turn the output yoke slightly to allow the gears to mesh.
. Hi Jeff, I am assuming that these are the parts you removed that were working?? If you are using recently sourced parts, the gears must match. . . The pictures below show the speedo gears and U-joints. I believe they are from a 1927 & 28 car and truck. The speedo comes out the right side of the rear bearing retainer. It has a hole in the shaft with a slot or square drive for the speedo cable. The gears must be matched and aligned with the gears on the U-joint which is difficult after you have the torque tube connected. . . Lou .
It is interesting that the 'pencil' drive gear is positioned to the side towards where the speedo cable connect, instead of in the middle of the space. This positioning supports Steve's comment about the pencil drive gear going too far, thus sticking out the other end and preventing the cap from going on.
Dean
Dean 'Rustoholic' Meltz old and ugly is beautiful!
Guys, I was able to actually remove the pencil drive gear, I'm guessing I should not have been able to do that. It looks like the U-Joint may be coming back apart
Jeff
1925 Superior K 4 Dr Sedan 1966 C10 2003 Silverado 1500 HD
Hey guys, me again, just getting back to this after a couple of hectic weeks. I'm trying to align the speedo gear with the driveshaft gear. I must be doing something wrong because when I get it in and I turn the speedo gear with a screwdriver it forces the driveshaft back. Is there a trick to getting it aligned correctly? If there is anyone that has done this and in the know, I would love to have a phone conversation with you while I attempt to do this, you can PM me and I'll give you my number. Thanks
Jeff
1925 Superior K 4 Dr Sedan 1966 C10 2003 Silverado 1500 HD