I have been making a document of ongoing progress since we started this project. I will start posting the progress in a single thread to avoid having to many individual ones.
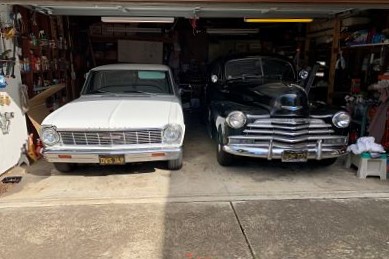
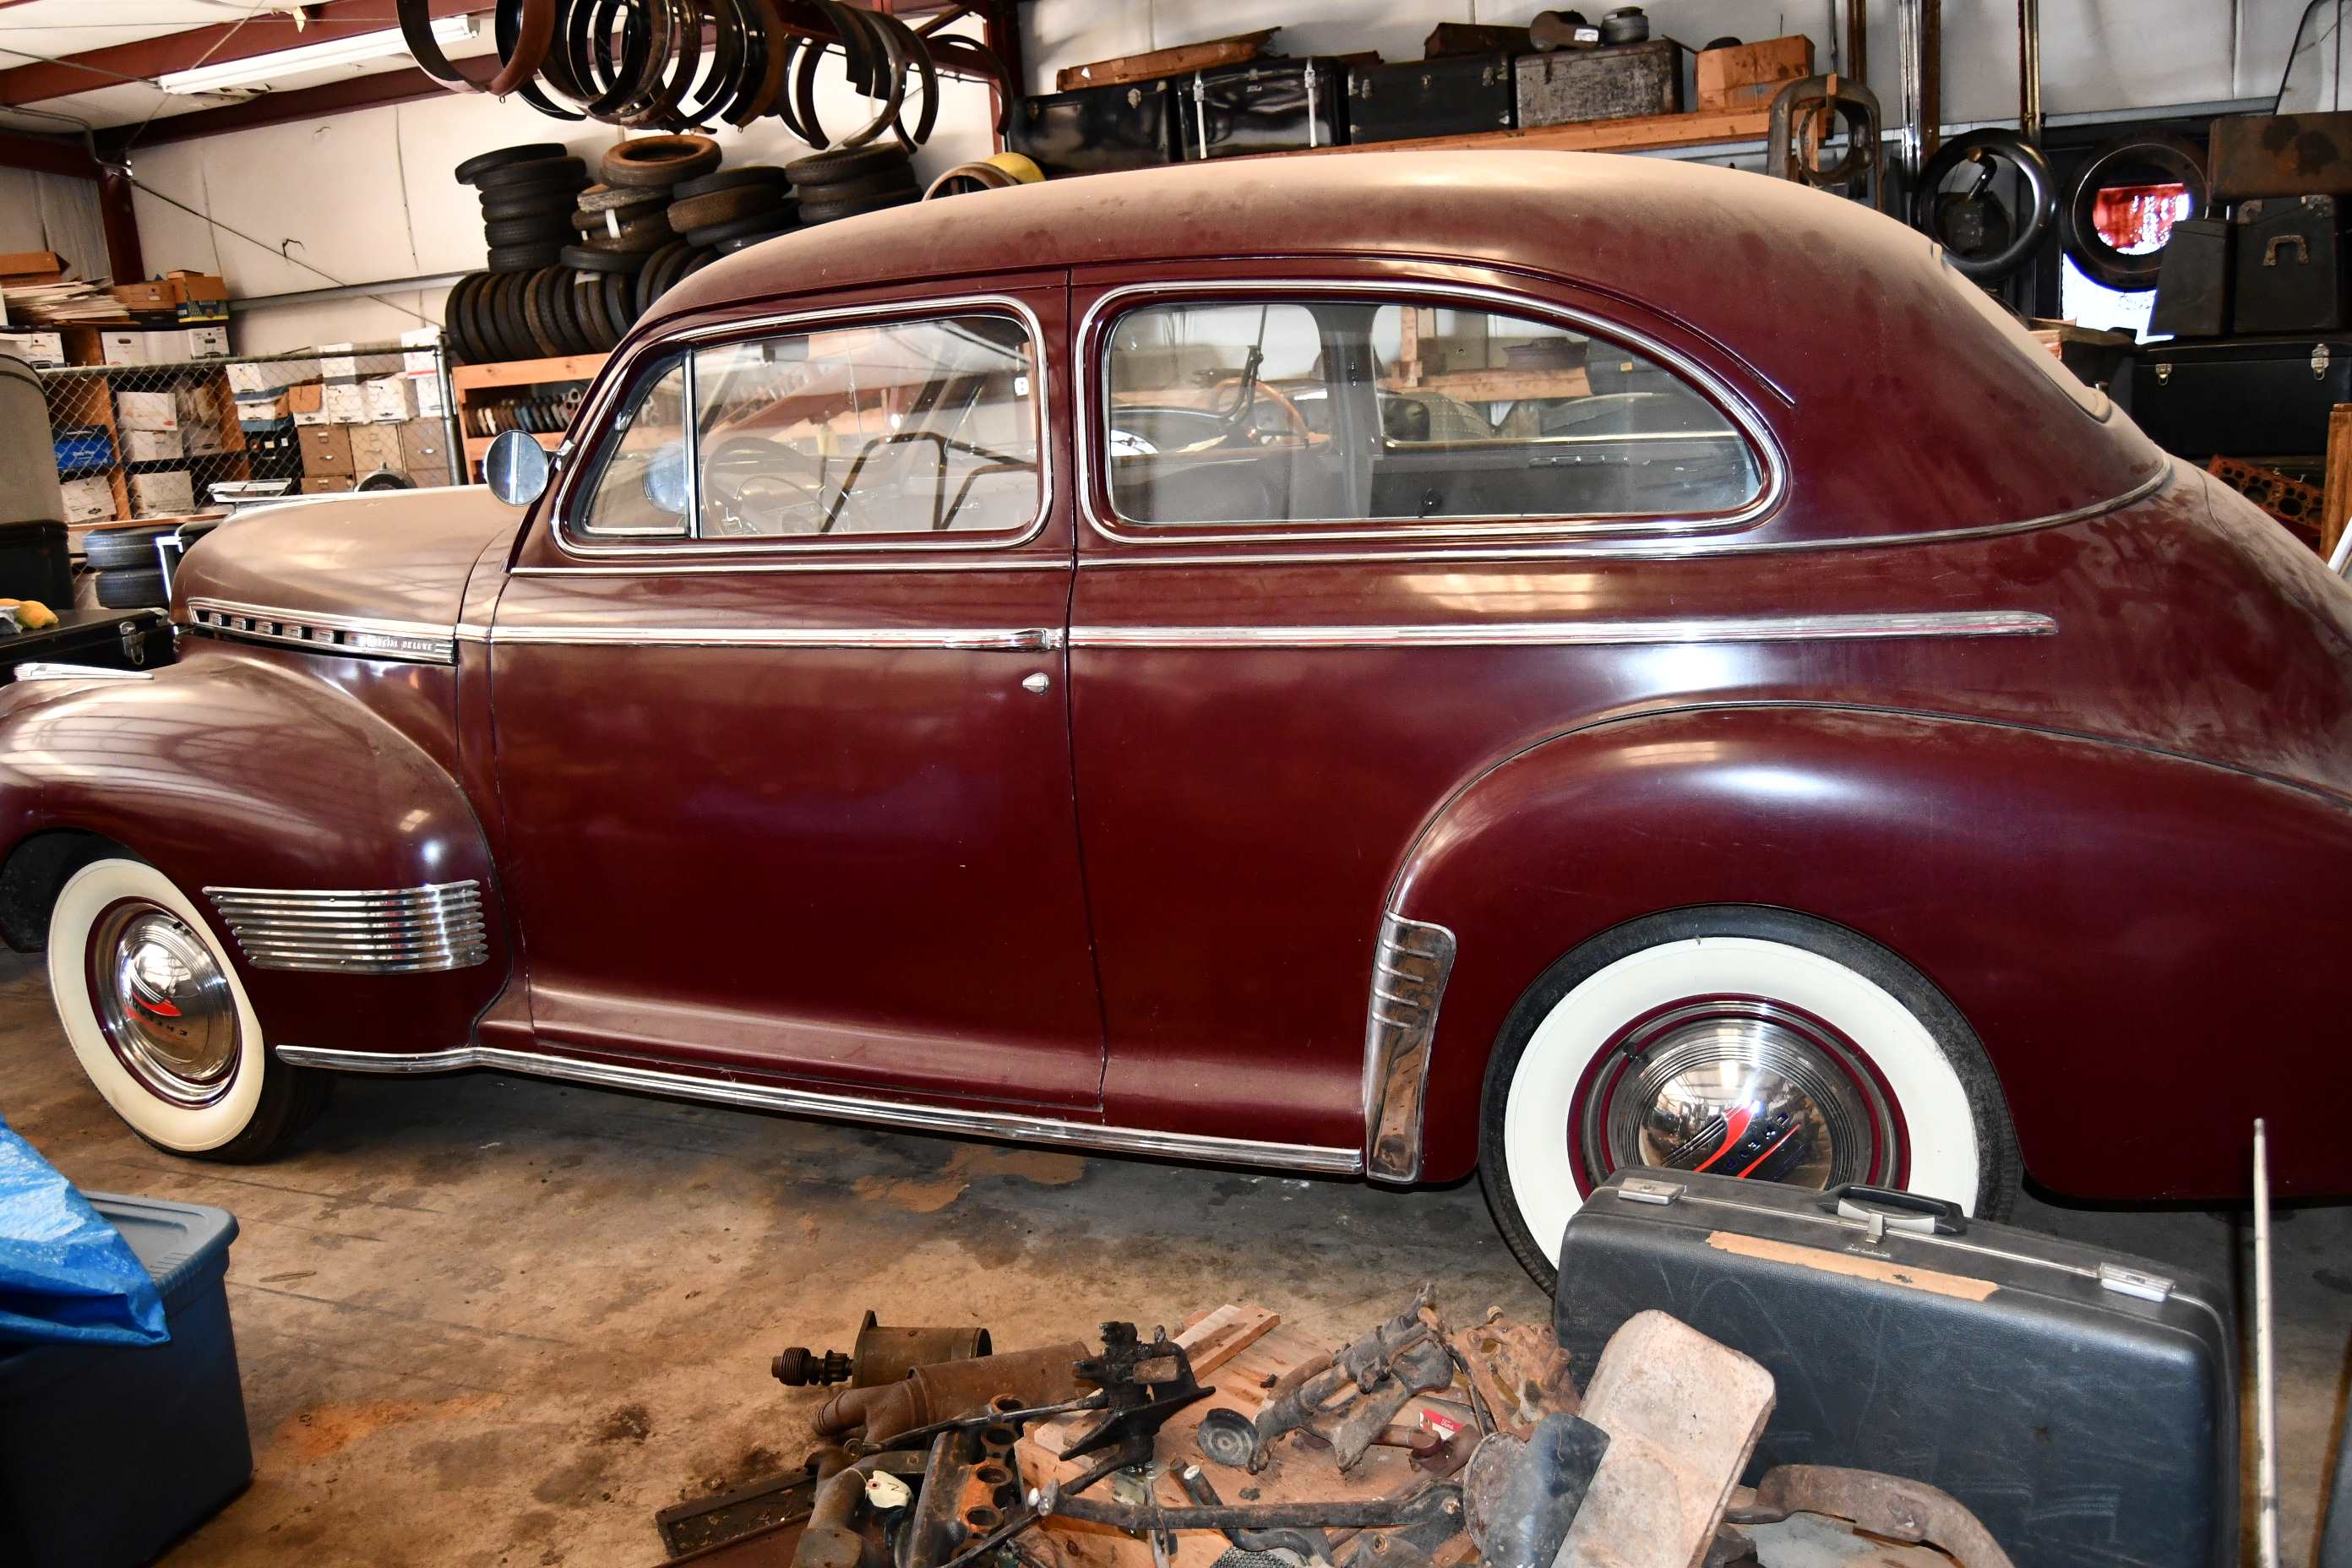
June 2018 1941 Chevrolet Master Deluxe delivered. Goal of this is to be a father son project. I have done basic mechanic work and minor paint work prior to this but nothing to this extent or scale. This is not planned to be a restoration to a show car or to ‘of the assembly line’ condition. It is designed to go to local drive ins and get ice cream. It is going to be a for fun car. Many of the choices will be left to my sons, they may not be period correct. This is a combined experience.
One of the first things done after a good car wash, was buying reprints of all the literature and service manuals for the car. Also lots of You Tube videos have been and continue to be watched as needed. Also joined the VCCA as a great source of information. Before purchasing this car I was already a member on gbodyforum.com. That is a great source of information that I have used for my Monte Carlo. This site also has several members willing to help on any topic they can.
The car came with lots of parts and was mostly complete. Good condition for the age. Last known registration based on the sticker on the window was 1969 in Missouri. Did not run when purchased. New battery, changed fluids cleaned points and it started.
Drove it about 2 miles to verify all the gears and clutch worked. Ran well considering it was sitting for at least the last seven years, if not more. Brakes worked well too. Was not safe to drive to far since the dry rot in the tires was extensive. One tire the inner tube can be seen through the sidewall. The brands on the tires are manufactures that have not been around since the sixties. The test drive was made to help assess what we were going to need to do.
I have found that having an old car is a constant project that is never done. I think that is a good thing. Keeps me learning new things. Having two from different eras is just a form of higher education.
June 2019: After a year the parts that came with the car were sorted through, fenders, trim and most exterior parts where stripped from the car. My sons and I had started the long process of sanding old paint, pulling dents, hammering out dents etc. Got the truck and doors to open and close and line up. Since the fenders where off the car topped off the shocks with fluid. The car now rebounded smoothly instead of constantly bouncing. Found that the car has been hit in the rear corner. Allot of hammering and pulling eventually put stuff back where it should have been. Small amounts of filler were still needed but nothing major, definitely nothing deep. Would rather have a minor impression than a thick amount of filler. Various colors are a mix of filler and skim coat. Sanded smooth. Shot some prime on it to keep it from rusting. We decided to work panel by panel and then tackle the car body. Logic was we were learning and it was easier to redo a panel than the complete car. Also constantly sanding was getting real old fast. Getting some primer in place was a nice break and made it feel like there was progress. Down to bare metal on the rear corners. With the exception of below the right rear taillight it was pretty good. We used a combination of chemical stripper and orbital sanders. The kids never used the chemicals. We used mask the whole time. Ventilators with the chemical stripper.
I have found that having an old car is a constant project that is never done. I think that is a good thing. Keeps me learning new things. Having two from different eras is just a form of higher education.
July 2019 Working on the rear driver’s side now. Also continued removing, bagging and tagging parts as we went. The parts were starting to consume all available storage space on any shelf we had. Several boxes of parts everywhere.
I have found that having an old car is a constant project that is never done. I think that is a good thing. Keeps me learning new things. Having two from different eras is just a form of higher education.
September 2019 Roof and doors in primer. Trunk was shot with primer from a can. Since there was no filler in the rear corners hit that with etching primer also from a can. Was still searching for a compressor so the gun was not usable. NAPA carries the paint we were going to use in both a spray can and for a spray gun. Then we found a 33 gallon Craftsman compressor on Craigslist. With a Harbor Freight gun put the initial coat on the roof and doors. We were still learning and the thought was if we damaged the HF gun then it was basically disposable. It actually turned out to be a good primer gun. Shot an even coat on the car. Then we sanded again. Son’s first time using the spray gun, primed the doors.
I have found that having an old car is a constant project that is never done. I think that is a good thing. Keeps me learning new things. Having two from different eras is just a form of higher education.
January 2020 Removed the hood and all of the inner fenders. No plastic parts here. Everything is bolted together. The firewall is the original paint. Car was originally black. Unfortunately as first time painters we were not skilled enough to attempt a painting black. At this point since it was winter we hung a tarp to divide part of the garage into a paint booth. Primed and painted the inner panels at the end of work sessions so the fumes could clear before we did any more work. The garage heater we installed the prior year was proving to be a good investment.
I have found that having an old car is a constant project that is never done. I think that is a good thing. Keeps me learning new things. Having two from different eras is just a form of higher education.
August 2020 Over the winter did allot of body work on the front fenders also allot of sanding on the car to get it ready for the next coat. Primed the fenders and other parts during the spring using the spay gun. Prepping the car for an even coat of primer Next week was supposed to be favorable weather. I had to paint outside do the height of my ceiling in the garage. Next day Everything primed. More sanding followed. Sons and I agreed to make the car blue. Set everything up in the driveway and painted every panel. The weather turned out to be perfect. Started at sun up and had enough time to get the job completed. Gun held enough paint to do a coat on the car or on all the panels. Had enough time to shoot the panels fill the gun, paint the car and refill before it was time to start on the panels again. Was a nice pace and there was no downtime waiting for the next coat. We used thin coats as recommended. I forget the time between coats but was surprised that it was not that long.
I have found that having an old car is a constant project that is never done. I think that is a good thing. Keeps me learning new things. Having two from different eras is just a form of higher education.
End of August, beginning of September 2020 We decided that since the front clip was off now was a good time to run the engine and see what might be needed. Once again changed all of the fluids. This time changed the plugs and wires and the belt. It fired right up and to our surprise we found no leaks and everything seemed to go smoothly. Plans where to change the hoses when they came in. Let it cool and started it again. See if the heating and cooling would cause anything to leak, nothing. Next morning I had a green garage floor. Water pump gasket went. To my surprise NAPA carries this water pump still. Though at that age replace it too. GM used the same one up till they discontinued the 235 inline 6. Few bolts removed the radiator to get at it easier and changed it out. Hooked everything back up. Son starts up the car and everything seems ok. Then the heater core goes in the car. We unhooked that it was running fine.
I have found that having an old car is a constant project that is never done. I think that is a good thing. Keeps me learning new things. Having two from different eras is just a form of higher education.
September 2020 Rear fenders on. Wind shield and inner fenders on. First of the front fenders mounted. Front clip on, later we would learn the grill should have gone in before any fender bolts where tightened. One of many lessons on the job.
I have found that having an old car is a constant project that is never done. I think that is a good thing. Keeps me learning new things. Having two from different eras is just a form of higher education.
October 2020 Prepped to install rear glass. Pic is the before. All the glass in the car with the exception of the windshield is the original to the best of our knowledge. If it is not original it is period per the marks on it. Windshield was cracked and could not be reused.
I have found that having an old car is a constant project that is never done. I think that is a good thing. Keeps me learning new things. Having two from different eras is just a form of higher education.
November 2020 Rear bumper on, first time. Unfortunately the bumpers we had where not in the best shape. The rear one was straight but rusted and pitted. Front, pitted and rusted to a greater extent. Original plan was to mount it and see what we thought. If nothing else all of the brackets and the rear bumper shelf would now be in place. Turned out the front was so bad it had to be painted. We took the rear off again and painted it so the bumpers matched. Budget did not allow for us to replace these. During the next month installed the rear tail lights and made the wiring harness for that. Plan to install blinkers so I had to get different sockets. Also installed the license plate bracket and light at that time.
I have found that having an old car is a constant project that is never done. I think that is a good thing. Keeps me learning new things. Having two from different eras is just a form of higher education.
March 2021 Lots of polishing fitting and adjusting took place to get to this next step. Also, hunting for little bits like trim clips etc. Online there is a place called the Filing Station that I have found to be extremely useful in finding parts. Started to the smaller parts back on the car. All the door latches had to be reinstalled, door handles installed, trunk latch rebuilt from two damaged ones. The stainless was put on during this time. Also mounted a new exhaust. Amazingly a Toyota muffler fit the car. Youngest son did all of the inside bolts since he could sit up between the grill and radiator. Used the jack allot to align the fenders as we bolted them together.
I have found that having an old car is a constant project that is never done. I think that is a good thing. Keeps me learning new things. Having two from different eras is just a form of higher education.
April 2021 Final window is in. This was done piece by piece around th car as we had time after painting the car. Some windows were delayed waiting for parts to arrive.
I have found that having an old car is a constant project that is never done. I think that is a good thing. Keeps me learning new things. Having two from different eras is just a form of higher education.
November 2021 Between March and now the bumper has been mounted, wiring for the headlights and a lot of little misc. work has been done. Unfortunately the bumper is bent. Good news is it was easy to line up since the bracket for the bumper was also bent to match.
I have found that having an old car is a constant project that is never done. I think that is a good thing. Keeps me learning new things. Having two from different eras is just a form of higher education.
December 2021 Test fitted the seats. Took a break from wiring to do something different for a while. Took the seats from a 1999 Ford Windstar. The rear one in the Windstar was the width needed for the front of the car and the middle bench from the Windstar fits in the rear of the car. We have the original seats but it is not in the budget at this time to get them reupholstered. These were $100 for the pair. We made brackets for them using angle iron. If we get the originals reupholstered in the future its just a few bolts to change them out.
I have found that having an old car is a constant project that is never done. I think that is a good thing. Keeps me learning new things. Having two from different eras is just a form of higher education.
January 2022 Fog lights mounted. Still waiting to get a 6v incandescent sealed beam light. All the other parts are reedy to for the passenger side light. Story of the car. Work on a section till you need to order a part then work on another. At this point we are mounting any part we can to get space back in the garage.
I have found that having an old car is a constant project that is never done. I think that is a good thing. Keeps me learning new things. Having two from different eras is just a form of higher education.
February 2022 Seats are in and seatbelts are now bolted in place.
Last edited by Mr87Monty; 02/15/2203:02 PM.
I have found that having an old car is a constant project that is never done. I think that is a good thing. Keeps me learning new things. Having two from different eras is just a form of higher education.
Items to get this on the road: - Finish wiring. Most of what is in the dash is the original cloth. Much of the insolation is gone. Wires need to be run to the rear of the car for the taillights to connect to. Fog lights need a harness. - Clean all the switches. If we are going to rewire everything each switch is getting a good cleaning - Driver’s front break keeps locking up after sitting. May need adjustment. All others are fine. Shoes have lots of meat left and surprisingly all the parts look recent. - Fuel ling needs to be connected. If it is not in good shape it needs to be replaced - Panels given the final alignment - Sticking gas pedal, I think it needs the return spring replaced - Tires changed. I have a road worthy set but not putting them on the car till it is ready to run - Get ice cream. Kids were promised that we are going to get ice cream when there are plates on it and it legally can drive down the road.
When that is done we will start the list of interior items. Seats are what’s needed to go down the road. At this point it will be nice to have a drivable car. As with any old car the vehicle is never done.
More to come…..
I have found that having an old car is a constant project that is never done. I think that is a good thing. Keeps me learning new things. Having two from different eras is just a form of higher education.
WOW what a story. Glad to see you and the boys are seeing the project toward completion. They will remember this for the rest of their lives. Keep it up !!
The order for the body clips and the headlights came in. The Filling Station had NOS headlights. Wagner made in Newark, NJ. Both boys where surprised to see they where US made and made in the NE. Made me think of how rare it really is to see a made in USA label that is not followed by 'from foreign materials'.
I have found that having an old car is a constant project that is never done. I think that is a good thing. Keeps me learning new things. Having two from different eras is just a form of higher education.
Headlights are in and finished the harnesses for them. Unfortunately the old wires cannot be removed from the dimmer switch. The screws are just to rusted. Removed it from the car and waiting for a new one to come from the Filling Station. Also ordered a headlight switch while I was at it. The dimmer for the gauges only works in one spot. When I initially tested it I thought the gauge must be on or off for the light, then I thought why would it turn so far past on if it was not a dimmer.
Currently we are only removing a few wires at a time so we do not forget something. I know it will take longer this way but it is working so far.
I have found that having an old car is a constant project that is never done. I think that is a good thing. Keeps me learning new things. Having two from different eras is just a form of higher education.
Time to update this thread. A few parts I may have placed elsewhere on the forum but I thought I should make this thread complete.
Fixed the sticking throttle and brake. put the floor plate back in and it should be ready for a test run shortly.
Took the 41 on the road for a 5 mile trip. It starts, stops, and shifts without issue. Temps stayed around 180 for the trip per the gauge. All the gauges (not counting the gas gauge as it was running off a jug) appear to work correctly. Headlights are working (tail lights not yet connected). Suspension was smooth and the engine sounded good. Started after about 30 seconds without anything sprayed down the carb. Did smoke a bit for the first 1/8 mile but that cleared up. Hills did not seem to affect it. Stayed at 30 MPH without an issue, did not try anything faster. The body panels were not even making noises.
Pleased for a first true test of three years' work. We were expecting bigger issues or some problems. Did have some coolant coming out the overflow but we suspect that was due to us overfilling it and not knowing how much to add. Biggest issue was we ran out of gas 6 feet from our garage door when putting it away. :)
The mirrors arrived and we have them mounted. Mounted them to the top of the door frame just over the vent window. The driver's side is ok (not great) for driving use. The passenger side is useless for driving use. The passenger side is great for aiming at the back corner of the car. It will be a great help for backing and parking. They did not fit in front of the vent window due to the door gap being too small. I do like the look of them and the boys are happy too.
Also mounted the wipers. They are not functional yet but they do look better than having the big holes in the body.
Tail lights wired and working. Sons fixed the brake light switch on their own. Currently the wires are run to add blinkers in the future but at this point we are aiming to get it on the road. Will probably finish the blinkers when it is off the road for the winter.
I have found that having an old car is a constant project that is never done. I think that is a good thing. Keeps me learning new things. Having two from different eras is just a form of higher education.
My youngest changed the transmission fluid. Easy task. The fill and drain plugs where not over tightened and did not run into any issues. About 3/4 of a quart came out and a quart went back in.
He then dropped the tank to get any slug out. The scope showed it looking ok but needing a clean out. All of the lines etc. are cleaned now and ready to go when the plate is cleaned out.
He has been tasked with the under car items since when he does that we to not have to lift the car up to have room to work.
I have found that having an old car is a constant project that is never done. I think that is a good thing. Keeps me learning new things. Having two from different eras is just a form of higher education.
This is a great thread. Thank you for going to the trouble to post it.
I had the same mirror problem with my 38 when I got it. I attempted to move the drivers door back a bit by bending the hinges off the car, as per manual. One of them snapped in two so that was a big setback. I had room to mount a mirror on the passenger’s side but it took quite a hunt to find one that would come around enough to give me a view.
My 1951 1 Ton is now on the road! My 38 Master 4 Door is also now on the road .
My son took the old ‘for storage’ tire off and put on the good ones. Will keep the old ones so in the winter the good ones do not get flat sided.
Looks like it is going to be safer for us to replace the tank. Cleaned it out with vinegar etc. and now there is a lot of loose sludge. Last thing we want is issues with rust in the fuel system. The sending unit is shot anyways and I wanted to replace the straps since I have to drop the tank to change the sending unit. Will run the car off of a boat tank for the time being.
Washed the car today. What a difference it makes to get the dust from sitting all this time off of it. The car passed the NYS inspection today. Unfortunately the water pump’s main seal let go when I got to the mechanics. Added water and drove home. The water pump has less than 15 miles on it and under an hour or idle time on it. We saw the coolant gushing out from behind the pulley. Will need to change that out.
I have found that having an old car is a constant project that is never done. I think that is a good thing. Keeps me learning new things. Having two from different eras is just a form of higher education.
Looks great ! Regarding the tank issue. Be sure to ask whoever you buy from if the tank has internal baffles to keep the gas from sloshing around which drives the gas gage crazy (also the driver). I made that mistake & got one with no baffles.
Looks great ! Regarding the tank issue. Be sure to ask whoever you buy from if the tank has internal baffles to keep the gas from sloshing around which drives the gas gage crazy (also the driver). I made that mistake & got one with no baffles.
Dick
I ordered one from Chevs of The 40s. They had one that works with fuel injection or carburetors cheaper than the original. It includes all of the straps, seals etc. needed to mount in. Other bonus was they discounted the sending unit for me with this tank.
I have found that having an old car is a constant project that is never done. I think that is a good thing. Keeps me learning new things. Having two from different eras is just a form of higher education.
Took the car out to a few events in the last couple weeks. Each time went well.
Developed an issue starting when hot and stalling at idle. Found that the coil had a crack in the porcelain on the bottom and it was weeping fluid. I had never seen one made like the one on the car. The wire to the coil came out of the bottom and the + and - were on the top. It had porcelain on the bottom like a spark plug has on top. Car was last on the road in 69 from what we have been able to find so this coil may be really old. Also the resistance on the secondary was out of spec. Replaced the coil with a new one and the car starts and runs better than it ever has.
We mounted the new gas tank. Also connected the fuel gauge. It appears to be accurate but time will tell. Took us a while to figure out how best to mount the tank but it is now in. The poly tank fits tight but it fits. Issue we had was that this new tank requires a vent and the old one did not. We had to find a way to run a line for the vent and have it higher than the tank. Also had to ground this tank unlike the old one. Good side is that it has baffles in it and that it will not rust.
Seals around the u joint on the torque tube are leaking a lot. Was hoping to make it through the season just topping it off. Unfortunately each drive accelerates the leak. Having to refill the transmission after each drive. And we are not going more than 15 miles in a trip. This is the next item to be fixed.
I have found that having an old car is a constant project that is never done. I think that is a good thing. Keeps me learning new things. Having two from different eras is just a form of higher education.
I posted updates in the wrong thread. Will catch this one up and then add todays updates
Looks like I have been falling behind on the updates to this post. Been keeping a book on to track the progress for my records since the start. Will post from that to get this up to date.
July 2022
Looks like it is going to be safer for us to replace the tank. Cleaned it out with vinegar etc. and now there is a lot of loose sludge. Last thing we want is issues with rust in the fuel system. The sending unit is shot anyways and I wanted to replace the straps since I have to drop the tank to change the sending unit. Will run the car off of a boat tank for the time being.
Washed the car today. What a difference it makes to get the dust from sitting all this time off of it. The car passed the NYS inspection today. Unfortunately the water pump’s main seal let go when I got to the mechanics. Added water and drove home. The water pump has less than 15 miles on it and under an hour or idle time on it. We saw the coolant gushing out from behind the pulley. Will need to change that out.
Took the car out to a few events in the last couple weeks. Each time went well.
Developed an issue starting when hot and stalling at idle. Found that the coil had a crack in the porcelain on the bottom and it was weeping fluid. I had never seen one made like the one on this car. The wire to the coil came out of the bottom and the + and - were on the top. It had porcelain on the bottom like a spark plug has on top. Car was last on the road in 69 from what we have been able to find so this coil may be really old. Also the resistance on the secondary was out of spec. Replaced the coil with a new one and the car starts and runs better than it ever has.
We mounted the new gas tank. Also connected the fuel gauge. It appears to be accurate but time will tell. Took us a while to figure out how best to mount the tank but it is now in. The poly tank fits tight but it fits. Issue we had was that this new tank requires a vent and the old one did not. We had to find a way to run a line for the vent and have it higher than the tank. Also had to ground this tank unlike the old one. Good side is that it has baffles in it and that it will not rust.
Seals around the u joint on the torque tube are leaking a lot. Was hoping to make it through the season just topping it off. Unfortunately each drive accelerates the leak. Having to refill the transmission after each drive. And we are not going more than 15 miles in a trip. This is the next item to be fixed.
I have found that having an old car is a constant project that is never done. I think that is a good thing. Keeps me learning new things. Having two from different eras is just a form of higher education.
Losing fluid too quickly out of the seals on the torque tube to safely drive the car without risking damage. Time to replace the seals on the torque tube. Have to take the end off where it meets the transmission to get at the seals.
Though this would be a 1 afternoon job, we were wrong on that. Took the seat out to have more room to work. Took the top two bolts out of the collar holding the torque tube ball on. My son under the car then stated that there was only one bolt. It appears the prior owner broke a bolt off in the transmission and tightened the remaining three and called it a day. Spent the next 1.5 hours teaching my son to drill out the bolt. He learned a new skill and lots of patients. Finally have everything disassembled and cleaned up.
Torque tube is back together. My youngest did all of the work. I only checked that the bolts were tight and watched that things went together properly. Good learning experience for him. It did not leak overnight but we have not driven the car yet either.
The parking brake has not been connected since we received the car. Since we have the transmission tunnel cover is off and the seat is out we are going to do this next. Able to access the linkage from the top and bottom. Found a NOS rod to connect the bar under where the u-joint to the front of the linkage.
I have found that having an old car is a constant project that is never done. I think that is a good thing. Keeps me learning new things. Having two from different eras is just a form of higher education.
The part we ordered for the parking brake linkage was the incorrect part. We decided to put the transmission cover back on, install the carpet and reinstall the seat. We do not want to lose any more drive time this year. The parking brake will need to be done later from underneath. Carpet we used my oldest son saw on sale at Runnings for $24.99. The piece may not be car carpet but it worked out well. We decided to install it in two sections so that if we needed to get at the transmission we could remove the front section without the need to remove the front seat. Cut holes for all of the pedals so the carpet slips over the top of them. Also placed reproduction rubber covers over the brake and clutch pedals. Placed the starter pedal back on too. This little change made quite a difference to the interior look.
I have found that having an old car is a constant project that is never done. I think that is a good thing. Keeps me learning new things. Having two from different eras is just a form of higher education.
Back to the parking brake. Thanks to a VCCA member we were able to get the correct linkage to go from under the car to under the hood. My youngest son was able to hook everything up under the car to match the pictures supplied by VCCA members. Unfortunately the linkage does not line up with the part coming from under the hood. Still looking into if the part under the hood is correct or not. This is attached to the frame and was hooked up when we bought it. Due to the parking brake issues to have some success during the day we installed the ashtray in the interior. That was a 100% success. Calling the day 50% successful since the packaging brake, job 1 failed but the ashtray, job 2 passed. We are thinking of adding a small job each time something does not work so we can point to that little thing and say progress was made, something is completed.
I have found that having an old car is a constant project that is never done. I think that is a good thing. Keeps me learning new things. Having two from different eras is just a form of higher education.
Out to another drive in show. On the way there we could tell the recently installed carpet made a difference in the amount of noise in the car. Also the transmission is shifting better and not leaking since replacing the seals. The drive-in was lots of fun. We have found the local drive-in ones to be the most fun. Just show up, park the car and walk around.
Finally have all the materials to start making the interior panels and upholstery. Kids watched YouTube on how it was supposed to be done and wanted to try it another way without buying everything pre made. I am all for supporting doing it our way. Bought 3mm hardboard from Lowes for the door and kick panels. Oldest son chose a brown canvas that is similar to the dash color for the doors. We left the dash with the original paint. A lighter tan for the upper areas of the pillars and around the window areas was chosen. For the door pulls my oldest had the idea to go to Good Will and get brown leather belts. He wants to make pull straps like the 87 Monte Carlo has out of the leather belts. For a headliner we have a 48 star flag. Plan for the flag is to take all of the bows out of the roof and paint them black. Then run the flag from the front to the rear of the car above all of the bows. The stars are placed above the driver's seat. The headliner may take a few revisions to get right.
The youngest started to cut panels. Made a few templates for the doors and kick panels. Has a roughly cut panel for the driver’s door. It needs holes cut for the window cranks and door handle. He cut it slightly large so it can be trimmed just right. His thought process was to get the driver's side just right then copy it for the passenger. Started in the front since he thinks it looks easier than the rear. He also attempted to make a kick panel. Unfortunately that one was a lesson in why to measure twice cut once. Not a big deal. Better to learn with something simple like that.
Not a big thing but we bought floor mats. Now that there is a carpet that is a light color kept getting asked how are you going to keep it clean. Bought some CAT brand tan floor mats. Cut to size ones that will do the job when needed. Have them in my truck and they work well there.
Saturday took the 41 out for the longest drive we have done, about 50 miles. Shortly into the drive the speedometer started to make a screeching noise. Shortly after that the needle would jump from the 40 MPH we were doing to around 80 and then back down. (I am certain we did not do 80 at any point and that this car cannot accelerate that quickly ). Not certain about the cause for this but on the 87 Monte Carlo it did a similar thing when the speedometer cable started to bind. Fixed the Monte Carlo by disconnecting the cable and spraying lube into it. Hope this is a simple fix like that turned out to be. Guess that is the next thing on the list of to-dos for the car.
I have found that having an old car is a constant project that is never done. I think that is a good thing. Keeps me learning new things. Having two from different eras is just a form of higher education.
Not much progress to report. Drove around a few times until today. We need to fix the parking brake, Speedometer and now the generator. Today the generator seized and had to get towed home. Kids and I all agreed it never left us stranded until now and we only have a few weeks left in the season to drive it anyways so not loosing much drive time.
I have found that having an old car is a constant project that is never done. I think that is a good thing. Keeps me learning new things. Having two from different eras is just a form of higher education.
November 2022 We opened up the generator and it looks like the felt oiler piece is missing or degrading to the point that it is no longer there. The ball bearing resembles shrapnel. Oiled it a week prior to it failing but the oil leaks out the bottom. The VCCA was a great help in identifying this issue. One of the members had a generator that they were able to sell to us.
December 2022 Christmas is past and we finally had time to get back to the generator. Lucky to have a rare 58 degree day in winter. My youngest son put the generator in. After that the car started up and we drove around the block without any issues. Gauge showed charging as it did with the last generator. Headlights did make it go into discharge at idle but with the slightest throttle they were charging.
I have found that having an old car is a constant project that is never done. I think that is a good thing. Keeps me learning new things. Having two from different eras is just a form of higher education.
Back to wiring. Last year changed out what we had to do to get it on the road for the season. Now it is time to finish the job. Started by removing the original headlight switch. Son mounted a fuse box behind where the kick panel cover will go. Will run the items that normally receive constant power from the headlight switch from this location. Plan to connect the stop light, blinkers, lighter, fog lights and possibly the radio to this. Adds the advantage of not losing everything if one fuse goes out. Also it will be easier to access for troubleshooting.
I have found that having an old car is a constant project that is never done. I think that is a good thing. Keeps me learning new things. Having two from different eras is just a form of higher education.
Kids thought it was out of sight and how often do you really need to get to it. It is easier to access than the one under the passenger dash in my wife's MINI.
There are 8 fuses in the box. It is actually one for a boat, for this reason it has 8 spots just for ground wires. There is a cover for it that fits nicely over the top and is clear. We do not plan to use the grounds but they are nice to clip a test light to or run a temporary ground wire from when checking for a bad ground.
I have found that having an old car is a constant project that is never done. I think that is a good thing. Keeps me learning new things. Having two from different eras is just a form of higher education.
Youngest son has connected the horn to the horn button, wired the fog lights wired to the correct switch and has both front blinkers working. None of these items were connected last summer. He removed the spectrometer that stopped working last fall and all of the dash lights. While he was doing the wiring I cleaned and lubricated the workings of the speedometer to get it properly functioning again. Also made a new wiring harness or the dash lights. Before we reinstall the lights we are waiting for a package of new bulbs to arrive.
My youngest has done all the dash connections to date. He makes measurements and tells me to make any harnesses or parts he needs. For example, for the dash lights he measured the distance between each bulb, drew a diagram and handed me all the old sockets he removed. From his instructions I was able to make the harness. for him. He plans to take all of the wires when done and wrap them.
I have found that having an old car is a constant project that is never done. I think that is a good thing. Keeps me learning new things. Having two from different eras is just a form of higher education.
Winter break is over and we have completed rewiring the car. All of the new items function properly. The dimmer for the dash lights now works. Car now has blinkers and a horn. All of the dash lights were replaced with new bulbs. Started the car and drove it out into the driveway to test everything. The headlights, dash lights and especially the tail lights all appeared brighter after the rewiring. After this was completed we documented all of the new wire colors in the back of the 41 service manual. Also recorded the part numbers for the blinker kit and the flasher.
The chassis was lubricated today. First time they have used a grease gun. Found a diagram in the 41 maintenance manual showing all of the lubrication points. While they were working down there they adjusted the hangar for the tailpipe. It was too high in the rear and the pipe did not allow for much movement. Loosening the mount a little and lengthening it gave the pipe some give and allowed it to hang closer to the correct position.
We made an effort to get the radio working for the car. Using jumper wires with alligator clips on them we connected them to the car. Also connected an antenna. With the power on to the car we turned the dial on the radio to see what would happen. Then we waited hoping it just needed to warm up. Then we tuned it hoping something would happen. Finally we decided that since only one tube had a slight glow to it that the radio was not going to work without requiring repairs. We had already decided if it worked currently then we would put it in. If it did not then we were going to let it be. There are only a few talk radio AM channels left in the area and of these only two are powerful enough to receive regularly so there is not much benefit to us from an AM only radio unless it already worked. Going to go with a hidden Bluetooth speaker when we get to that point. Might still clean up the old radio and place it in the dash for looks. That is a decision for another time.
I have found that having an old car is a constant project that is never done. I think that is a good thing. Keeps me learning new things. Having two from different eras is just a form of higher education.
Carburetor has been leaking for some time. It needed a rebuild. Luckily I was able to find an already rebuilt one being sold for my car. We installed it today. At first was a little concerned when the one that we removed did not exactly match the one we had received. Found a web site that detailed the changes to the Carter W1 carburetor used by Chevrolet over the years. Turns out that my 41 had a carburetor for a 39 or 40 on it. The one I received was for a 41. We installed it and the car fired right up and idles smoothly. Unfortunately the gas line is leaking slightly where it connects to the carb. We will have to get a new fitting for it before we can really test drive it with the new to us carb. I do not want to have a leaking line over a hot engine, even with a very small leak.
I have found that having an old car is a constant project that is never done. I think that is a good thing. Keeps me learning new things. Having two from different eras is just a form of higher education.
You are wise to seal the fuel leak before hitting the road, I dont want to hear of you ruining all that hard work though no doubt the boys would enjoy the next project. Tony
Installed the proper throttle return spring and the bracket to attach it too. The pedal has a stiffer feel to it now. My son did not want to remove the one that was on it. His thought was if one breaks what will return the throttle, I could not find any flaw with this idea so we left it.
We installed a glass bowl in-line fuel filter similar to what would have been on the car back in the day. Unfortunately the compression fittings leaked. We had not used any sealant on the threads. Took it all apart and applied some liquid sealant and no leaks. After this we checked all of the fluids. My youngest checks the transmission, he can do it without needing to lift up the car. Found it was down a little. We were not surprised. It is seeping out of the side of it. Since nothing was added since early last year we were actually impressed that was all that it lost. Oil was down, it burns a little and the valve cover leaks. In addition he found it was starting to drip around the drain plug, plan to change the oil this weekend so not worried about the plug since it was tight. All tires were up to the proper pressure. Plenty of coolant in the radiator.
After idling it in the driveway for a bit we took it out for the first ride of the season. Wow what a difference the replacement carb makes. Only issue was that when it first started it seemed to idle too low and die if I did not give it a slight amount of gas to keep it running. After a few minutes it was idling perfectly fine so I do not think I am going to make an adjustment for that. I will just give it a slight amount of gas, I can hear when it is ready to run. It was suggested we try giving it a little choke the first few minutes, might try that. Going down the road the throttle response was the best it has ever been. Not only that on a 90 degree curve in our road that we always had to downshift to second to accelerate out of before all that needed to be done now was to take my foot off entering the corner and put it back down coming out while leaving it in third. Biggest surprise was on a flat stretch when I gave it gas in third gear and we could feel it kick in accelerating from 30 mph up to 50 mph. Not something I would normally do but wanted to make sure the carb was performing properly. The old one would have required a downshift to perform in the same manner. Still going to run the car between 35 mph and 40 mph as a general rule.
I have found that having an old car is a constant project that is never done. I think that is a good thing. Keeps me learning new things. Having two from different eras is just a form of higher education.
Yes, you will need a bit of choke to keep things running smoothly for the first few miles/minutes.
Do you know which rear axle ratio is in your car? I know that 4.11 was standard. There was a 3.73 option.
I installed Ford umbrella style oil seals on the valves to reduce some of the oil burning. Those greatly reduce the blue smoke when leaving a stop light.
I do not know the ratio in the rear end. The way it drove yesterday I would have to think it is the 4.11. The car wants to cruise around 40 -45 mph. Is there a way I can easily tell what the rear end is? With the torque tube I cannot count the times the drive shaft turns verses the wheel like I have on other cars. The engine is not screaming at 50 in 3rd but it is up there.
My old carb did not need a choke but while it ran it was not responsive. The old one also seemed to have a fast idle. We will need to try using it next time.
I have found that having an old car is a constant project that is never done. I think that is a good thing. Keeps me learning new things. Having two from different eras is just a form of higher education.
I am sure that you have a 4.11 ratio. Only a handful of 1941 Chevrolets were ordered with the 3.73 ratio and tose cars were mainly in tthe great plaines area. If all the noise insulation is in place the 50 and 60 will be quite bt 1941 standards.
It is also to have a little blue smoke after a long idle especially is the oil shields have bee removed from the intake valves.
I am sure that you have a 4.11 ratio. Only a handful of 1941 Chevrolets were ordered with the 3.73 ratio and tose cars were mainly in tthe great plaines area. If all the noise insulation is in place the 50 and 60 will be quite bt 1941 standards.
Thanks, that is what I thought too. I have the insulation on the firewall and there is a carpet installed. Other than that the interior is still missing. I will say the carpet made a huge difference in the sound level once that was installed. It really did surprise me.
I have found that having an old car is a constant project that is never done. I think that is a good thing. Keeps me learning new things. Having two from different eras is just a form of higher education.
The valve noise is not bad a at all so I had not prioritized that vary high. Issue is that the valve cover gasket is leaking a lot now and if I have to replace that might as well do the valves at the same time.
We have been wanting to do the interior. Unfortunately we keep moving it down the list to perform mechanical items. Seats, seat belts we considered mandatory. The carpet we did while doing a bunch of little items that had to get done but did not look like much. Any time we have to do several items that do not appear to make any changes we try to plan something visible that makes a difference. Helps keep mundane projects feel more important when added to a wow I can see a difference now project.
I have found that having an old car is a constant project that is never done. I think that is a good thing. Keeps me learning new things. Having two from different eras is just a form of higher education.
Been driving it more than working on it. Since May we have driven it about 400 - 500 miles. This is more than we drove all last year. It hit us when I looked down at the gas gauge and realized we have to fill it again. Some of the trips have just been hour and a half rides to nowhere. Others have been to town and back. All unplanned, just a nice day and nowhere to go.
Recently we changed the oil and installed a clock in the dash. Kids always wanted the clock since they first saw one installed in another car. It lights up as it should but does not keep time. The minute hand is loose and always points down. We debated about fixing the electric motor in it but decided not to since we commonly disconnect the battery anyways.
Finally got all of the parts to the emergency brake properly installed this weekend. We spent hours staring at this. A friend looked at it and we found that not only was the bar the linkage connected to bent but so was the mount the pivot point used to connect to the frame. Once that was bent back things lined up and we were able to connect everything. Now we just have to properly adjust the cables and this item might be able to be crossed off of the todo list.
We have hit a point where no one wants the car to be off the road so we do not want to start any big item and on top of that with both kids getting older any long stretches of time are getting fewer and fewer. We need a few less weekdays and a few more weekdays.
I have found that having an old car is a constant project that is never done. I think that is a good thing. Keeps me learning new things. Having two from different eras is just a form of higher education.
Ended July installing a headliner. The boys have wanted to use a flag so we used a 48 star US flag. It fits nicely. Unfortunately I had to fold in part of the stars due to the curve of the roof. Have not tucked in the rear yet as we still make something around the window.
I have found that having an old car is a constant project that is never done. I think that is a good thing. Keeps me learning new things. Having two from different eras is just a form of higher education.
Started making door cards. We had bought the canvas last year thinking we would do this over the winter. Other items took priority. Now that we do not want to do anything to take the car off the road we are working on the interior. Used duck canvas, hard board and for a little padding we used my wife's old yoga mat, she now has a new one. Installing the rear panel a few wrinkles appeared when the panel was bent to fit but we thought it still looked good.
Door handles and window cranks are back on. As well as the window trim on the doors. Since we left the dash with the original paint we decided to do the same with the trim pieces for the windows. There are scratches and marks but it somehow adds to the character of the car. For the escutcheons around the door handles and window cranks we found chair sliders that were the same color as the handles knobs and modified them to work. We only had a handful for the car. Completed the kick panels also. They were mounted with industrial Velcro. The driver's side is hiding the fuse block we installed. Having minivan bench seats installed has been nice for working on the car. They fold down and out of the way when you need more room to work on the interior. Since we made brackets to mount them with if we ever do get the original seats done we can swap them out without any issues. A goal has been to make it that anything we do can be undone down the road.
I have found that having an old car is a constant project that is never done. I think that is a good thing. Keeps me learning new things. Having two from different eras is just a form of higher education.
Took the valve cover off to fix a leaking valve cover gasket and found that the oil line to the rocker oiler was cut and that the return line was held on with a piece of wire. The old gasket was cracked at each corner and extremely hard. Thanks to the community at VCCA we were able to replace the part. My oldest took off the front set of rockers so we could slide the new oiler on. Using a compression fitting the old line could be attached to the new oiler. Once the rockers were all back in place we checked the spacing and verified that oil was going everywhere it was supposed to. Next we put a valve cover gasket on and gave it a test drive. No leaks appeared from the valve cover gasket and the engine sounds better since setting the spacing on the valves. Since we were doing all this work we changed the spark plugs also. They did not look bad but we had it apart.
I have found that having an old car is a constant project that is never done. I think that is a good thing. Keeps me learning new things. Having two from different eras is just a form of higher education.
Awesome that you have kids willing and eager to help you with this project...good luck!
A long time Chevy lover. First car 54 chevy Bel Air, second car 1955 Delray. Current Chevys 2023 Camaro, 1955 210 Delray (show car), a 2020 Chevy BoltEV and most recent purchase, 1941 Chevy Special Deluxe.
Once we had it running again we drove it until the weather changed and it was time to garage it for the winter. My youngest is in sports and both are focused on school. School first is taking the time from the project. Not neglecting it but priorities came in play. When we have a chance we plan to rewire the horn and finish the interior.
I have found that having an old car is a constant project that is never done. I think that is a good thing. Keeps me learning new things. Having two from different eras is just a form of higher education.
The horn has had an issue where it only works properly when the car has a few RPMs going. Youngest son and I attempted to rewire it using a relay and heavier gauge wire. Everything seemed to go well until we reconnected the battery and the horn sounded nonstop. Apparently we swapped two of the wires. With all of the wires in the correct place the horn did not sound at all. Check all of the voltages with a multimeter and everything was correctly connected. Then we checked the part number on the relay and per the internet it is a 12vdc relay and not a 6v one. Ordered the correct one and will swap it when that comes in.
Earlier in the day my oldest and I bought a piece of rubber mat to cut for the trunk floor. He spent the day cutting that to fit the floor and cleaning up some of the wiring in the trunk area. Plan is to take one of the extra tires we have and place it back there for the spare. Also have what we believe to be a correct jack to place in the trunk once we have time to refinish it.
One of our friends' kids was over and helped out by taking a wire brush to clean the surface rust of an old rim and prep it for paint. This is going to be the spare tire in the trunk once it is painted.
After all of that work was done we found the answer to a mystery thunk that occurred every time we hit a large bump. The driver’s rear had a metal to metal thunk when we hit a bump. Numerous times we looked over the suspension and found nothing. Removed everything from the trunk and it was still there. Then we noticed that the part the spare mounts on had chipped the paint on the floor where it was hitting. Picked it up and dropped it, there was the mystery sound.
With my sons in school, sports and jobs work has slowed but we still have plans to work on it when time allows.
I have found that having an old car is a constant project that is never done. I think that is a good thing. Keeps me learning new things. Having two from different eras is just a form of higher education.
Remember that the horn wiring is a "grounding" circuit. The contact in the horn button on the steering wheel is the last link in the circuit. The wire coming up the steering column from the horn is hot all the time. The horn button connects that wire to ground to make the horn sound.
Your weak horn sound could simply be a need to adjust the contact points in the horn.
We had just wired it incorrectly to start. To small of a wire to the horn and not using a lead directly from the battery. Currently we are not using the 'horn' button in the middle of the wheel. Instead we are triggering it with a button we placed in the dash. There was a hole there for something else and it was easier to get the circuit right first. Also when we had to originally get the car inspected it had to have a horn connected to pass. As poorly as it worked it passed.
I have found that having an old car is a constant project that is never done. I think that is a good thing. Keeps me learning new things. Having two from different eras is just a form of higher education.
I remember working at Firestone in Richmond, VA in the 60's. We had 2 mechanics authorized to perform the twice a year state safety inspection. One day there was quite a commotion in the shop. A customer was extremely mad that he could not use a dash mounted switch to activate the horn.
Down here the only restriction on the horn control is that if the "button" isnt in the centre of the steering wheel the control must be labeled as "horn" and be a momentary contact type. Tony
I noticed that in one photo your Son was in the trunk. You weren't headed out to a Drive-In Movie, were you?
Mike
We were joking about that when I took the picture. He found it the easiest way to trim the mat to fit. We also were joking about how he blended all in wearing all black.
I have found that having an old car is a constant project that is never done. I think that is a good thing. Keeps me learning new things. Having two from different eras is just a form of higher education.
For future reference, It's best to wait until you are near the Drive-In, to put the kids in the trunk. That's just my opinion, I could be wrong. Maybe it depends on the kids. I have really enjoyed your posts. Here is a picture of my Son and me from 40ish years ago. He got an early start too.
Just consider that moving the rear wheels back will pull the torque tube back that amount as well.
We are not moving the rear wheels at all. Drive train is staying as was. When I was mentioning the thunk I was referencing the bar that holds the spare in place in the trunk.
I have found that having an old car is a constant project that is never done. I think that is a good thing. Keeps me learning new things. Having two from different eras is just a form of higher education.
Had a little time to work on the car this weekend. The correct relay came in the mail and installed it. Horn works correctly now. It is much louder than it ever was before. I think running the line directly from the battery is the biggest difference. For safety reasons we did add an inline fuse when we ran the line. It is not a show car and I think the added safety of a fuse is definitely worth it.
I have found that having an old car is a constant project that is never done. I think that is a good thing. Keeps me learning new things. Having two from different eras is just a form of higher education.
We decided that even with the mat in the trunk it did not look as good as it could with a few simple improvements. My youngest decided to paint it all with flat black. A huge improvement over what it had been. It hides a lot of the imperfections in the trunk. Looks much better now.
I have found that having an old car is a constant project that is never done. I think that is a good thing. Keeps me learning new things. Having two from different eras is just a form of higher education.
Attempted to put the spare in the trunk for the first time. I thought the bolt looked to be in bad shape. Sones tried to clean the threads and run the nut on and back off. The post broke. Oldest cut out the pin holding the remaining portion of the old post on while I made a new one from a piece of threaded rod. He mounted it in the trunk and the tire went in. Since we have a few extra hubcaps, we placed one on the spare too. Also cleaned up some of the wiring while we were there. Overall a successful afternoon.
I have found that having an old car is a constant project that is never done. I think that is a good thing. Keeps me learning new things. Having two from different eras is just a form of higher education.