|
|
Joined: Mar 2011
Posts: 249
Backyard Mechanic
|
OP

Backyard Mechanic
Joined: Mar 2011
Posts: 249 |
Going to begin the swap in a few weeks.
Those of you who have been there and have suggestions or others who would like to give me some recommendations go to it with my thanks.
1954 Chevrolet 235 going into the 1947 Chevrolet and the 216 coming out.
Member # 047137 - 1947 Chevrolet 4 door sport sedan
|
|
|
|
|
Joined: Feb 2008
Posts: 3,801 Likes: 1
ChatMaster - 3,000
|
|
ChatMaster - 3,000
Joined: Feb 2008
Posts: 3,801 Likes: 1 |
Going to begin the swap in a few weeks.
Those of you who have been there and have suggestions or others who would like to give me some recommendations go to it with my thanks.
1954 Chevrolet 235 going into the 1947 Chevrolet and the 216 coming out. My thought goes with Gene's quote below. "To use the engine front motor mount, bolt holes need to be drilled in the front mounting plate using the 1947 plate as a guide".
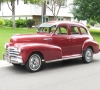
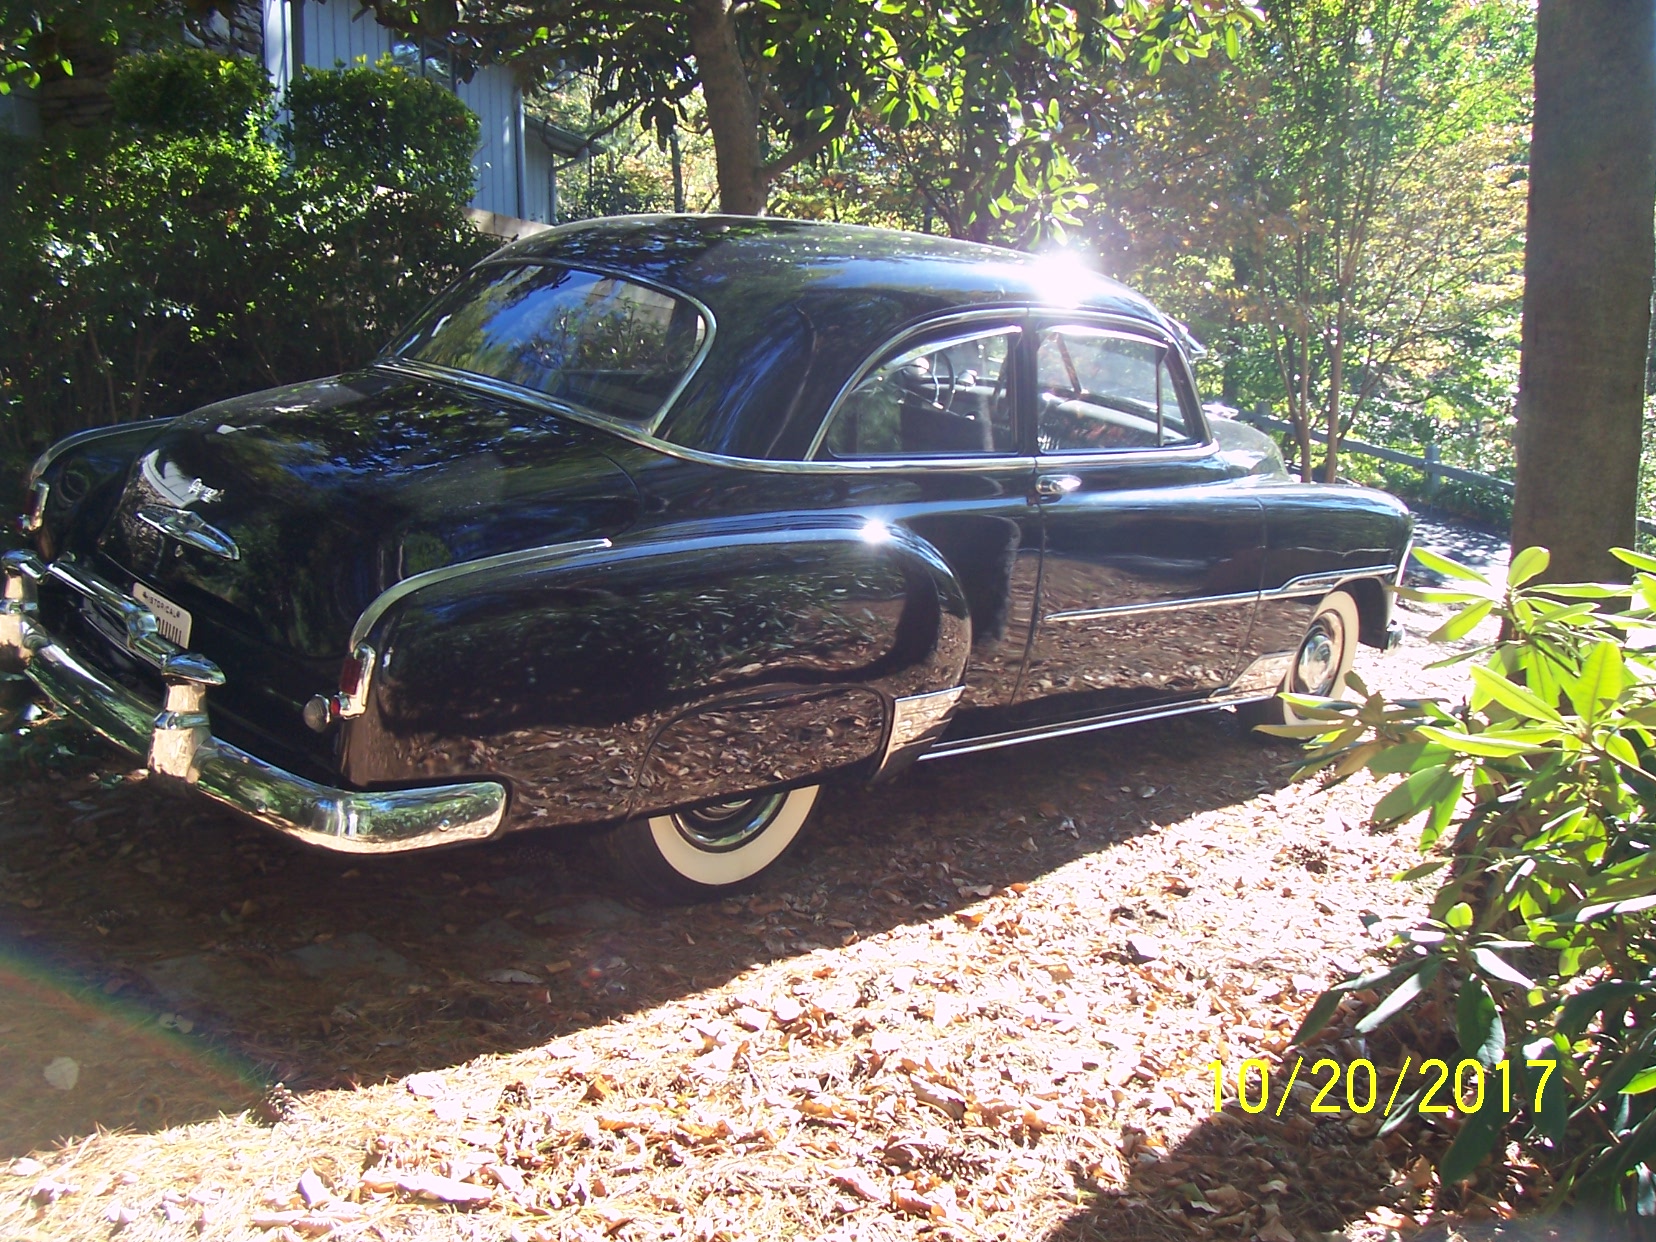
1951 Chevy Styleline Deluxe 2 door sedan / purchased from second owner 6-19-2000.
|
|
|
|
|
Joined: Mar 2011
Posts: 249
Backyard Mechanic
|
|
OP
Backyard Mechanic
Joined: Mar 2011
Posts: 249 |
Member # 047137 - 1947 Chevrolet 4 door sport sedan
|
|
|
|
|
Joined: Apr 2008
Posts: 1,194
ChatMaster - 1,000
|
|
ChatMaster - 1,000
Joined: Apr 2008
Posts: 1,194 |
I would recommend getting new front engine mounts, they are usually soaked with oil and its the perfect time to replace them. I would also have a new pilot bushing on hand. I'm just south of you in Osceola so if you get in a bind and need a hand let me know.
|
|
|
|
|
Joined: Nov 2004
Posts: 373 Likes: 1
Backyard Mechanic
|
|
Backyard Mechanic
Joined: Nov 2004
Posts: 373 Likes: 1 |
I following the article from patricks antique cars and trucks http://www.patricksantiquecars.com/articles.htmlI put an 1959 Chevy 235 into my 1948 Fleetline Aerosedan and had no problems. I also converted it to 12 volt and used the pertronix ignition.
VCCA Member 51121
|
|
|
|
|
Joined: Apr 2006
Posts: 3,511 Likes: 47
ChatMaster - 3,000
|
|
ChatMaster - 3,000
Joined: Apr 2006
Posts: 3,511 Likes: 47 |
Dean 'Rustoholic' Meltz old and ugly is beautiful!
|
|
|
|
|
Joined: Mar 2011
Posts: 249
Backyard Mechanic
|
|
OP
Backyard Mechanic
Joined: Mar 2011
Posts: 249 |
Thank you - I have copied them and also have Patrick's Auto Supply Mag.
Member # 047137 - 1947 Chevrolet 4 door sport sedan
|
|
|
|
|
Joined: Sep 2009
Posts: 6,689 Likes: 21
ChatMaster - 6,000
|
|
ChatMaster - 6,000
Joined: Sep 2009
Posts: 6,689 Likes: 21 |
While you're at it you may want to get a PG 3:55 or 3:73 rear gears for it. I would think that a set of 3:55s and a 261 would be the best combination in order to leave the original appearance. But, there are several options such as dual exhaust, multicarbs, ignitions, voltages and accessories. You will need a different exhaust pipe from the original. Most muffler shops can help you there. As to the 235, it is my understanding that the 1959 is the best one. May be you could find one and use it instead of the 54. Good luck with it, Charlie 
Last edited by 41specialdeluxe; 01/09/15 05:53 PM.
|
|
|
|
|
Joined: Jan 2002
Posts: 30,701 Likes: 141
ChatMaster - 25,000
|
|
ChatMaster - 25,000
Joined: Jan 2002
Posts: 30,701 Likes: 141 |
The 4.11 with a 235 will be almost as quick and a 261 with a 3.55.
With the 4.11 it will have a very strong high gear for normal driving.
At this point I would be more concerned about getting the engine in place.
If the 235 smokes a little consider it normal for a 1954 that has never been apart.
Gene Schneider
|
|
|
|
|
Joined: Mar 2011
Posts: 249
Backyard Mechanic
|
|
OP
Backyard Mechanic
Joined: Mar 2011
Posts: 249 |
Member # 047137 - 1947 Chevrolet 4 door sport sedan
|
|
|
|
|
Joined: Feb 2008
Posts: 3,801 Likes: 1
ChatMaster - 3,000
|
|
ChatMaster - 3,000
Joined: Feb 2008
Posts: 3,801 Likes: 1 |
OK ..... you've got all the info .... Is the conversion done yet ?????? If not, make arrangements for pizza, beer and lodging.    Then print date and directions.  The swap will be handled, 1,2,3 .... we'll all be cruisin' down the highway in the '47 quicker than you think.  WHEW, that all worked out fine!
1951 Chevy Styleline Deluxe 2 door sedan / purchased from second owner 6-19-2000.
|
|
|
|
|
Joined: Mar 2011
Posts: 249
Backyard Mechanic
|
|
OP
Backyard Mechanic
Joined: Mar 2011
Posts: 249 |
Not yet - still working on my plan. I want to clean up the engine and paint it the proper color. Don't even know what the proper color would be when you put a 1954 Chevrolet Engine into a 1947 Chevrolet. Do you go 1954 color or go 1947 color or do your own thing?
Member # 047137 - 1947 Chevrolet 4 door sport sedan
|
|
|
|
|
Joined: Feb 2008
Posts: 3,801 Likes: 1
ChatMaster - 3,000
|
|
ChatMaster - 3,000
Joined: Feb 2008
Posts: 3,801 Likes: 1 |
Not yet - still working on my plan. I want to clean up the engine and paint it the proper color. Don't even know what the proper color would be when you put a 1954 Chevrolet Engine into a 1947 Chevrolet. Do you go 1954 color or go 1947 color or do your own thing? I hope you understand I was kidding with you .... but I do like pepperoni and double cheese. The color choice is yours BUT, if you want it to have the original color, which will somewhat "hide" the 235, keyword being "somewhat", paint it 216 gray.
1951 Chevy Styleline Deluxe 2 door sedan / purchased from second owner 6-19-2000.
|
|
|
|
|
Joined: Feb 2011
Posts: 3,136
ChatMaster - 3,000
|
|
ChatMaster - 3,000
Joined: Feb 2011
Posts: 3,136 |
I would go with the '47 shade gray...I have the light blue on my 216 block, because of the more recent rebuild, and I hate it...Just 'cause it doesn't look original...
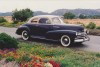
1947 Fleetmaster Sport Coupe VCCA # 47475
If it's not wearing a Bowtie...It's not properly dressed...!
|
|
|
|
|
Joined: May 2002
Posts: 3,578
ChatMaster - 3,000
|
|
ChatMaster - 3,000
Joined: May 2002
Posts: 3,578 |
Blue, man Kevin get the paint brush out!
|
|
|
|
|
Joined: Nov 2002
Posts: 7,472 Likes: 26
ChatMaster - 7,000
|
|
ChatMaster - 7,000
Joined: Nov 2002
Posts: 7,472 Likes: 26 |
I am putting a 54 235 in my 51 and I am going to paint it gray. My car is two tone red and white and I think in addition to being a year correct color it will also look better than the blue.
Steve D
|
|
|
|
|
Joined: Jan 2002
Posts: 30,701 Likes: 141
ChatMaster - 25,000
|
|
ChatMaster - 25,000
Joined: Jan 2002
Posts: 30,701 Likes: 141 |
I would paint it the 1929-1953 gray.
The 1953 Power Glide and 1954 and up car engines were blue but the gray will make it look more original.
Gene Schneider
|
|
|
|
|
Joined: Sep 2009
Posts: 6,689 Likes: 21
ChatMaster - 6,000
|
|
ChatMaster - 6,000
Joined: Sep 2009
Posts: 6,689 Likes: 21 |
After an engine swaps to a 235, or other non-original engine, and when someone asks you if it still has the original engine in it, what do you tell them? Consider this: a. Do you say "Yes"? Now, if you have it painted 216 gray then the color will support the untruth when you raise the hood. b. If you say "No" then painting it the color that engine was originally will support your honesty. c. On the other hand, if you have painted it the original color but state that you did so to match the original engine color. Then you have been truthful. Takes a bit of talking rather than the quick "yes" or "no." c. It only becomes problematic when you have falsely stated the engine's originality and the observer(s) realize that you have been untruthful and are trying to side-step the issue. Not good. The above is something to think about when you are contemplating an original vs non-original engine swap. Just saying... Charlie BTW: I asked a little time back who of us were running a completely original engine. There was a heap of folks who said they were. I doubt there are very many who have not swapped out to aluminum pistons, different head, converted to 12 volts, electronic ignition (Distributor. You know what I mean) or a completely different year and displacement engine altogether. And this is saying nothing of the rear gears. I've seen heavily modified owners tell folks that the car is original. It is easier than describing all the changes, I suppose. Mercy!
|
|
|
|
|
Joined: Mar 2012
Posts: 282
Backyard Mechanic
|
|
Backyard Mechanic
Joined: Mar 2012
Posts: 282 |
my engine is original with the exception of a chrome valve cover and split manifold with duals...and it's painted Black...
I went out there today during the cold spell and gave it some gas to drink down the carb and she fired right up even drove her to the store and back... I can't wait till spring the shoot some clear coat on it...
|
|
|
|
|
Joined: Nov 2002
Posts: 7,472 Likes: 26
ChatMaster - 7,000
|
|
ChatMaster - 7,000
Joined: Nov 2002
Posts: 7,472 Likes: 26 |
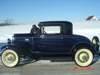
Most that might ask are the same folks that look at my 32 and want to know if I bought it new! Then they will ask if it has an automatic transmission. As far as the 51 goes I'll just say it's an all original body with a later all chevy power train.
Steve D
|
|
|
|
|
Joined: Feb 2008
Posts: 3,801 Likes: 1
ChatMaster - 3,000
|
|
ChatMaster - 3,000
Joined: Feb 2008
Posts: 3,801 Likes: 1 |
Most that might ask are the same folks that look at my 32 and want to know if I bought it new! Then they will ask if it has an automatic transmission. As far as the 51 goes I'll just say it's an all original body with a later all chevy power train. Many folks that ask if this or that is original are simply making conversations. That's fine with me. Are those same folks looking to see if the valve cover has 4 hold down bolts or 2 acorns? I don't think so. MY '51, in the avatar, has a 1955 235 with dual exhaust. I have been approached by those folks "in the know", saying they just know I put a Ford flathead V8 in there, based on the sound. So, I don't worry too much about my answers to folks who ask questions about my car. It's all just conversation.
1951 Chevy Styleline Deluxe 2 door sedan / purchased from second owner 6-19-2000.
|
|
|
|
|
Joined: Feb 2008
Posts: 3,801 Likes: 1
ChatMaster - 3,000
|
|
ChatMaster - 3,000
Joined: Feb 2008
Posts: 3,801 Likes: 1 |
Most that might ask are the same folks that look at my 32 and want to know if I bought it new! Then they will ask if it has an automatic transmission. As far as the 51 goes I'll just say it's an all original body with a later all chevy power train. Geez Steve .... if you bought the '32 new and you were 20 at the time, you'd be 103 now. Better sit and rest, for a spell.
1951 Chevy Styleline Deluxe 2 door sedan / purchased from second owner 6-19-2000.
|
|
|
|
|
Joined: Mar 2011
Posts: 249
Backyard Mechanic
|
|
OP
Backyard Mechanic
Joined: Mar 2011
Posts: 249 |
Not worrying to much about it remaining original. I am happy to be able to save the engine I am taking out of the 47 for the next owner should they be interested in bringing it back to original.
Member # 047137 - 1947 Chevrolet 4 door sport sedan
|
|
|
|
|
Joined: Nov 2002
Posts: 7,472 Likes: 26
ChatMaster - 7,000
|
|
ChatMaster - 7,000
Joined: Nov 2002
Posts: 7,472 Likes: 26 |
I am doing the same with my 51 as I am putting in the 54 running gear. My thoughts are that if I happen upon a good 54 hardtop without an engine I will be able make the swap.
Steve D
|
|
|
|
|
Joined: Mar 2011
Posts: 249
Backyard Mechanic
|
|
OP
Backyard Mechanic
Joined: Mar 2011
Posts: 249 |
Looking for 1947 Chevrolet (code 345-354) oxford maroon metallic spray
paint. Any place to find this product? Thanks
Member # 047137 - 1947 Chevrolet 4 door sport sedan
|
|
|
|
|
Joined: Nov 2001
Posts: 29,863
Tech Advisor ChatMaster - 25,000
|
|
Tech Advisor ChatMaster - 25,000
Joined: Nov 2001
Posts: 29,863 |
The Mangy Old Mutt
"If It's Not Junk.....It's Not Treasure!"
|
|
|
|
|
Joined: Sep 2010
Posts: 284
Backyard Mechanic
|
|
Backyard Mechanic
Joined: Sep 2010
Posts: 284 |
Ranger:
That's the color my car was originally, and, someone repainted it. The paint appears to be a very close match. The color they used is Honda Bordeaux Red Pearl. The number on my bottle of Honda touch-up paint is 08703-R78PAH-PN.
Regards:
Oldengineer
|
|
|
|
|
Joined: Jan 2002
Posts: 30,701 Likes: 141
ChatMaster - 25,000
|
|
ChatMaster - 25,000
Joined: Jan 2002
Posts: 30,701 Likes: 141 |
Over the years I have seen a large number of maroon cars repainted in off colors. If I were to choose a maroon I would select a color from a modern cars that looks correct. The reproduced colors are often too purple, tomato red or some other shade. The original 1947-1950 maroon was a beautiful color but wore thin from the sun after three or four years.
I a started in the dealship in 1950 most of the 1947 and 1948 maroon cars required repainting. Some of the other metallic colors were bad also.
15 years ago I ordered a gallon of lacquer from Hibernia for my 1950. Wanted it just for touch-up. The color is a light gray non metallic. A very easy formula of black, white and a dash of yellow. The paint they sold me was way too dark and I could not use it. $100 down the drain.
Last edited by Chev Nut; 01/12/15 12:12 AM.
Gene Schneider
|
|
|
|
|
Joined: Nov 2001
Posts: 29,863
Tech Advisor ChatMaster - 25,000
|
|
Tech Advisor ChatMaster - 25,000
Joined: Nov 2001
Posts: 29,863 |
15 years ago I ordered a gallon of lacquer from Hibernia for my 1950. Wanted it just for touch-up. The color is a light gray non metallic. A very easy formula of black, white and a dash of yellow. The paint they sold me was way too dark and I could not use it. $100 down the drain. That is true even today on the new cars. You can order paint from PPG for a 2014 model and the paint may or may not match the paint that is on the vehicle. Even paint used out of the same can that a car was re-painted with several years earlier may no longer match.  
The Mangy Old Mutt
"If It's Not Junk.....It's Not Treasure!"
|
|
|
|
|
Joined: Feb 2008
Posts: 3,801 Likes: 1
ChatMaster - 3,000
|
|
ChatMaster - 3,000
Joined: Feb 2008
Posts: 3,801 Likes: 1 |
15 years ago I ordered a gallon of lacquer from Hibernia for my 1950. Wanted it just for touch-up. The color is a light gray non metallic. A very easy formula of black, white and a dash of yellow. The paint they sold me was way too dark and I could not use it. $100 down the drain. That is true even today on the new cars. You can order paint from PPG for a 2014 model and the paint may or may not match the paint that is on the vehicle. Even paint used out of the same can that a car was re-painted with several years earlier may no longer match. Only a bit off topic, but you guys are aware of "LEER" fiberglass caps for pickup trucks. You pick out your style of cap, then give them the paint code off the glove box door. Cap order and paint code are sent to LEER factory to fill the order. Cap comes back in your specified color and it matches your truck well. Amazing to me ! You can't get that good of a match when your car is touched up at the local body shop.
1951 Chevy Styleline Deluxe 2 door sedan / purchased from second owner 6-19-2000.
|
|
|
|
|
Joined: Feb 2011
Posts: 3,136
ChatMaster - 3,000
|
|
ChatMaster - 3,000
Joined: Feb 2011
Posts: 3,136 |
Great photo...Bet their not cheap...
1947 Fleetmaster Sport Coupe VCCA # 47475
If it's not wearing a Bowtie...It's not properly dressed...!
|
|
|
|
|
Joined: Mar 2011
Posts: 249
Backyard Mechanic
|
|
OP
Backyard Mechanic
Joined: Mar 2011
Posts: 249 |
True about the cover for the truck. I ordered a cover for my 2011 Ford Ranger four by four. It came and was installed by a company in town. Matches just wonderfully and so very functional for me. My Ford Ranger is a red one - one of the last manufactured in the US.
Member # 047137 - 1947 Chevrolet 4 door sport sedan
|
|
|
|
|
Joined: Mar 2011
Posts: 249
Backyard Mechanic
|
|
OP
Backyard Mechanic
Joined: Mar 2011
Posts: 249 |
Which spark plug for the 235 1954 Ford engine with straight stick? No custom work to be done on the engine. Has Autolite 86 in it now.
AC - R43 or AC - R45
Also, some mention of a pilot bushing to assist with installation. Could you all give me just a little more information about the pilot bushing?
Thank you!
Last edited by rangerart71; 01/14/15 05:57 PM.
Member # 047137 - 1947 Chevrolet 4 door sport sedan
|
|
|
|
|
Joined: Jan 2002
Posts: 30,701 Likes: 141
ChatMaster - 25,000
|
|
ChatMaster - 25,000
Joined: Jan 2002
Posts: 30,701 Likes: 141 |
The correct modern AC spark plug number for a 1954 CHEVROLET engine would be an AC44. A 43 is too cold of a heat range. The 45 is OK. The R indicates it is a resistor type plug. I run the AC45R in my cars and they work fine.
First a reminder. The 1954 engine you have originally was in a 1954 car with an automatic transmission. Automatic transmission cars did not require a pilot bearing.
At one point you mentioned the engine was removed from a 1952 Chevrolet. If this car had a standard transmisson a pilot bearing (which is necessary for std, trans. cars) whould have been installed.
The pilot bearing is a solid brass bushing that fits in the "hole" at the back of the crankshaft. It supports the front shaft of the transmission and has an ID of 19 /32"....and will be visable when the clutch is removed.
When installing the engine you MUST use your present 1947 flywheel housing and motor mounts abd brackets.
You can use the 1954 flywheel and clutch parts if they came with the engine. The parts can not be mixed (54 disc with 47 pressure plate as an example.)
Must be all one or the other. The 1954 clutch is prefered as it is stronger to with the more powerful 1954 engine.
Before starting the engine drain the oil and put in 5 Qts. of 10W30 oil. Also make sure the transmission is full of gear oil.
Lubricate the throw out bearing and pilot bearing as per the shop manual.
Gene Schneider
|
|
|
|
|
Joined: Mar 2011
Posts: 249
Backyard Mechanic
|
|
OP
Backyard Mechanic
Joined: Mar 2011
Posts: 249 |
Thank you Gene. Things are moving forward. Slowly because I am taking it slow and checking and re-checking so that I make as few mistakes as possible.
Let's help me get this straightened. I was told that I was buying a 1952 engine(216) with an automatic transmission.
When I went to pick it up and brought it home it turned out to be a 1954 235 engine with the bell housing and tranny connected.
Question - it looks like my 216 tranny that would be a stick. How do I recognize the different between an automatic or a stick. Numbers, ???
Lastly, if it turns out to be a 235 with a stick why cannot I use the entire outfit to replace what is currently in my 1947 chev?
Thank you again.
Last edited by rangerart71; 01/14/15 07:44 PM.
Member # 047137 - 1947 Chevrolet 4 door sport sedan
|
|
|
|
|
Joined: Feb 2011
Posts: 3,136
ChatMaster - 3,000
|
|
ChatMaster - 3,000
Joined: Feb 2011
Posts: 3,136 |
Aren't the push rod/lifter covers between the two enough to tell which motor you were looking at...? Not trying to be...I might have brought along an engine # chart to see what year, etc. you were seeking...
1947 Fleetmaster Sport Coupe VCCA # 47475
If it's not wearing a Bowtie...It's not properly dressed...!
|
|
|
|
|
Joined: Mar 2011
Posts: 249
Backyard Mechanic
|
|
OP
Backyard Mechanic
Joined: Mar 2011
Posts: 249 |
Please read the entire posting = then give me an answer.
I knew the engine ran good and for other reasons I did not recognize the difference in the engine. That was a blessing in disguise.
My question now is about the tranny.
Thank you
Member # 047137 - 1947 Chevrolet 4 door sport sedan
|
|
|
|
|
Joined: Feb 2008
Posts: 3,801 Likes: 1
ChatMaster - 3,000
|
|
ChatMaster - 3,000
Joined: Feb 2008
Posts: 3,801 Likes: 1 |
"Question - it looks like my 216 tranny that would be a stick. How do I recognize the different between an automatic or a stick. Numbers, ???"
This question was answered for you, in another thread somewhere, when you provided the "F54Y" numbers from the distributor pad, on your purchased engine. F = Flint Engine Mfg Plant 54 = 1954 Y = Powerglide Transmission Letter "Z" = standard shift engine Click on this site. http://chevy.oldcarmanualproject.com/models/engine.htm#54engScroll down until you see 1954 imprinted on the aqua colored stripe. Look at left column "model and code" heading.
1951 Chevy Styleline Deluxe 2 door sedan / purchased from second owner 6-19-2000.
|
|
|
|
|
Joined: Nov 2002
Posts: 7,472 Likes: 26
ChatMaster - 7,000
|
|
ChatMaster - 7,000
Joined: Nov 2002
Posts: 7,472 Likes: 26 |
If it looks like your 216 tranny then it's a stick. The powerglide tranny is completely different and weighs about three times the weight of the stick. As Gene has posted above the bell housing from the 47 must be used to keep the original mounts. All the other components can be used together , but not mixed with the 47 parts. At least that's my interpretation. You can also go on ebay or the internet and find photos of the transmissions and you should also purchase repair manuals for the engine and transmission as they will come in handy in the future. The Filling Station or National Chevy Assoc. are two sources that should have them.
Steve D
|
|
|
|
|
Joined: Feb 2008
Posts: 3,801 Likes: 1
ChatMaster - 3,000
|
|
ChatMaster - 3,000
Joined: Feb 2008
Posts: 3,801 Likes: 1 |
[quote=m006840] If it looks like your 216 tranny then it's a stick. The powerglide tranny is completely different and weighs about three times the weight of the stick. As Gene has posted above the bell housing from the 47 must be used to keep the original mounts. All the other components can be used together , but not mixed with the 47 parts. At least that's my interpretation. You can also go on ebay or the internet and find photos of the transmissions and you should also purchase repair manuals for the engine and transmission as they will come in handy in the future. The Filling Station or National Chevy Assoc. are two sources that should have them. [/quote Oh ... I thought the poster was asking for appearance differences in stick vs automatic ENGINES. Thus my direction to distributor pad stampings. I did not think there was a question concerning stick vs powerglide appearances. Like night and day. Powerglide pic. http://www.ebay.com/itm/BTE-Powerglide-Transmission-Bracket-Brake-with-1-82-Planetary-/160922492583
1951 Chevy Styleline Deluxe 2 door sedan / purchased from second owner 6-19-2000.
|
|
|
|
|
Joined: Jan 2002
Posts: 30,701 Likes: 141
ChatMaster - 25,000
|
|
ChatMaster - 25,000
Joined: Jan 2002
Posts: 30,701 Likes: 141 |
Your 1947 bell housing must be used due to the motor mount brackets attached to it. Your 1947 trans. must be used due to the length.
Gene Schneider
|
|
|
|
|
Joined: Mar 2011
Posts: 249
Backyard Mechanic
|
|
OP
Backyard Mechanic
Joined: Mar 2011
Posts: 249 |
Even though I have owned 3 - 47's I have never been this far into one.
The transmission is a stick - even though the engine stamp says that it is a 1954 with an automatic. The owner of the engine did not know what he had. He told me it was an automatic as well.
So I will use the engine plus my bell housing and my stick transmission and go from there.
Again, thank you for your patience. That is what a teacher does. In this case I am a 71 year old student and all you fine fellows are the teachers.
Blessings
Member # 047137 - 1947 Chevrolet 4 door sport sedan
|
|
|
|
|
Joined: Mar 2011
Posts: 249
Backyard Mechanic
|
|
OP
Backyard Mechanic
Joined: Mar 2011
Posts: 249 |
Been working on the 54 - 235 engine. Bell housing and transmission removed. All parts removed from the engine so that I can paint the engine.
Valve cover off - what did I find? All new lifters!
Oil pan off - what did I find? All new pistons!
Engine inside very clean - no overload of old oil anywhere.
Also appears that the camshaft is very very clean. Wondering if that is new as well.
So pleased with what I have to work with. And the price was right.
Thanks for your help.
One question: should I open up the timing gear and check that out while I have the engine apart?
Thanks again!
Member # 047137 - 1947 Chevrolet 4 door sport sedan
|
|
|
|
|
Joined: Jan 2002
Posts: 30,701 Likes: 141
ChatMaster - 25,000
|
|
ChatMaster - 25,000
Joined: Jan 2002
Posts: 30,701 Likes: 141 |
To see the lifters you would need to remove the side cover, remove the rocker arms and push rods and then lift the lifters out. I suspect you are refering to the rocker arms.
Seeing the engine is clean and appears to have been rebuilt if it were mine I would ASSUME the timing gear and it's oil passage is OK.
Clean off the top of one of the pistons and see if it is stamped oversized....like .030 or .040. If it is it indicates the engine has been rebuilt.
Last edited by Chev Nut; 01/18/15 11:22 AM.
Gene Schneider
|
|
|
|
|
Joined: Mar 2011
Posts: 249
Backyard Mechanic
|
|
OP
Backyard Mechanic
Joined: Mar 2011
Posts: 249 |
Member # 047137 - 1947 Chevrolet 4 door sport sedan
|
|
|
|
|
Joined: Apr 2008
Posts: 1,194
ChatMaster - 1,000
|
|
ChatMaster - 1,000
Joined: Apr 2008
Posts: 1,194 |
Did you find that it had a pilot bushing in the end of the crankshaft when you removed the transmission?
|
|
|
|
|
Joined: Mar 2011
Posts: 249
Backyard Mechanic
|
|
OP
Backyard Mechanic
Joined: Mar 2011
Posts: 249 |
I did not need to clean the top of the piston. The number .40 stood out without any cleaning. Why not .30 I do not know.
I have had my 216 apart and none of the components looked like new. In the 235 the pistons - the push rods - the crank - the lifters - everything is as clean as they can be.
In that all these parts look good I think I will pass on the timing gear and trust that it is good as well.
I am encouraged and am going to start cleaning up the outside of the engine for painting and then begin to putting the parts back on the 235 for installation.
I am sure I will be back should I and I probably shall run into problems while putting the pieces back together.
Member # 047137 - 1947 Chevrolet 4 door sport sedan
|
|
|
|
|
Joined: Feb 2008
Posts: 3,801 Likes: 1
ChatMaster - 3,000
|
|
ChatMaster - 3,000
Joined: Feb 2008
Posts: 3,801 Likes: 1 |
I did not need to clean the top of the piston. The number .40 stood out without any cleaning. Why not .30 I do not know.
I have had my 216 apart and none of the components looked like new. In the 235 the pistons - the push rods - the crank - the lifters - everything is as clean as they can be.
In that all these parts look good I think I will pass on the timing gear and trust that it is good as well.
I am encouraged and am going to start cleaning up the outside of the engine for painting and then begin to putting the parts back on the 235 for installation.
I am sure I will be back should I and I probably shall run into problems while putting the pieces back together. Why .040 and not .030 ? When the cylinder was "bored out", the amount of boring required determines how LARGE the new piston will be. .040 is larger than .030, so if it reads .040 on the piston, you know it had to be bored MORE to clean up the cylinder wall properly. As an example, my 235 has .080 pistons.
1951 Chevy Styleline Deluxe 2 door sedan / purchased from second owner 6-19-2000.
|
|
|
|
|
Joined: Mar 2011
Posts: 249
Backyard Mechanic
|
|
OP
Backyard Mechanic
Joined: Mar 2011
Posts: 249 |
Member # 047137 - 1947 Chevrolet 4 door sport sedan
|
|
|
|
|
Joined: Jan 2002
Posts: 30,701 Likes: 141
ChatMaster - 25,000
|
|
ChatMaster - 25,000
Joined: Jan 2002
Posts: 30,701 Likes: 141 |
Those numbers were only examples. Could be 10,20,30,40 or 60.
The 1954 engine should have the narrow grove balancer and water pump. What are you planing to do with the generator from the '47?
Also you said it did not have a distributor.....start looking for a 1954 Power Glide distributor or any 1955-1962 dist.
Last edited by Chev Nut; 01/18/15 02:20 PM.
Gene Schneider
|
|
|
|
|
Joined: Mar 2011
Posts: 249
Backyard Mechanic
|
|
OP
Backyard Mechanic
Joined: Mar 2011
Posts: 249 |
I have a generator that came with the 54 - I have not gone far enough yet to see what it is off. Is there a certain number that I am looking for or would the generator off my 47 work for the 54.
I also have two other generators that came with my 47. The starter motor off my 47 should - according to previous posting - fit the 54 in that I am using the 47 bell housing and transmission. I also have two other starters that came with the 47.[b][/b]
I think I can figure out most other questions that come up however I will not hesitate to continue to come to VCCA for the final word.
Member # 047137 - 1947 Chevrolet 4 door sport sedan
|
|
|
|
|
Joined: Jan 2002
Posts: 30,701 Likes: 141
ChatMaster - 25,000
|
|
ChatMaster - 25,000
Joined: Jan 2002
Posts: 30,701 Likes: 141 |
If the 1954 generator is used you must use a 1954 regulator....actually there were two different generators. Also the mounting bracket may be different. No reason the 1947 generator could not be used if the narrow pulley was installed.
Would be best to use the 1954 Power Glide starter as it was "stronger" than the 1947 (that always can be changed later if the '47 dosen't work OK)
Gene Schneider
|
|
|
|
|
Joined: Mar 2011
Posts: 249
Backyard Mechanic
|
|
OP
Backyard Mechanic
Joined: Mar 2011
Posts: 249 |
Could you provide for me some numbers as it relates to what Distributor will work for a 54 Power Glide 235 engine.
Also speak relating the vacuum assist. Should I find a distributor that works what number vacuum advance would work should there not be a va on the distributor.
Thank you!
Member # 047137 - 1947 Chevrolet 4 door sport sedan
|
|
|
|
|
Joined: Mar 2009
Posts: 885
ChatMaster - 750
|
|
ChatMaster - 750
Joined: Mar 2009
Posts: 885 |
Right, wrong, or indifferent, this is what I had in my 48.
62 235 eng with all 48 parts from flywheel/bell housing back.
48 distributor.
Left all 6 volt systems intact.
Orig 216 intake and exhaust systems with the elimination of the port rings on the intake. Low top later Rochester carb so I had use of orig choke and throttle cables. Timing was set by ear as PO had installed flywheel incorrectly and had timing mark set to no 5 instead of no 1. Heavy positive cable to starter and heavy shielded neg cable to bottom bolt of starter. Always started great regardless of weather conditions hot or cold. Ran smooth as glass with lots of power.
Jim.
|
|
|
|
|
Joined: Jan 2002
Posts: 30,701 Likes: 141
ChatMaster - 25,000
|
|
ChatMaster - 25,000
Joined: Jan 2002
Posts: 30,701 Likes: 141 |
While the 1947 distributor will work in a 1954 PG engine it has a forged gear for the forged camshat used til 1953. The 1954 PG engine has s a steel gear to match the steel camshaft. Also it will be a way to get away from the odd ball points used from 1941-mid 1948.
A 1955 and up distributor can be used as the 12 volt has no bearing on the ignition system other than the coil.
The problem with 1953 and 1954 engnes is srating with a hot engine. The 1954 PG starter had more field coils in the starter. A good '47 starter may do the job.
Distributors to use.
1112396 1954 Power Glide
1112403 1955-1962 235 cars - very common.
With either the vacuum advance is more to the rear of the dist. housing due to the motor mount bracket on those years.
The number is stamped into the dist. plate next to the points.
Last edited by Chev Nut; 01/18/15 11:47 PM.
Gene Schneider
|
|
|
|
|
Joined: Mar 2011
Posts: 249
Backyard Mechanic
|
|
OP
Backyard Mechanic
Joined: Mar 2011
Posts: 249 |
Should I have any interest in:
(1) Cardone Remanufactered Distributor - seen on many sites for a 1954 235.
or
(2) Chevs of the Forties - 1112358 listed to work for a 1954 chevrolet and other chevies.
Last edited by rangerart71; 01/19/15 02:47 PM.
Member # 047137 - 1947 Chevrolet 4 door sport sedan
|
|
|
|
|
Joined: Jan 2002
Posts: 30,701 Likes: 141
ChatMaster - 25,000
|
|
ChatMaster - 25,000
Joined: Jan 2002
Posts: 30,701 Likes: 141 |
The 112358 is for a 1950
you want it for a 1954 with Power Glide as the material of the other 1954 gears if different.
Try the 1955 and up. Should be easy to find and will work OK
Gene Schneider
|
|
|
|
|
Joined: Mar 2011
Posts: 249
Backyard Mechanic
|
|
OP
Backyard Mechanic
Joined: Mar 2011
Posts: 249 |
I found a 1112403 in pretty good shape however it does not come with the vacuum advance.
Will I be able to find the vacuum advance number in the distributor?
Or, I bet you can -
can you give me the number of the vacuum advance so that I can find one and get it on the way here.
Wonderful help - thanks!
Member # 047137 - 1947 Chevrolet 4 door sport sedan
|
|
|
|
|
Joined: Jan 2002
Posts: 30,701 Likes: 141
ChatMaster - 25,000
|
|
ChatMaster - 25,000
Joined: Jan 2002
Posts: 30,701 Likes: 141 |
You could use the vacuum advance from the '47 or buy a new one from NAPA.
Gene Schneider
|
|
|
|
|
Joined: Mar 2011
Posts: 249
Backyard Mechanic
|
|
OP
Backyard Mechanic
Joined: Mar 2011
Posts: 249 |
I will buy a new one - for a 54 235. Am trying to keep the 216 intact as much as I can. Thank you.
Member # 047137 - 1947 Chevrolet 4 door sport sedan
|
|
|
|
|
Joined: Mar 2011
Posts: 249
Backyard Mechanic
|
|
OP
Backyard Mechanic
Joined: Mar 2011
Posts: 249 |
Ran into my first disappointment with the new engine this morning.
The plug on the oil pan leaks. No problem! Took it all down to my miracle worker Garage Owner and Bruce fixed it within about 30 minutes.
Good to go! Like you friends on VCCA it is good to have friends in the community that can help you over little hurdles.
Blessings & thanks!
Member # 047137 - 1947 Chevrolet 4 door sport sedan
|
|
|
|
|
Joined: Mar 2011
Posts: 249
Backyard Mechanic
|
|
OP
Backyard Mechanic
Joined: Mar 2011
Posts: 249 |
Just about have the engine all ready for painting. Going to have a friend of mine that owns a collision center paint it for me.
However, I do have this question: What would be your recommendation for the exhaust system? Would you paint the intake the same as the engine? or leave it unpainted? Would you paint the exhaust? or leave it unpainted?
Please tell me how you handled this on your Chevrolet hobby.
Thank you.
Member # 047137 - 1947 Chevrolet 4 door sport sedan
|
|
|
|
|
Joined: Sep 2009
Posts: 6,689 Likes: 21
ChatMaster - 6,000
|
|
ChatMaster - 6,000
Joined: Sep 2009
Posts: 6,689 Likes: 21 |
Get some high temp exhaust paint from Chevies of the 40s or Filling Station. Paint the whole engine. Except the carb, gen, starter, etc. It will burn off so don't drive the car none afterwards if you want it to stay pristine. Trailer Queens have do not run long enough to damage the paint. "Drivers" do. Actually, the paint on the intake and exhaust are supposed to look like they have been too hot. Especially the exhaust. Anything else is sort of cheating.  Not really but not all of us can afford a nice trailer and resist the temptation to drive the car much. It is what it is. You're welcome. Charlie BTW: I hope that visor has been given a decent burial.
|
|
|
|
|
Joined: Mar 2011
Posts: 249
Backyard Mechanic
|
|
OP
Backyard Mechanic
Joined: Mar 2011
Posts: 249 |
I like my visor very much thank you!
Member # 047137 - 1947 Chevrolet 4 door sport sedan
|
|
|
|
|
Joined: Nov 2002
Posts: 7,472 Likes: 26
ChatMaster - 7,000
|
|
ChatMaster - 7,000
Joined: Nov 2002
Posts: 7,472 Likes: 26 |
originally the intake and exhaust manifolds were painted along with the rest of the engine. On mine I painted the intake with the engine color but used "cast iron gray" for the exhaust. The factory engine paint on the exhaust soon burned off and the rust color took over. While mine is not correct it does (in my opinion) look a little cleaner.
Steve D
|
|
|
|
|
Joined: Mar 2011
Posts: 249
Backyard Mechanic
|
|
OP
Backyard Mechanic
Joined: Mar 2011
Posts: 249 |
Member # 047137 - 1947 Chevrolet 4 door sport sedan
|
|
|
|
|
Joined: Nov 2002
Posts: 7,472 Likes: 26
ChatMaster - 7,000
|
|
ChatMaster - 7,000
Joined: Nov 2002
Posts: 7,472 Likes: 26 |
Your welcome. As an added note I purchased my high temp paint from a local stove shop.
Steve D
|
|
|
|
|
Joined: Mar 2011
Posts: 249
Backyard Mechanic
|
|
OP
Backyard Mechanic
Joined: Mar 2011
Posts: 249 |
Well the engine is painted and now waiting for the weather to get nice to be installed.
Used Eastwood Spray Max 2 K for the primer and a nice looking Gray for the engine with black being using on various add on pieces with the Chrome valve cover and Chrome push rod cover. And of course, orange on the oil cover lid.
Excited to get it into the old 47!
Member # 047137 - 1947 Chevrolet 4 door sport sedan
|
|
|
|
|
Joined: Feb 2008
Posts: 3,801 Likes: 1
ChatMaster - 3,000
|
|
ChatMaster - 3,000
Joined: Feb 2008
Posts: 3,801 Likes: 1 |
Well the engine is painted and now waiting for the weather to get nice to be installed.
Used Eastwood Spray Max 2 K for the primer and a nice looking Gray for the engine with black being using on various add on pieces with the Chrome valve cover and Chrome push rod cover. And of course, orange on the oil cover lid.
Excited to get it into the old 47! We need some pics to see your work ! 
1951 Chevy Styleline Deluxe 2 door sedan / purchased from second owner 6-19-2000.
|
|
|
|
|
Joined: Mar 2011
Posts: 249
Backyard Mechanic
|
|
OP
Backyard Mechanic
Joined: Mar 2011
Posts: 249 |
Wondering: In that I am replacing my original 216 and keeping the original bell housing and transmission with a 235 from the 54 Chevrolet.......do I need or would it be better to pull the original bell housing and transmission in the process of pulling the engine OR should I just pull the engine and replace it with the 235.
Thank you!
Member # 047137 - 1947 Chevrolet 4 door sport sedan
|
|
|
|
|
Joined: Nov 2002
Posts: 7,472 Likes: 26
ChatMaster - 7,000
|
|
ChatMaster - 7,000
Joined: Nov 2002
Posts: 7,472 Likes: 26 |
I think it would be best to pull the transmission etc. with the engine. Make all the changeovers and install the 235 with the tranny already attached. Probably would be a good time to change the rear main seal-reface the flywheel and install a new clutch.
Steve D
|
|
|
|
|
Joined: Mar 2011
Posts: 249
Backyard Mechanic
|
|
OP
Backyard Mechanic
Joined: Mar 2011
Posts: 249 |
Member # 047137 - 1947 Chevrolet 4 door sport sedan
|
|
|
|
|
Joined: Mar 2011
Posts: 249
Backyard Mechanic
|
|
OP
Backyard Mechanic
Joined: Mar 2011
Posts: 249 |
Continuing my 1954 235 exchange with my 216 in the 1947 "saga"!
With the flywheel coming off the 216 to be replaced into the bell housing of the 235 (using the same bell housing off the 1947 that is going into the 235) do I need to remember how it came off the 216 as I replace it into the bell housing on the 235? Is there any aligning I should be concerned with?
If I just put it on will it effect how I time the car?
Member # 047137 - 1947 Chevrolet 4 door sport sedan
|
|
|
|
|
Joined: Jan 2002
Posts: 30,701 Likes: 141
ChatMaster - 25,000
|
|
ChatMaster - 25,000
Joined: Jan 2002
Posts: 30,701 Likes: 141 |
Just clean-up the mating surfaces. Should be metal to metal with no paint on them.
Last edited by Chev Nut; 03/13/15 10:28 AM.
Gene Schneider
|
|
|
|
|
Joined: Mar 2011
Posts: 249
Backyard Mechanic
|
|
OP
Backyard Mechanic
Joined: Mar 2011
Posts: 249 |
Member # 047137 - 1947 Chevrolet 4 door sport sedan
|
|
|
|
|
Joined: Mar 2011
Posts: 249
Backyard Mechanic
|
|
OP
Backyard Mechanic
Joined: Mar 2011
Posts: 249 |
Making progress on my engine swap - 216 in a 1947 to a 235 in a 1947.
However, seems like questions keep popping up.
Here is the next: There is the front mount in the front of the engine. No problem - will drill the new engine to fit.
There is the mount on the transmission. Seems to be no problem.
However, the mounts coming off the lower corner on both sides of the bell housing are not there.
Should they be there? The mount is missing on the bell housing but there are two mounts on the frame opposite of where the mount on the bell housing should be
Where do I go now? I cannot seem to find replacement mounts for the bell housing hook - up May have to make my own.
Thanks for any thoughts.
Member # 047137 - 1947 Chevrolet 4 door sport sedan
|
|
|
|
|
Joined: Jan 2002
Posts: 30,701 Likes: 141
ChatMaster - 25,000
|
|
ChatMaster - 25,000
Joined: Jan 2002
Posts: 30,701 Likes: 141 |
The brackets AND MOUNTS must be on the bell housing. They prevent the engine from twisting under power. The brackets fit 1937-1948 cars.....Do you mean the brakets were ot on the '47 bell housing which you are reusing? If not there the engine was probably replaced once before.
Gene Schneider
|
|
|
|
|
Joined: Mar 2011
Posts: 249
Backyard Mechanic
|
|
OP
Backyard Mechanic
Joined: Mar 2011
Posts: 249 |
That is what I am thinking. The brackets are not on the housing - either side - however, there are partial brackets on the frame on both sides.
Question -where would you suggest I find them to purchase OR should I make my own?
Thank you!
Member # 047137 - 1947 Chevrolet 4 door sport sedan
|
|
|
|
|
Joined: Sep 2010
Posts: 284
Backyard Mechanic
|
|
Backyard Mechanic
Joined: Sep 2010
Posts: 284 |
Ranger:
The brackets and rubber mounts were missing on my 48 when I got it. I managed to get the missing parts from Bruce Bugay in Virginia - who's probably still on this forum. The "M' Shaped rubber mounts are available from COT40s, etc. You also might reach out to the fella that's selling a bunch of 47 parts recently on this forum - he may have the brackets and mounts as well.
Regards:
Oldengineer
|
|
|
|
|
Joined: Mar 2011
Posts: 249
Backyard Mechanic
|
|
OP
Backyard Mechanic
Joined: Mar 2011
Posts: 249 |
Member # 047137 - 1947 Chevrolet 4 door sport sedan
|
|
|
|
|
Joined: Mar 2011
Posts: 249
Backyard Mechanic
|
|
OP
Backyard Mechanic
Joined: Mar 2011
Posts: 249 |
This has been a long trip. Pulled the 216 and began to harvest the transmission, bell housing, etc from the 216 and transfer those over to the 235.
Question: While cleaning up the transmission I noticed the following.
The end that goes into the bell housing has just a little wobble to it and the other end the universal joint has movement up and down and back and forth on the center point.
Is that normal or okay. I am thinking that once the U.V. joint is connected to the drive shaft that will keep the U.V. joint centered.
Is that good thinking - any thoughts are appreciated. Thanks!
Member # 047137 - 1947 Chevrolet 4 door sport sedan
|
|
|
|
|
Joined: Feb 2008
Posts: 3,801 Likes: 1
ChatMaster - 3,000
|
|
ChatMaster - 3,000
Joined: Feb 2008
Posts: 3,801 Likes: 1 |
Don't overlook those bell housing mounts, when you get to that point.
1951 Chevy Styleline Deluxe 2 door sedan / purchased from second owner 6-19-2000.
|
|
|
|
|
Joined: Feb 2011
Posts: 3,136
ChatMaster - 3,000
|
|
ChatMaster - 3,000
Joined: Feb 2011
Posts: 3,136 |
I'm trying to remember...it's been that far back...I'm sure I made my own, though...I believe I think I welded them up from solid steel...And I recall it made for a rougher ride...Might have added some rubber...
1947 Fleetmaster Sport Coupe VCCA # 47475
If it's not wearing a Bowtie...It's not properly dressed...!
|
|
|
|
|
Joined: Apr 2008
Posts: 1,194
ChatMaster - 1,000
|
|
ChatMaster - 1,000
Joined: Apr 2008
Posts: 1,194 |
The input shaft for the transmission goes into the pilot bushing in the end of the crankshaft.
|
|
|
|
|
Joined: Mar 2011
Posts: 249
Backyard Mechanic
|
|
OP
Backyard Mechanic
Joined: Mar 2011
Posts: 249 |
Thank you for the imput.
I was concerned about the wobble at the imput end - that should be controlled by the pilot bushing.
And the play in the universal joint toward at the end of the tranny. That should be controlled when installed as well.
I have the pilot bushing and the motor mounts. The middle mounts were missing when I pulled the engine. However, I found a pair and that will be taken care of shortly.
Thank you
Member # 047137 - 1947 Chevrolet 4 door sport sedan
|
|
|
|
|
Joined: Mar 2011
Posts: 249
Backyard Mechanic
|
|
OP
Backyard Mechanic
Joined: Mar 2011
Posts: 249 |
I find it very interesting that as I proceed further and further into this project the MORE problems I find facing me.
Motor mounts missing or different then what they are supposed to be.
Transmission linkage that has been fabricated to be much different from the original.
New gaskets needed almost everywhere and piles of grease that has to be scrapped off.
Oh well, I wanted a winter project. I may get it done by next winter.
This all takes a lot of time.
No - I am not complaining - just saying.......
Member # 047137 - 1947 Chevrolet 4 door sport sedan
|
|
|
|
|
Joined: Feb 2008
Posts: 3,801 Likes: 1
ChatMaster - 3,000
|
|
ChatMaster - 3,000
Joined: Feb 2008
Posts: 3,801 Likes: 1 |
"I find it very interesting that as I proceed further and further into this project the MORE problems I find facing me".Much like daily life, don't ya think ? Before you know it, you'll be running up and down the highway, burning rubber, just having a good ole time.
1951 Chevy Styleline Deluxe 2 door sedan / purchased from second owner 6-19-2000.
|
|
|
|
|
Joined: Feb 2005
Posts: 2,433
ChatMaster - 2,000
|
|
ChatMaster - 2,000
Joined: Feb 2005
Posts: 2,433 |
Hey Ranger......welcome to the world of WBO.... Work By Others  Stick with it, it will all work out in the end.
ken48
VCCA 42589
|
|
|
|
|
Joined: Feb 2011
Posts: 3,136
ChatMaster - 3,000
|
|
ChatMaster - 3,000
Joined: Feb 2011
Posts: 3,136 |
Old cars...Gotta love them or they just end up with bullet holes in 'em...
1947 Fleetmaster Sport Coupe VCCA # 47475
If it's not wearing a Bowtie...It's not properly dressed...!
|
|
|
|
|
Joined: Jan 2002
Posts: 30,701 Likes: 141
ChatMaster - 25,000
|
|
ChatMaster - 25,000
Joined: Jan 2002
Posts: 30,701 Likes: 141 |
Why would transmission linkage be different if you are using the same 1947 tranmmission.
Either type of the side motor mounts will work.
Gene Schneider
|
|
|
|
|
Joined: Mar 2011
Posts: 249
Backyard Mechanic
|
|
OP
Backyard Mechanic
Joined: Mar 2011
Posts: 249 |
Thanks Gene - and you are right.
Got the mounts and the linkage is fine.
Chalk it up to: old age - slow mind - stupity - or??
Member # 047137 - 1947 Chevrolet 4 door sport sedan
|
|
|
|
|
Joined: Mar 2011
Posts: 249
Backyard Mechanic
|
|
OP
Backyard Mechanic
Joined: Mar 2011
Posts: 249 |
Waiting for the leveler to come for the cherry picker.
In the mean time, on goes the flywheel (had it ground) - no I did not forget the pilot bushing - then the clutch - then the bell housing - starter - then the tranny and then the engine is going into the 1947.
It has been a long haul - the only thing that yet concerns me is whether or not I have the distributor in the way you friends have instructed me to follow.
Thanks for all your help. Will keep you updated.
Member # 047137 - 1947 Chevrolet 4 door sport sedan
|
|
|
|
|
Joined: Mar 2011
Posts: 249
Backyard Mechanic
|
|
OP
Backyard Mechanic
Joined: Mar 2011
Posts: 249 |
Today I installed the flywheel - the clutch - the pressure plate, etc.
Have to wait until Monday to attach the Transmission. Getting it worked on this Saturday.
The directions for the clutch installation said to look for the X Hand-crank the engine until the "X" mark on the flywheel is at the bottom. Install the clutch disc, pressure plate, and cover assembly and support them with the clutch pilot tool. Turn the clutch assembly until the "X" mark on the clutch cover lines up with the "X" mark on the flywheel, Fig. 117. Then install the attaching bolts.
I searched and searched and all I found were the words install this side facing the flywheel.
Should I be concerned? I attached the pressure plate to the flywheel as instructed. Each bolt tightened a little at a time all the way around.
Well, in any case - will have the engine compartment painted and engine at least in place by next Tuesday.
Getting closer!
Member # 047137 - 1947 Chevrolet 4 door sport sedan
|
|
|
|
|
Joined: Jan 2002
Posts: 30,701 Likes: 141
ChatMaster - 25,000
|
|
ChatMaster - 25,000
Joined: Jan 2002
Posts: 30,701 Likes: 141 |
Don't worry about the "X"....That was done when the original pressure plate and flywheel were used and balanced together. Once you change and replace parts that all out the window.
Gene Schneider
|
|
|
|
|
Joined: Mar 2011
Posts: 249
Backyard Mechanic
|
|
OP
Backyard Mechanic
Joined: Mar 2011
Posts: 249 |
Thank you - I was thinking about taking it apart and rechecking.
Thanks for your expertise!
Member # 047137 - 1947 Chevrolet 4 door sport sedan
|
|
|
|
|
Joined: Mar 2011
Posts: 249
Backyard Mechanic
|
|
OP
Backyard Mechanic
Joined: Mar 2011
Posts: 249 |
Well everything is just about ready to install the engine.
Engine - bell-housing - new clutch - transmission attached.
Will finish the engine compartment in the next day or so. Painting the compartment and then the installation.
My wife says - clear out the garage before you try to start the car OR
push the car out into the driveway. Why? Just in case it blows up you will not destroy the other vehicles in the garage.
Member # 047137 - 1947 Chevrolet 4 door sport sedan
|
|
|
|
|
Joined: Jun 2007
Posts: 1,743 Likes: 11
ChatMaster - 1,500
|
|
ChatMaster - 1,500
Joined: Jun 2007
Posts: 1,743 Likes: 11 |
Sounds like your wife is a very wise woman. Good advice for sure. Best of luck!
Russell #38868
'48 4 door Fleetline
|
|
|
|
|
Joined: Mar 2011
Posts: 249
Backyard Mechanic
|
|
OP
Backyard Mechanic
Joined: Mar 2011
Posts: 249 |
I am not worrying so much about putting the engine back in the car.
I do have a concern as too how the transmission connects itself to the
drive shaft tube. All I can do is be sure the end of the tranny starts into the drive shaft tube and HOPE it lines its self up?
Not sure how that will work out!
Member # 047137 - 1947 Chevrolet 4 door sport sedan
|
|
|
|
|
Joined: Nov 2002
Posts: 7,472 Likes: 26
ChatMaster - 7,000
|
|
ChatMaster - 7,000
Joined: Nov 2002
Posts: 7,472 Likes: 26 |
If the splines don't align just turn a rear wheel slightly and that will rotate the drive shaft. It will not be a problem.
Steve D
|
|
|
|
|
Joined: Mar 2011
Posts: 249
Backyard Mechanic
|
|
OP
Backyard Mechanic
Joined: Mar 2011
Posts: 249 |
Thank you - that helps -you know how you worry about things!
Member # 047137 - 1947 Chevrolet 4 door sport sedan
|
|
|
|
|
Joined: Mar 2011
Posts: 249
Backyard Mechanic
|
|
OP
Backyard Mechanic
Joined: Mar 2011
Posts: 249 |
Well - the engine went in today.
Well - almost all the way. Just two inches short. The thing that worried me has got me stuck.
The transmission is two inches from reaching the holes for the mounting bolts.
What do I need to do? I tried moving the rear wheel to no avail.
Want to finish the install tomorrow. Someone give me some miracle advice. As always, thanks. Another question - does the transmission need to be in gear or out of gear to make the correct link up?
Member # 047137 - 1947 Chevrolet 4 door sport sedan
|
|
|
|
|
Joined: Nov 2002
Posts: 7,472 Likes: 26
ChatMaster - 7,000
|
|
ChatMaster - 7,000
Joined: Nov 2002
Posts: 7,472 Likes: 26 |
It sounds as though you may not have the engine and tranny at the proper angle to line up. Is the car supported at the rear with stands under the axle or under the frame?
Steve D
|
|
|
|
|
Joined: Mar 2011
Posts: 249
Backyard Mechanic
|
|
OP
Backyard Mechanic
Joined: Mar 2011
Posts: 249 |
No - I have the car setting - all four tires - on concrete blocks.
The car is as level on the blocks as it would be if it were setting
on the concrete garage floor.
Thank you.
Member # 047137 - 1947 Chevrolet 4 door sport sedan
|
|
|
|
|
Joined: Nov 2002
Posts: 7,472 Likes: 26
ChatMaster - 7,000
|
|
ChatMaster - 7,000
Joined: Nov 2002
Posts: 7,472 Likes: 26 |
Perhaps one of our resident experts will chime in with some advice. I would prefer to see at least the rear supported by jackstands under the frame. First I think its safer and second it allows movement of the torque tube for alignment and the ability to rotate a wheel. Doesn't need to be much, just a shake back and forth while a second person applies a push/wiggle from the front.
Steve D
|
|
|
|
|
Joined: Jan 2002
Posts: 30,701 Likes: 141
ChatMaster - 25,000
|
|
ChatMaster - 25,000
Joined: Jan 2002
Posts: 30,701 Likes: 141 |
It is very dangerous to use cement blocks to support the weight of the car. They can crack or crumble.....I would never get under a car supported with cement blocks.
Gene Schneider
|
|
|
|
|
Joined: Nov 2001
Posts: 29,863
Tech Advisor ChatMaster - 25,000
|
|
Tech Advisor ChatMaster - 25,000
Joined: Nov 2001
Posts: 29,863 |
The Mangy Old Mutt
"If It's Not Junk.....It's Not Treasure!"
|
|
|
|
|
Joined: Mar 2011
Posts: 249
Backyard Mechanic
|
|
OP
Backyard Mechanic
Joined: Mar 2011
Posts: 249 |
Setting the record straight - The car is setting on four solid concrete blocks to keep it level. Under the axle in the rear I have a pair of
jack stands and in the front I have a pair of jack stands.
The engine went in today - had to take off the rear transmission housing to get the floppy universal to aline itself with the drive shaft. Got the rear mounts installed and the front mounts installed.
Not much more to do before it is rolled outside and fired up.
Member # 047137 - 1947 Chevrolet 4 door sport sedan
|
|
|
|
|
Joined: Nov 2002
Posts: 7,472 Likes: 26
ChatMaster - 7,000
|
|
ChatMaster - 7,000
Joined: Nov 2002
Posts: 7,472 Likes: 26 |
That is good news all the way around.
Steve D
|
|
|
|
|
Joined: Feb 2008
Posts: 3,801 Likes: 1
ChatMaster - 3,000
|
|
ChatMaster - 3,000
Joined: Feb 2008
Posts: 3,801 Likes: 1 |
Hopefully, this update will be all you expected. Treated correctly, the 235 will outlast all of us.
1951 Chevy Styleline Deluxe 2 door sedan / purchased from second owner 6-19-2000.
|
|
|
|
|
Joined: Mar 2011
Posts: 249
Backyard Mechanic
|
|
OP
Backyard Mechanic
Joined: Mar 2011
Posts: 249 |
Got the antifreeze and oil into the car today.
Still a little work to be done.
Question: On the battery side of the engine I have two wires wrapped together with connectors. The one has the connector the size that goes to the coil. No Problem
The other has a connector about 7/16 - I am not able to remember where it came from on my 216 - but it appears to need to go somewhere.
Any ideas where that somewhere might be?
Thanks again.
Member # 047137 - 1947 Chevrolet 4 door sport sedan
|
|
|
|
|
Joined: Jan 2002
Posts: 30,701 Likes: 141
ChatMaster - 25,000
|
|
ChatMaster - 25,000
Joined: Jan 2002
Posts: 30,701 Likes: 141 |
id your 1947 still have a polarity reversing switch connected ....... the switch sat on top of the strateer and activated by the starter linkage.
Gene Schneider
|
|
|
|
|
Joined: Mar 2011
Posts: 249
Backyard Mechanic
|
|
OP
Backyard Mechanic
Joined: Mar 2011
Posts: 249 |
Thanks - that came to mind but I was not sure.
Appreciate your help.
Member # 047137 - 1947 Chevrolet 4 door sport sedan
|
|
|
|
|
Joined: Mar 2011
Posts: 249
Backyard Mechanic
|
|
OP
Backyard Mechanic
Joined: Mar 2011
Posts: 249 |
Well, today was to be the day I started the "beast." I call it the beast because that is what it has become.
Today I had just two things to do before I could start it.
Number 1 - Hook up the accelerator.
Of course, that did not work out in that the accelerator linkage that I have on hand is too short.
Number 2 - I decided to try to start it anyhow.
Of course, that did not work out in that I cannot get any gasoline past the fuel pump. It is a new pump with the gas line connected to the carb and the vacuum advance connected to the carb. The other two connectors from the fuel pump go to the windshield wipers and I can't recall where the other goes.
So another job for tomorrow.
Should you have any ideas on either subject please share your thoughts. This needs to be done.
Thanks!
Member # 047137 - 1947 Chevrolet 4 door sport sedan
|
|
|
|
|
Joined: Feb 2008
Posts: 3,801 Likes: 1
ChatMaster - 3,000
|
|
ChatMaster - 3,000
Joined: Feb 2008
Posts: 3,801 Likes: 1 |
Well, today was to be the day I started the "beast." I call it the beast because that is what it has become.
Today I had just two things to do before I could start it.
Number 1 - Hook up the accelerator.
Of course, that did not work out in that the accelerator linkage that I have on hand is too short.
Number 2 - I decided to try to start it anyhow.
Of course, that did not work out in that I cannot get any gasoline past the fuel pump. It is a new pump with the gas line connected to the carb and the vacuum advance connected to the carb. The other two connectors from the fuel pump go to the windshield wipers and I can't recall where the other goes.
So another job for tomorrow.
Should you have any ideas on either subject please share your thoughts. This needs to be done.
Thanks! Look at this link, it may assist you with your fuel pump/vacuum hose routing. http://www.chevytalk.org/fusionbb/showtopic.php?tid/308050/If I recall correctly, when converting from a 216 to a 235, the pivot point for the accelerator bellcrank is moved. Read this step #4 from Patricks Antique Autos and Trucks in AZ.In this article, he lists the steps for converting from a 216 to a 235.
"4.Throttle linkage may need modifying if your block's bellcrank mount hole is further back (toward firewall). Easy ... some of the curve will need to be taken out of the accelerator rod. Squeeze it in a vise 'till it makes it's travel without rubbing the floor pan (as installed in the bellcrank, without return spring). When that's done, measure how much it needs shortening by bringing the whole linkage assemble to "full throttle". Simply cut that amount out of the slender part of the rod and re-weld. Done!"
1951 Chevy Styleline Deluxe 2 door sedan / purchased from second owner 6-19-2000.
|
|
|
|
|
Joined: Mar 2011
Posts: 249
Backyard Mechanic
|
|
OP
Backyard Mechanic
Joined: Mar 2011
Posts: 249 |
Thank you - I have the fuel pump connected as per the previous message. Still no gas flow. Will check for possible plugged lines, etc.
The throttle situation is still a problem for me even with the explanation.
Will work on it in the morning.
Thanks again for imput.
Member # 047137 - 1947 Chevrolet 4 door sport sedan
|
|
|
|
|
Joined: Mar 2011
Posts: 249
Backyard Mechanic
|
|
OP
Backyard Mechanic
Joined: Mar 2011
Posts: 249 |
Okay - I give up! Is there a secret I do not know about installing the fuel pump on a 235?
Had the fuel pump with the vacuum installed - all the right hook - ups but gas only to the pump with nothing going to the carb.
So, I changed to the old fuel pump that just pumps fuel. Same result.
Some information about having to hold up a rod when installing the pump. Others say that is for V8's only.
What am I missing?
Last edited by rangerart71; 04/29/15 04:53 PM.
Member # 047137 - 1947 Chevrolet 4 door sport sedan
|
|
|
|
|
Joined: Nov 2002
Posts: 7,472 Likes: 26
ChatMaster - 7,000
|
|
ChatMaster - 7,000
Joined: Nov 2002
Posts: 7,472 Likes: 26 |
When installing the pump you should feel pressure on the pump arm when lining up the mounting holes. If it goes into place without being compressed then it is not in correctly. Try compressing the arm on the pump that is off and you will determine which way it needs to be compressed to pump. The arm will need to be installed so that it rides on the cam and the pump pushed towards the engine under pressure to get it in position for bolting.
Steve D
|
|
|
|
|
Joined: Feb 2008
Posts: 3,801 Likes: 1
ChatMaster - 3,000
|
|
ChatMaster - 3,000
Joined: Feb 2008
Posts: 3,801 Likes: 1 |
Assuming you have the distributor in place, crank the engine "A BIT" to rotate the camshaft, then try again, to install the pump.
You should feel the resistance on the fuel pump arm, as explained by Steve D.
1951 Chevy Styleline Deluxe 2 door sedan / purchased from second owner 6-19-2000.
|
|
|
|
|
Joined: Mar 2011
Posts: 249
Backyard Mechanic
|
|
OP
Backyard Mechanic
Joined: Mar 2011
Posts: 249 |
Spent most of today trying to get gas past the fuel pump to the carb.
No luck:
Took the pump off and installed it as instructed by the last VCCA friend. Felt the pressure and felt sure it would be good.
Nothing!
Took the air hose and blew back through the line to the tank and found that the line to the tank was fine.
Checked all the lines running into the pump and from the pump were hooked up correctly.
What else?
Tomorrow I am going to run a line from the fuel pump to a coffee can to see if it is trying to pump gas.
Is it necessary to prime the pump or is the gas coming from the tank enough to get the pump working?
Thanks - this has become a real challenge.
Member # 047137 - 1947 Chevrolet 4 door sport sedan
|
|
|
|
|
Joined: Jan 2002
Posts: 30,701 Likes: 141
ChatMaster - 25,000
|
|
ChatMaster - 25,000
Joined: Jan 2002
Posts: 30,701 Likes: 141 |
If the lines and pump are dry sometimes it helps to pour about a shot glass of fuel directly into the carburetor throat....may have to do it two or three times.
Do this with the pump mounted and lines hooked up.
Gene Schneider
|
|
|
|
|
Joined: Mar 2011
Posts: 249
Backyard Mechanic
|
|
OP
Backyard Mechanic
Joined: Mar 2011
Posts: 249 |
Thank you Gene.
Tried that to no avail. The engine will cough but not start because no gas is getting to the carburator from the fuel pump.
Going to give it the bucket test in the morning - to see if the pump will pull gasoline from the bucket.
Member # 047137 - 1947 Chevrolet 4 door sport sedan
|
|
|
|
|
Joined: Nov 2004
Posts: 373 Likes: 1
Backyard Mechanic
|
|
Backyard Mechanic
Joined: Nov 2004
Posts: 373 Likes: 1 |
I had the same problem on my 1938 Chevy. I blew air thru the line and it wasnt pluged. But that also blew all the fuel out of the line. After everything was reconnected, I blew some air (with the compressor) into the gas tank filler, like I was putting gas in it. That forced the gas thru the line all the way to the fuel pump. Problem solved for me, and it's been working ever since.
VCCA Member 51121
|
|
|
|
|
Joined: Mar 2011
Posts: 249
Backyard Mechanic
|
|
OP
Backyard Mechanic
Joined: Mar 2011
Posts: 249 |
Thank you - will try that as well.
Problem I am having is getting the gasoline from the pump to the carburator. It doesn't seem to want to pump. One is a new pump and other pump is from my old 216 engine. One pumps gas only the other pumps gas and vacuum.
So one of the pumps should work. But both do the same thing. Sit there and ignore the gas that needs to be pumped.
I know I am missing something but what exactly I am missing I do not know.
Thanks again for your help.
Member # 047137 - 1947 Chevrolet 4 door sport sedan
|
|
|
|
|
Joined: Feb 2008
Posts: 3,801 Likes: 1
ChatMaster - 3,000
|
|
ChatMaster - 3,000
Joined: Feb 2008
Posts: 3,801 Likes: 1 |
Thank you - will try that as well.
Problem I am having is getting the gasoline from the pump to the carburator. It doesn't seem to want to pump. One is a new pump and other pump is from my old 216 engine. One pumps gas only the other pumps gas and vacuum.
So one of the pumps should work. But both do the same thing. Sit there and ignore the gas that needs to be pumped.
I know I am missing something but what exactly I am missing I do not know.
Thanks again for your help. It will not hurt to try the can full of fuel, as the fuel tank. I once had a fuel line that was "cracked / open" on the top side of the fuel line, facing the floor of the vehicle. When cranking, the pump was sucking air in, from the crack, instead of the fuel from the tank. Give the coffee can idea a try. You have nothing to lose and you always face challenges very well.
1951 Chevy Styleline Deluxe 2 door sedan / purchased from second owner 6-19-2000.
|
|
|
|
|
Joined: Mar 2011
Posts: 249
Backyard Mechanic
|
|
OP
Backyard Mechanic
Joined: Mar 2011
Posts: 249 |
The gas flows freely from the tank.
Tried the pump from the coffee can and no suction at all.
It appears that I am not getting the pump placed correctly. I can feel the roller and I can feel the slight pressure when I push the lever into the hole.
Will do it again tomorrow.
Thanks for all the help.
Member # 047137 - 1947 Chevrolet 4 door sport sedan
|
|
|
|
|
Joined: Jan 2002
Posts: 30,701 Likes: 141
ChatMaster - 25,000
|
|
ChatMaster - 25,000
Joined: Jan 2002
Posts: 30,701 Likes: 141 |
To get it to puimp you will have to exert a a lot of pressure on the armwith the single pump and a lot,lot more wth the dual pump.
Gene Schneider
|
|
|
|
|
Joined: Mar 2011
Posts: 249
Backyard Mechanic
|
|
OP
Backyard Mechanic
Joined: Mar 2011
Posts: 249 |
Thanks Gene - I am a little thick in the head. Will you explain to me what you just posted?
Thanks!
Member # 047137 - 1947 Chevrolet 4 door sport sedan
|
|
|
|
|
Joined: Feb 2008
Posts: 3,801 Likes: 1
ChatMaster - 3,000
|
|
ChatMaster - 3,000
Joined: Feb 2008
Posts: 3,801 Likes: 1 |
The gas flows freely from the tank.
Tried the pump from the coffee can and no suction at all.
It appears that I am not getting the pump placed correctly. I can feel the roller and I can feel the slight pressure when I push the lever into the hole.
Will do it again tomorrow.
Thanks for all the help. Which pump are you trying to mount ? The single action pump, or the pump with the vacuum assist ? Has the pump you are trying to install been sitting around for some time ? Try to make the pump diaphragm operate BEFORE mounting the pump to the block. Move (compress) the pump actuator lever to allow the diaphragm to move.
1951 Chevy Styleline Deluxe 2 door sedan / purchased from second owner 6-19-2000.
|
|
|
|
|
Joined: Mar 2011
Posts: 249
Backyard Mechanic
|
|
OP
Backyard Mechanic
Joined: Mar 2011
Posts: 249 |
Which pump are you trying to mount ?
The single action pump, or the pump with the vacuum assist ?
Has the pump you are trying to install been sitting around for some time ? The pump with the vacuum assist. Thought maybe it could have been bad so installed the single action pump from my 216. That one would not work either. Neither has been sitting around. I am thinking that I am not getting it centered enough on the roller when I put it in. I am going to do it again tomorrow very carefully. Should that not work I will perhaps use dynamite. Thank you all for trying so hard to help this old timer with limited talents.
Member # 047137 - 1947 Chevrolet 4 door sport sedan
|
|
|
|
|
Joined: Feb 2008
Posts: 3,801 Likes: 1
ChatMaster - 3,000
|
|
ChatMaster - 3,000
Joined: Feb 2008
Posts: 3,801 Likes: 1 |
Which pump are you trying to mount ?
The single action pump, or the pump with the vacuum assist ?
Has the pump you are trying to install been sitting around for some time ? The pump with the vacuum assist. Thought maybe it could have been bad so installed the single action pump from my 216. That one would not work either. Neither has been sitting around. I am thinking that I am not getting it centered enough on the roller when I put it in. I am going to do it again tomorrow very carefully. Should that not work I will perhaps use dynamite. Thank you all for trying so hard to help this old timer with limited talents. The roller you are speaking of is the eccentric on the camshaft that activates/operates the "lever" on the fuel pump. If not careful, during installation, it is possible for the fuel pump lever to end up UNDER the camshaft. If that is the case, in that position, the lever on the fuel pump will not be moved/activated by the camshaft eccentric. One more far fetched thought, when you are installing the double action pump, you do have #19, the sediment bowl secured in place ... see link below. http://chevy.oldcarmanualproject.com/shop/1949_53/06engine/6_089.HTM
1951 Chevy Styleline Deluxe 2 door sedan / purchased from second owner 6-19-2000.
|
|
|
|
|
Joined: Mar 2011
Posts: 249
Backyard Mechanic
|
|
OP
Backyard Mechanic
Joined: Mar 2011
Posts: 249 |
The Fuel Pump I have is FS-286 Fuel Pump - 6 cycle pump with vacuum assist and no glass bowl. Came from the Filling Station.
Everything looks good and tight with the pump.
Member # 047137 - 1947 Chevrolet 4 door sport sedan
|
|
|
|
|
Joined: Feb 2008
Posts: 3,801 Likes: 1
ChatMaster - 3,000
|
|
ChatMaster - 3,000
Joined: Feb 2008
Posts: 3,801 Likes: 1 |
The Fuel Pump I have is FS-286 Fuel Pump - 6 cycle pump with vacuum assist and no glass bowl. Came from the Filling Station.
Everything looks good and tight with the pump. OK. If you have the pump installed and all the lines connected CORRECTLY, disconnect the line to the fuel tank, from the pump. Have someone crank your engine, while you feel for a suction or "a draw" at the fitting on the pump, where the tank line was connected. No suction ? 1. One or both fuel pumps are not good. Unlikely. 2. Camshaft is not rotating to activate eccentric. Possible. 3. Fuel pump arm is not being located in correct position, when installed. Probable.
1951 Chevy Styleline Deluxe 2 door sedan / purchased from second owner 6-19-2000.
|
|
|
|
|
Joined: Mar 2011
Posts: 249
Backyard Mechanic
|
|
OP
Backyard Mechanic
Joined: Mar 2011
Posts: 249 |
Well, today went quite well considering...
The starter stopped working. Thankfully I had a back up. Will check to see what is wrong with the old one later.
The vacuum assist fuel pump will be going back. It has a leak in the upper gasket. Looks to me as if there is one screw that is bad and is allowing air to escape. So went to the 216 fuel pump single stage and now have gas to the carburator.
Now to work on getting the old beast started. It did not want to fire up today so will begin to look at all the electrical work that I did to it to make sure that work is correct.
I did work on the accelerator linkage and hope that I have that correct. Not real sure where the return spring is supposed to go but I did find a place for it.
The carburator is as it was when I bought the engine. Trust that it is set up correctly. Will be reading the manual this evening.
The distributor cap was cracked so will order a new one. I probably did that when I was installing the engine in the car.
Any suggestions on how I should proceed or you would proceed to get the car started would be welcomed.
Thank you for all the help.
I will keep the questions coming as long as the car sets in the garage and causes me headaches.
Blessings. Art
Member # 047137 - 1947 Chevrolet 4 door sport sedan
|
|
|
|
|
Joined: Feb 2008
Posts: 3,801 Likes: 1
ChatMaster - 3,000
|
|
ChatMaster - 3,000
Joined: Feb 2008
Posts: 3,801 Likes: 1 |
Here is a pic of the engine, showing the accelerator spring, anchored at the oil pan. http://chevy.oldcarmanualproject.com/parts/1929_54/085a.htmYou did what kind of electrical work on the engine? Before any advice is given, what you did "electrically" must be known. Did you POSSIBLY have the distributor out? If so, why was it out ? There are only two settings on the carb. One is idle speed, one is air/fuel mixture. GENTLY, turn mixture screw in, until you feel resistance. GENTLY is the key. Then turn screw out 1 1/2 to 2 full turns. That should get air/fuel mixture in the ballpark. Both are adjustable, once engine is running.
1951 Chevy Styleline Deluxe 2 door sedan / purchased from second owner 6-19-2000.
|
|
|
|
|
Joined: Mar 2011
Posts: 249
Backyard Mechanic
|
|
OP
Backyard Mechanic
Joined: Mar 2011
Posts: 249 |
Dealt with the distributor situation earlier in this Blog of our progress together. [b]I found a 1112403 in pretty good shape however it does not come with the vacuum advance. Purchased the vacuum advance. This was taken from my earlier posting in this blog.
OK. Depending on whether you have the distributor out or not ... If not out, start on page 12-35, if already out, go to bottom left side of page 12-36. BE CERTAIN DISTRIBUTOR IS FULLY SEATED, BEFORE STARTING CAR. IF DISTRIBUTOR IS NOT FULLY SEATED INTO OIL PUMP. CAR WILL START ...... BUT OIL PUMP WILL NOT BE ENGAGED. NO OIL PRESSURE = NO ENGINE ! Click here. http://chevy.oldcarmanualproject.com/shop/1949_53/12electrical/12_36.HTM[/b] When I purchased the engine there was no distributor - ordered the one mentioned from a guy in Canada and followed all directions listed above installing it. Plan to walk through that process again to see if I have it right. Please share your experience here relating to installing the distributor should you desire. Walk me through the process of installing the accelerator linkage if you have time. I had to lengthen the linkage and am wondering if I have it installed correctly. Thanks for sticking with me fellows and gals during this process. If I had known how many new things I would have to know and do I would have rethought doing this.
Member # 047137 - 1947 Chevrolet 4 door sport sedan
|
|
|
|
|
Joined: Feb 2008
Posts: 3,801 Likes: 1
ChatMaster - 3,000
|
|
ChatMaster - 3,000
Joined: Feb 2008
Posts: 3,801 Likes: 1 |
Dealt with the distributor situation earlier in this Blog of our progress together. [b]I found a 1112403 in pretty good shape however it does not come with the vacuum advance. Purchased the vacuum advance. This was taken from my earlier posting in this blog.
OK. Depending on whether you have the distributor out or not ... If not out, start on page 12-35, if already out, go to bottom left side of page 12-36. BE CERTAIN DISTRIBUTOR IS FULLY SEATED, BEFORE STARTING CAR. IF DISTRIBUTOR IS NOT FULLY SEATED INTO OIL PUMP. CAR WILL START ...... BUT OIL PUMP WILL NOT BE ENGAGED. NO OIL PRESSURE = NO ENGINE ! Click here. http://chevy.oldcarmanualproject.com/shop/1949_53/12electrical/12_36.HTM[/b] When I purchased the engine there was no distributor - ordered the one mentioned from a guy in Canada and followed all directions listed above installing it. Plan to walk through that process again to see if I have it right. Please share your experience here relating to installing the distributor should you desire. Walk me through the process of installing the accelerator linkage if you have time. I had to lengthen the linkage and am wondering if I have it installed correctly. Thanks for sticking with me fellows and gals during this process. If I had known how many new things I would have to know and do I would have rethought doing this. This thread has become lengthy, I did not recall the distributor postings. If you follow page 12-36 exactly, you distributor will be in correctly and you will be in proper timing. IF NOT, it will not start. It must be done correctly, exactly, no maybes here. If you have lengthened the linkage, and the carb opens completely, when gas pedal is fully depressed, you're good. A straight forward process on the linkage. Yes, you have jumped into the lake on this project, the deep end of the lake, but you seem to be getting through it all. Soon, you'll be giving all the advice, with your "hands on" experience. You mentioned a VCCA friend was assisting you. He will continue to be your "advisor", if he's still assisting. Keep the questions coming, if needed. Here to help, when possible.
1951 Chevy Styleline Deluxe 2 door sedan / purchased from second owner 6-19-2000.
|
|
|
|
|
Joined: Mar 2011
Posts: 249
Backyard Mechanic
|
|
OP
Backyard Mechanic
Joined: Mar 2011
Posts: 249 |
Thanks Bob for all the help and other VCCA members as well.
I am coming close to the end of the questions: Here is one of the few remaining.
Does anyone out there have a picture of how the accelerator linkage should look once it has been adjusted for the 235 from the 216?
The reason I ask is that there are two places the linkage can be mounted. One right under the exhaust and one to the right of the one under the exhaust. (closer to the accelerator pedal).
The one being used is the one under the exhaust and I am having a difficult time adjusting the linkage to fit correctly.
Thank you Art
Member # 047137 - 1947 Chevrolet 4 door sport sedan
|
|
|
|
|
Joined: Feb 2008
Posts: 3,801 Likes: 1
ChatMaster - 3,000
|
|
ChatMaster - 3,000
Joined: Feb 2008
Posts: 3,801 Likes: 1 |
Thanks Bob for all the help and other VCCA members as well.
I am coming close to the end of the questions: Here is one of the few remaining.
Does anyone out there have a picture of how the accelerator linkage should look once it has been adjusted for the 235 from the 216?
The reason I ask is that there are two places the linkage can be mounted. One right under the exhaust and one to the right of the one under the exhaust. (closer to the accelerator pedal).
The one being used is the one under the exhaust and I am having a difficult time adjusting the linkage to fit correctly.
Thank you Art I will try to get a linkage pic for you, on 5/5/15, from my '51, with a '55 235 engine. Pic will have to be sent to your email address, since I do not have good fortune trying to post pics here.
1951 Chevy Styleline Deluxe 2 door sedan / purchased from second owner 6-19-2000.
|
|
|
|
|
Joined: Mar 2011
Posts: 249
Backyard Mechanic
|
|
OP
Backyard Mechanic
Joined: Mar 2011
Posts: 249 |
Thanks Bob - figured it out last night.
Found pictures on the internet.
Confusing as too which mounting point to use.
Thanks Again.
Member # 047137 - 1947 Chevrolet 4 door sport sedan
|
|
|
|
|
Joined: Feb 2008
Posts: 3,801 Likes: 1
ChatMaster - 3,000
|
|
ChatMaster - 3,000
Joined: Feb 2008
Posts: 3,801 Likes: 1 |
Thanks Bob - figured it out last night.
Found pictures on the internet.
Confusing as too which mounting point to use.
Thanks Again. OK, good that you got it figured out, now share what you did with the rest of us, so we know.
1951 Chevy Styleline Deluxe 2 door sedan / purchased from second owner 6-19-2000.
|
|
|
|
|
Joined: Mar 2011
Posts: 249
Backyard Mechanic
|
|
OP
Backyard Mechanic
Joined: Mar 2011
Posts: 249 |
Remember - I am 72 years old and in good mind and sound judgement. BUT sometimes figure things out later rather then sooner.
I simply turned the pivot around so it was facing the Right direction instead of the Wrong direction and it was just fine.
Thanks again for all the straight forward directions.
Last edited by rangerart71; 05/05/15 01:31 PM.
Member # 047137 - 1947 Chevrolet 4 door sport sedan
|
|
|
|
|
Joined: Mar 2011
Posts: 249
Backyard Mechanic
|
|
OP
Backyard Mechanic
Joined: Mar 2011
Posts: 249 |
However, much earlier in the dialog we discussed distributors. We felt a 1112403 would be the right distributor for my 235 engine.
DO WE STILL AGREE WITH THAT?[b][/b]
If so - the distributor came but without a rotor - condensor - or cap.
What year rotor - condensor - cap do I purchase for that distributor if it is the right one?
Last edited by rangerart71; 05/05/15 01:35 PM.
Member # 047137 - 1947 Chevrolet 4 door sport sedan
|
|
|
|
|
Joined: Nov 2002
Posts: 7,472 Likes: 26
ChatMaster - 7,000
|
|
ChatMaster - 7,000
Joined: Nov 2002
Posts: 7,472 Likes: 26 |
Your supplier should be able to give you the correct parts with the distributor part number.
Steve D
|
|
|
|
|
Joined: Feb 2008
Posts: 3,801 Likes: 1
ChatMaster - 3,000
|
|
ChatMaster - 3,000
Joined: Feb 2008
Posts: 3,801 Likes: 1 |
Remember - I am 72 years old and in good mind and sound judgement. BUT sometimes figure things out later rather then sooner.
I simply turned the pivot around so it was facing the Right direction instead of the Wrong direction and it was just fine.
Thanks again for all the straight forward directions. Good that you are properly pivoting, now. We are the same age. Figuring things out later, rather than "not figuring things out at all" is a good thing. "Better late than never". You've heard that a million times ..... probably all quoted by 70 plus year old folks. 
1951 Chevy Styleline Deluxe 2 door sedan / purchased from second owner 6-19-2000.
|
|
|
|
|
Joined: Jun 2007
Posts: 1,743 Likes: 11
ChatMaster - 1,500
|
|
ChatMaster - 1,500
Joined: Jun 2007
Posts: 1,743 Likes: 11 |
1955 Looks like a good number for 1955.
Russell #38868
'48 4 door Fleetline
|
|
|
|
|
Joined: Feb 2008
Posts: 3,801 Likes: 1
ChatMaster - 3,000
|
|
ChatMaster - 3,000
Joined: Feb 2008
Posts: 3,801 Likes: 1 |
However, much earlier in the dialog we discussed distributors. We felt a 1112403 would be the right distributor for my 235 engine.
DO WE STILL AGREE WITH THAT?[b][/b]
If so - the distributor came but without a rotor - condensor - or cap.
What year rotor - condensor - cap do I purchase for that distributor if it is the right one? I do not care to have Chevy info, beyond 1957. That being said, the 1112403 fits '55 to '57 6 cylinders, perhaps more. Ordering dist. parts for '55, '56 or '57 will work for you.
1951 Chevy Styleline Deluxe 2 door sedan / purchased from second owner 6-19-2000.
|
|
|
|
|
Joined: Jan 2002
Posts: 30,701 Likes: 141
ChatMaster - 25,000
|
|
ChatMaster - 25,000
Joined: Jan 2002
Posts: 30,701 Likes: 141 |
I agree. The points, condenser, cap and rotor will be the same for 1953 (with 235( and 1954-1962.
Gene Schneider
|
|
|
|
|
Joined: Mar 2011
Posts: 249
Backyard Mechanic
|
|
OP
Backyard Mechanic
Joined: Mar 2011
Posts: 249 |
I have been checking the electric current - it comes into the coil with a nice bright light - comes out of the coil with a dim light.
Perhaps a problem with the coil - however, once again it is brand new. I have three other ones that I will try tomorrow to see if I can get that nice bright flow out of the coil as I see it going into the coil.
Then follow it to the distributor. The I should get that same nice flow of current to the points when the points are open. So I will see what I have there and continue to follow the current flow to the spark plugs.
This should give me some answers.
Any other suggestions please feel free to share.
From what I see in the previous post - the condenser - points - distributor cap for a 1954 Chevrolet 235 should be the right parts for this distributor.
Please correct me should I be wrong. Thank you!
Member # 047137 - 1947 Chevrolet 4 door sport sedan
|
|
|
|
|
Joined: Feb 2008
Posts: 3,801 Likes: 1
ChatMaster - 3,000
|
|
ChatMaster - 3,000
Joined: Feb 2008
Posts: 3,801 Likes: 1 |
'54 and up.
1951 Chevy Styleline Deluxe 2 door sedan / purchased from second owner 6-19-2000.
|
|
|
|
|
Joined: Mar 2011
Posts: 249
Backyard Mechanic
|
|
OP
Backyard Mechanic
Joined: Mar 2011
Posts: 249 |
Well I must have gotten all the stars in a roll because the 235 started up this morning. Two times!
Then I went to working on the muffler system. Thought I would start it again and it wouldn't start.
Sounds real good and didn't see much smoke from the header pipe.
The problem I kept running into over and over is current to the coil - current to the plug on the coil - current to the side of the distributor - current to the points.
However, most of the time I am getting current at the points and the outside wire that is connected from the coil to the side of the distributor(this should not be happening. No current to the spark plug wires.
However, in that it started once it must be able to start again if I can figure just what is happening.
Thanks again for all the help. Would not have gotten this far without VCCA friends.
Member # 047137 - 1947 Chevrolet 4 door sport sedan
|
|
|
|
|
Joined: Feb 2008
Posts: 3,801 Likes: 1
ChatMaster - 3,000
|
|
ChatMaster - 3,000
Joined: Feb 2008
Posts: 3,801 Likes: 1 |
Well I must have gotten all the stars in a roll because the 235 started up this morning. Two times!
Then I went to working on the muffler system. Thought I would start it again and it wouldn't start.
Sounds real good and didn't see much smoke from the header pipe.
The problem I kept running into over and over is current to the coil - current to the plug on the coil - current to the side of the distributor - current to the points.
However, most of the time I am getting current at the points and the outside wire that is connected from the coil to the side of the distributor(this should not be happening. No current to the spark plug wires.
However, in that it started once it must be able to start again if I can figure just what is happening.
Thanks again for all the help. Would not have gotten this far without VCCA friends. Where the 16 gauge wire passes from the negative coil terminal, to the terminal at the distributor, check to be certain that the distributor terminal is not grounding, within the distributor housing itself.
1951 Chevy Styleline Deluxe 2 door sedan / purchased from second owner 6-19-2000.
|
|
|
|
|
Joined: Mar 2011
Posts: 249
Backyard Mechanic
|
|
OP
Backyard Mechanic
Joined: Mar 2011
Posts: 249 |
Happy to report (with special thanks for those who have helped me along the way) that the 1947 Stylemaster is running well and should be on the road by Monday.
Of course, am going to take it to an exhaust person to make it sound a little quieter. Got the engine to run well - with the adjustments to the carburator and timing. Did the timing by ear. It seems to work out better that way.
Right now putting the front end together - grill, moldings, bumper, etc. Then take it off the blocks and stands and see how much adjustment is going to be needed for the clutch to work properly.
I am elated that the job is about over. Fishing here I come.
Thanks everyone.
Member # 047137 - 1947 Chevrolet 4 door sport sedan
|
|
|
|
|
Joined: Feb 2008
Posts: 3,801 Likes: 1
ChatMaster - 3,000
|
|
ChatMaster - 3,000
Joined: Feb 2008
Posts: 3,801 Likes: 1 |
Happy to report (with special thanks for those who have helped me along the way) that the 1947 Stylemaster is running well and should be on the road by Monday.
Of course, am going to take it to an exhaust person to make it sound a little quieter. Got the engine to run well - with the adjustments to the carburator and timing. Did the timing by ear. It seems to work out better that way.
Right now putting the front end together - grill, moldings, bumper, etc. Then take it off the blocks and stands and see how much adjustment is going to be needed for the clutch to work properly.
I am elated that the job is about over. Fishing here I come.
Thanks everyone. The knowledge you have gathered, with this project, will now be part of you ...... you can now share YOUR knowledge with others.
1951 Chevy Styleline Deluxe 2 door sedan / purchased from second owner 6-19-2000.
|
|
|
|
|
Joined: Mar 2011
Posts: 249
Backyard Mechanic
|
|
OP
Backyard Mechanic
Joined: Mar 2011
Posts: 249 |
Got the 47 off the blocks and ready to go for a drive today. When I went to shift into low the transmission just ground a lot. Same in 2nd and 3rd and reverse.
Yes, I know you know where I am going with this. Having put in the new clutch along with the rebuilt engine I forgot to adjust the clutch.
So tomorrow I will jack it up and adjust the clutch before I am able to take it out on the road to see how it purrs.
Member # 047137 - 1947 Chevrolet 4 door sport sedan
|
|
|
|
|
Joined: Feb 2008
Posts: 3,801 Likes: 1
ChatMaster - 3,000
|
|
ChatMaster - 3,000
Joined: Feb 2008
Posts: 3,801 Likes: 1 |
Got the 47 off the blocks and ready to go for a drive today. When I went to shift into low the transmission just ground a lot. Same in 2nd and 3rd and reverse.
Yes, I know you know where I am going with this. Having put in the new clutch along with the rebuilt engine I forgot to adjust the clutch.
So tomorrow I will jack it up and adjust the clutch before I am able to take it out on the road to see how it purrs. You're soooo close to your maiden voyage. Camera, videos are now necessary for the upcoming event.
1951 Chevy Styleline Deluxe 2 door sedan / purchased from second owner 6-19-2000.
|
|
|
|
|
Joined: Feb 2008
Posts: 3,801 Likes: 1
ChatMaster - 3,000
|
|
ChatMaster - 3,000
Joined: Feb 2008
Posts: 3,801 Likes: 1 |
Got the 47 off the blocks and ready to go for a drive today. When I went to shift into low the transmission just ground a lot. Same in 2nd and 3rd and reverse.
Yes, I know you know where I am going with this. Having put in the new clutch along with the rebuilt engine I forgot to adjust the clutch.
So tomorrow I will jack it up and adjust the clutch before I am able to take it out on the road to see how it purrs.
"Got the 47 off the blocks and ready to go for a drive today. When I went to shift into low the transmission just ground a lot. Same in 2nd and 3rd and reverse."I'm hoping the clutch disc is not installed backwards, thus creating the grinding.
1951 Chevy Styleline Deluxe 2 door sedan / purchased from second owner 6-19-2000.
|
|
|
|
|
Joined: Feb 2008
Posts: 3,801 Likes: 1
ChatMaster - 3,000
|
|
ChatMaster - 3,000
Joined: Feb 2008
Posts: 3,801 Likes: 1 |
Have you gotten a resolution to the transmission grinding ?
1951 Chevy Styleline Deluxe 2 door sedan / purchased from second owner 6-19-2000.
|
|
|
|
|
Joined: Mar 2011
Posts: 249
Backyard Mechanic
|
|
OP
Backyard Mechanic
Joined: Mar 2011
Posts: 249 |
Been gone and then my membership lapsed.
All is well - clutch works fine - shifting is a slight problem.
Am having a little difficulty getting 2nd gear in the correct place.
Shifts from 1st to reverse fine. Shifts from 1st to 2nd sometimes.
Shifts from 1st to 3rd always and when it does go into 2nd shifts fine into 3rd.
Any suggestions as to fine tune that 2nd gear let me know.
By the way, lots of difference I think between the 216 and 235 in speed. One thing I don't like is the roar from the rear end when you get it up to 50 to 60 mph. Probably a different rear end would work better.
Blessings. And Thanks, Art
Member # 047137 - 1947 Chevrolet 4 door sport sedan
|
|
|
|
|
Joined: Mar 2011
Posts: 249
Backyard Mechanic
|
|
OP
Backyard Mechanic
Joined: Mar 2011
Posts: 249 |
The 47 is up and running - a little loud.
On the way to the muffler shop Thursday morning for a new exhaust system.
Everything seems to be going smoothly. Still a little trouble getting the transmission to stay in 2nd gear. More adjustment needed.
Thanks all -
Member # 047137 - 1947 Chevrolet 4 door sport sedan
|
|
|
|
|
Joined: Mar 2011
Posts: 249
Backyard Mechanic
|
|
OP
Backyard Mechanic
Joined: Mar 2011
Posts: 249 |
Exhaust system is installed - car running fine - on the way home from the shop - noise like a lifter tapping - had been showing no oil coming out exhaust pipe - all of a sudden - the tapping stopped - blue smoke began to come out of the exhaust pipe.
Now parked in the garage and I am trying to find out what happened.
Is this the constant joy of owning an old chevy?
Member # 047137 - 1947 Chevrolet 4 door sport sedan
|
|
|
|
|
Joined: Nov 2002
Posts: 7,472 Likes: 26
ChatMaster - 7,000
|
|
ChatMaster - 7,000
Joined: Nov 2002
Posts: 7,472 Likes: 26 |
Sounds like continuing education to me. I would pull the plugs and check for residue and also do a complete compression test.
Steve D
|
|
|
|
|
Joined: Jan 2002
Posts: 30,701 Likes: 141
ChatMaster - 25,000
|
|
ChatMaster - 25,000
Joined: Jan 2002
Posts: 30,701 Likes: 141 |
You may have had a valve sticking. If it were mine I would pour some ATF through the carb. throat with the engine running at a fast iidle and let it soak for a day.
Gene Schneider
|
|
|
|
|
Joined: Dec 2001
Posts: 10,379 Likes: 1
Technical Advisor ChatMaster - 10,000
|
|
Technical Advisor ChatMaster - 10,000
Joined: Dec 2001
Posts: 10,379 Likes: 1 |
Check for a bent pushrod, broken rocker arm, or adjusting screw. 
RAY Chevradioman http://www.vccacolumbiariverregion.org/1925 Superior K Roadster 1928 Convertible, Sport, Cabriolet 1933 Eagle, Coupe 1941 Master Deluxe 5-Passenger Coupe 1950 Styleline Deluxe 4-Door Sedan 1950 Styleline Deluxe Convertible 2002 Pontiac, Montana, Passenger Van 2014 Impala, 4-Door Sedan, White Diamond, LTZ 2017 Silverado, Double Cab, Z71, 4X4, White, Standard Bed, LTZ If you need a shoulder to cry on, pull off to the side of the road. Death is the number 1 killer in the world.
|
|
|
|
|
Joined: Mar 2011
Posts: 249
Backyard Mechanic
|
|
OP
Backyard Mechanic
Joined: Mar 2011
Posts: 249 |
Pull the tube from the manifold stove to the automatic choke blow it clean as they can carbon up. Then check the back of the adjuster for the automatic choke and make sure that the small hole there is clean.
The above is taken from another question posted in this section. My question is about the "small hole" in the back of the adjuster for the automatic choke.
Is this found on all the backs of adjusters?
I just did some work on my automatic choke and found no hole in the back of the cover on the automatic choke on my 47.
Thanks!
Member # 047137 - 1947 Chevrolet 4 door sport sedan
|
|
|
|
|
Joined: Jan 2002
Posts: 30,701 Likes: 141
ChatMaster - 25,000
|
|
ChatMaster - 25,000
Joined: Jan 2002
Posts: 30,701 Likes: 141 |
Your '47 had an automatc choke?
Gene Schneider
|
|
|
|
|
Joined: Mar 2011
Posts: 249
Backyard Mechanic
|
|
OP
Backyard Mechanic
Joined: Mar 2011
Posts: 249 |
The rebuilt 235 that I installed in the 47 had a carb with the automatic choke. So I just used that.
Member # 047137 - 1947 Chevrolet 4 door sport sedan
|
|
|
|
|
Joined: Mar 2011
Posts: 249
Backyard Mechanic
|
|
OP
Backyard Mechanic
Joined: Mar 2011
Posts: 249 |
Engine running good - 235 sure has a lot more pep then my 216 did. Am happy with the swap.
Member # 047137 - 1947 Chevrolet 4 door sport sedan
|
|
|
|
|