|
|
Joined: Oct 2010
Posts: 1,005 Likes: 5
ChatMaster - 1,000
|
OP

ChatMaster - 1,000
Joined: Oct 2010
Posts: 1,005 Likes: 5 |
|
|
|
|
|
Joined: Feb 2010
Posts: 549
Oil Can Mechanic
|
|
Oil Can Mechanic
Joined: Feb 2010
Posts: 549 |
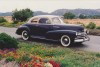
"Frame Off" restoration, its a journey not a destination
|
|
|
|
|
Joined: Nov 2002
Posts: 7,472 Likes: 26
ChatMaster - 7,000
|
|
ChatMaster - 7,000
Joined: Nov 2002
Posts: 7,472 Likes: 26 |
Looking good!! Are you planning on removing the chrome trim strip at the drip edge?
Steve D
|
|
|
|
|
Joined: Oct 2010
Posts: 1,005 Likes: 5
ChatMaster - 1,000
|
|
OP
ChatMaster - 1,000
Joined: Oct 2010
Posts: 1,005 Likes: 5 |
If I had a second set of drip caps, I might try it. But from what I have learned, DO NOT MESS with it. It looks straight and it is solid to the roof. I might try to polish it later, but right now I am going to leave it where it is.
|
|
|
|
|
Joined: Nov 2002
Posts: 7,472 Likes: 26
ChatMaster - 7,000
|
|
ChatMaster - 7,000
Joined: Nov 2002
Posts: 7,472 Likes: 26 |
I think that's a good idea as it looks like it could be a real nightmare.
Steve D
|
|
|
|
|
Joined: Feb 2011
Posts: 3,136
ChatMaster - 3,000
|
|
ChatMaster - 3,000
Joined: Feb 2011
Posts: 3,136 |
Going to be one cool car...I want one, too..! lol
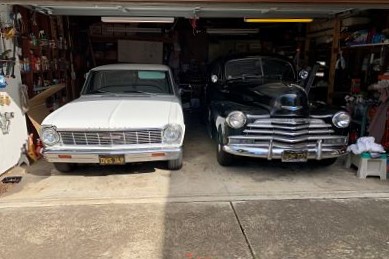
1947 Fleetmaster Sport Coupe VCCA # 47475
If it's not wearing a Bowtie...It's not properly dressed...!
|
|
|
|
|
Joined: Oct 2010
Posts: 1,005 Likes: 5
ChatMaster - 1,000
|
|
OP
ChatMaster - 1,000
Joined: Oct 2010
Posts: 1,005 Likes: 5 |
Saw my car today and have some new improvements to show. The door openings and sills have been painted. ![[Linked Image from i1311.photobucket.com]](http://i1311.photobucket.com/albums/s663/hawkeye1932/010_zpseqfpj9ex.jpg) The lower dash was also painted. ![[Linked Image from i1311.photobucket.com]](http://i1311.photobucket.com/albums/s663/hawkeye1932/003_zpsdzh5ptgu.jpg) The inside of the trunk lid is now painted as well. ![[Linked Image from i1311.photobucket.com]](http://i1311.photobucket.com/albums/s663/hawkeye1932/012_zpsskjxpxva.jpg) The biggest improvement is the roof - now sports a new coat of Mayland Black. ![[Linked Image from i1311.photobucket.com]](http://i1311.photobucket.com/albums/s663/hawkeye1932/002_zpspx4ze34e.jpg) But the biggest set back is the dash and garnish moldings. The paint supplier scanned the original piece and mixed the color. He got close but not close enough. He kept the original molding so he could adjust the color closer. My body guy picked up the new "improved" color and painted all 13 pieces as well as the dash. Look at the picture and see if you can find the original molding. Because we wanted to flatten the dash gloss so it would not be a reflective problem, the paint mixer added too much flattener which I'm told changed the color. ![[Linked Image from i1311.photobucket.com]](http://i1311.photobucket.com/albums/s663/hawkeye1932/001_zps7zekob9l.jpg) The color was corrected by using a different paint source. One that was tested by another 1950 owner with much better success. THANKS Andy for your help. The new and much closer color will be sprayed hopefully this weekend.
|
|
|
|
|
Joined: Oct 2010
Posts: 1,005 Likes: 5
ChatMaster - 1,000
|
|
OP
ChatMaster - 1,000
Joined: Oct 2010
Posts: 1,005 Likes: 5 |
|
|
|
|
|
Joined: Nov 2007
Posts: 3,620 Likes: 5
ChatMaster - 3,000
|
|
ChatMaster - 3,000
Joined: Nov 2007
Posts: 3,620 Likes: 5 |
Looks great! Don't forget to paint those rims!
Those accustomed to the finest...find it in Chevrolet.
1953 Belair Convertible
1951 2dr Deluxe Sedan
2015 GMC SLE 4X4
|
|
|
|
|
Joined: Oct 2010
Posts: 1,005 Likes: 5
ChatMaster - 1,000
|
|
OP
ChatMaster - 1,000
Joined: Oct 2010
Posts: 1,005 Likes: 5 |
The rims will be the last items to be painted. When I get the car home, the plan is to install all the sheet metal under the hood first. The wire harness will be next. After that, I plan on taking the old tires off of the rims and have the rims sand blasted and then painted. Hopefully by then, Mr. Piggy Bank will have enough stuffing to purchase tires. Brewster, how did you paint your rims? Same color on both sides? Also, how long did it take you to run your wire harness? I also have a Y & Z harness.
|
|
|
|
|
Joined: Nov 2007
Posts: 3,620 Likes: 5
ChatMaster - 3,000
|
|
ChatMaster - 3,000
Joined: Nov 2007
Posts: 3,620 Likes: 5 |
Yes, my rims are the same colour on both sides. A retired guy should be able to run the harness in 2-3 days... leaving time for a couple of cold beers, and nosey neighbors that want to check things out while the garage door is up. It took me a little while longer because of the two year old that runs my life now, and the full time job I have to hold down! Also, I euchred myself with the whole headliner issue that took a couple of days to sort out.
Those accustomed to the finest...find it in Chevrolet.
1953 Belair Convertible
1951 2dr Deluxe Sedan
2015 GMC SLE 4X4
|
|
|
|
|
Joined: Oct 2010
Posts: 1,005 Likes: 5
ChatMaster - 1,000
|
|
OP
ChatMaster - 1,000
Joined: Oct 2010
Posts: 1,005 Likes: 5 |
|
|
|
|
|
Joined: Nov 2007
Posts: 3,620 Likes: 5
ChatMaster - 3,000
|
|
ChatMaster - 3,000
Joined: Nov 2007
Posts: 3,620 Likes: 5 |
I did the body half on one day, then the front end on a different day. Also, a couple days were devoted to the turn signals, as they required soldering and I had never even opened one of them up before to see what I was dealing with. Turned out I needed a third and forth hand to hold the soldering iron, solder, wires and the signal body. I got Kaygee to come over and help me finish up. We did it wrong (the wiring diagram Y'nZ's supplies leaves a lot to be desired) and ended up doing it all over again on another day.
When you have the kit in front of you, it looks like the front end harness is going to be the hardest part to do, but it was certainly the easiest! Don't take the stickers off until everything works!
Those accustomed to the finest...find it in Chevrolet.
1953 Belair Convertible
1951 2dr Deluxe Sedan
2015 GMC SLE 4X4
|
|
|
|
|
Joined: Jan 2002
Posts: 1,069 Likes: 9
ChatMaster - 1,000
|
|
ChatMaster - 1,000
Joined: Jan 2002
Posts: 1,069 Likes: 9 |
I didn't have any significant problems with the instructions for the YnZ I used on my 48. But I didn't have the turn signal wires added.
1946 Chevy 3100 1/2 Ton Pickup Purchased 11/18/17 Sold 9/20
1948 Chevy Fleetmaster Coupe, Purchased 6/20/2010
1965 Chevy ll 350 Purchased Feb 2021. 3-speed Saginaw Hurst Floor Shifter 3.08 Rear End
2019 Ford Ranger Lariat Super Crew
|
|
|
|
|
Joined: Nov 2007
Posts: 3,620 Likes: 5
ChatMaster - 3,000
|
|
ChatMaster - 3,000
Joined: Nov 2007
Posts: 3,620 Likes: 5 |
The problem with the turn signals is that there are many aftermarket and dealer installed options instead of one factory offering. Both 5 wire and 7 wire versions were available. After you pic which hand drawn diagrams of the 3 pictured you are going to follow, you have to decide which way the diagram is pictured... top& bottom, front and back are not clear. Certainly a spot where a picture would be worth 1000 words...
In my parts box and on my cars I have a total of 4 different switches, and every one of them is different!
Last edited by brewster; 11/09/16 02:12 PM.
Those accustomed to the finest...find it in Chevrolet.
1953 Belair Convertible
1951 2dr Deluxe Sedan
2015 GMC SLE 4X4
|
|
|
|
|
Joined: Jan 2002
Posts: 30,701 Likes: 141
ChatMaster - 25,000
|
|
ChatMaster - 25,000
Joined: Jan 2002
Posts: 30,701 Likes: 141 |
In the US there is only one correct directional switch. It is Guide brand and has the chrome round handle and rubber wheel that contacts the steering wheel hub when in use, for self canceling. Being a dealer installed accessory only the wiring harness came with the switch. The 1950 version is painted the dark gray color that the steering column is painted on sedan models.
Gene Schneider
|
|
|
|
|
Joined: Oct 2010
Posts: 1,005 Likes: 5
ChatMaster - 1,000
|
|
OP
ChatMaster - 1,000
Joined: Oct 2010
Posts: 1,005 Likes: 5 |
The weather is still too cold to enjoy working on a car in an un-heated garage. The temp got up to a balmy 42 degrees today so I did a few things to the car. No real progress to show - just looking for small items and information so I can hit the ground running when the temp matches the car -50's. Thanks to Andy, Chevgene and Brewster for their help. ![[Linked Image from i1311.photobucket.com]](http://i1311.photobucket.com/albums/s663/hawkeye1932/001_zpsfdwzmcsc.jpg)
|
|
|
|
|
Joined: Nov 2007
Posts: 3,620 Likes: 5
ChatMaster - 3,000
|
|
ChatMaster - 3,000
Joined: Nov 2007
Posts: 3,620 Likes: 5 |
Looking great!!
Are you planning on wiring that speedo, then shoving it through the hole??!! Does it work that way?!
Those accustomed to the finest...find it in Chevrolet.
1953 Belair Convertible
1951 2dr Deluxe Sedan
2015 GMC SLE 4X4
|
|
|
|
|
Joined: Oct 2010
Posts: 1,005 Likes: 5
ChatMaster - 1,000
|
|
OP
ChatMaster - 1,000
Joined: Oct 2010
Posts: 1,005 Likes: 5 |
I placed the speedo cluster there so I could check on oil pressure and engine temperature from a convenient place. The car did not run for about 15 months and the oil pressure line was replaced. I wanted to see if everything was were it should be. PLUS, I only want to put the speedo cluster in a freshly painted dash ONCE!
|
|
|
|
|
Joined: Feb 2008
Posts: 3,801 Likes: 1
ChatMaster - 3,000
|
|
ChatMaster - 3,000
Joined: Feb 2008
Posts: 3,801 Likes: 1 |
BRUCE,
Thinking about your rims, how did you handle .... or did you handle the pin striping on the rims?
1951 Chevy Styleline Deluxe 2 door sedan / purchased from second owner 6-19-2000.
|
|
|
|
|
Joined: Nov 2007
Posts: 3,620 Likes: 5
ChatMaster - 3,000
|
|
ChatMaster - 3,000
Joined: Nov 2007
Posts: 3,620 Likes: 5 |
My original idea was to get Kerry to paint the rims, then take them to the pin striper (I found him through a Kijiji ad), and then take the striped rims back to Kerry for clear coating. However, my plan was wrong, since the striper said the clear coat would ruin the paint. I then took the unpainted rims pack to Kerry, got them cleared and revisited the striper. They turned out really good. I was lucky that my spare had never been blasted or sanded. It seemed to have one coat of paint over the factory paint and stripe, so I could see the slightly raised stripe under the paint for location and width.
Those accustomed to the finest...find it in Chevrolet.
1953 Belair Convertible
1951 2dr Deluxe Sedan
2015 GMC SLE 4X4
|
|
|
|
|
Joined: Oct 2010
Posts: 1,005 Likes: 5
ChatMaster - 1,000
|
|
OP
ChatMaster - 1,000
Joined: Oct 2010
Posts: 1,005 Likes: 5 |
We had great weather this weekend so I made some progress in the garage. I installed the heater duct assembly on the passenger side and the fresh air duct on the drivers side. ![[Linked Image from i1311.photobucket.com]](http://i1311.photobucket.com/albums/s663/hawkeye1932/017_zpscgvj6isf.jpg) I made weather strips for the trunk floor to quarter panel. I used 1/16" neoprene, glued and stapled it together. I attached it to the floor using weatherstrip adhesive but will be drilling holes for staples next time I get a chance. I feel the staples will hold the weather strip just a little better than glue alone. After all, thats what GM did in 1950. I held a LED trouble light under the floor and I just have a small opening in the front of both strips. Will use some type of caulk of seam sealer when the next opportunity comes along. ![[Linked Image from i1311.photobucket.com]](http://i1311.photobucket.com/albums/s663/hawkeye1932/013_zps6ea1a9a7.jpg) 1949 version ![[Linked Image from i1311.photobucket.com]](http://i1311.photobucket.com/albums/s663/hawkeye1932/a2af3838-d076-41ed-962d-5f513d801fe1_zpscb658ef1.jpg) 1950 version ![[Linked Image from i1311.photobucket.com]](http://i1311.photobucket.com/albums/s663/hawkeye1932/008_zpsqnq8bv29.jpg) 2017 version ![[Linked Image from i1311.photobucket.com]](http://i1311.photobucket.com/albums/s663/hawkeye1932/013_zpskcnzmqfb.jpg) Passenger side trunk floor ![[Linked Image from i1311.photobucket.com]](http://i1311.photobucket.com/albums/s663/hawkeye1932/019_zps617s0uvk.jpg) Drivers side between tail light and gas filler assembly ![[Linked Image from i1311.photobucket.com]](http://i1311.photobucket.com/albums/s663/hawkeye1932/020_zpstmlxkoco.jpg) Drivers side between gas filler housing and wheel housing
|
|
|
|
|
Joined: Oct 2010
Posts: 1,005 Likes: 5
ChatMaster - 1,000
|
|
OP
ChatMaster - 1,000
Joined: Oct 2010
Posts: 1,005 Likes: 5 |
|
|
|
|
|
Joined: Nov 2007
Posts: 3,620 Likes: 5
ChatMaster - 3,000
|
|
ChatMaster - 3,000
Joined: Nov 2007
Posts: 3,620 Likes: 5 |
Hawkeye... Any updates? Is it on the road yet?
Those accustomed to the finest...find it in Chevrolet.
1953 Belair Convertible
1951 2dr Deluxe Sedan
2015 GMC SLE 4X4
|
|
|
|
|
Joined: Oct 2010
Posts: 1,005 Likes: 5
ChatMaster - 1,000
|
|
OP
ChatMaster - 1,000
Joined: Oct 2010
Posts: 1,005 Likes: 5 |
|
|
|
|
|


![[Linked Image from i1311.photobucket.com]](http://s1311.photobucket.com/user/hawkeye1932/media/005_zpsremq58xd.jpg.html)
![[Linked Image from i1311.photobucket.com]](http://s1311.photobucket.com/user/hawkeye1932/media/036_zpsvepavw78.jpg.html)
![[Linked Image from i1311.photobucket.com]](http://s1311.photobucket.com/user/hawkeye1932/media/046_zpsb0mnsdpj.jpg.html)


![[Linked Image from i1311.photobucket.com]](http://s1311.photobucket.com/user/hawkeye1932/media/010_zpseqfpj9ex.jpg.html)
![[Linked Image from i1311.photobucket.com]](http://s1311.photobucket.com/user/hawkeye1932/media/003_zpsdzh5ptgu.jpg.html)
![[Linked Image from i1311.photobucket.com]](http://s1311.photobucket.com/user/hawkeye1932/media/012_zpsskjxpxva.jpg.html)
![[Linked Image from i1311.photobucket.com]](http://s1311.photobucket.com/user/hawkeye1932/media/002_zpspx4ze34e.jpg.html)
![[Linked Image from i1311.photobucket.com]](http://s1311.photobucket.com/user/hawkeye1932/media/001_zps7zekob9l.jpg.html)
![[Linked Image from i1311.photobucket.com]](http://s1311.photobucket.com/user/hawkeye1932/media/001_zpslzdxmgql.jpg.html)
![[Linked Image from i1311.photobucket.com]](http://s1311.photobucket.com/user/hawkeye1932/media/003_zpsaufvmvg2.jpg.html)
![[Linked Image from i1311.photobucket.com]](http://s1311.photobucket.com/user/hawkeye1932/media/002_zps9wevijms.jpg.html)
![[Linked Image from i1311.photobucket.com]](http://s1311.photobucket.com/user/hawkeye1932/media/005_zpsebhhnu1z.jpg.html)


![[Linked Image from i1311.photobucket.com]](http://s1311.photobucket.com/user/hawkeye1932/media/001_zpsfdwzmcsc.jpg.html)
![[Linked Image from i1311.photobucket.com]](http://s1311.photobucket.com/user/hawkeye1932/media/017_zpscgvj6isf.jpg.html)
![[Linked Image from i1311.photobucket.com]](http://s1311.photobucket.com/user/hawkeye1932/media/013_zps6ea1a9a7.jpg.html)
![[Linked Image from i1311.photobucket.com]](http://s1311.photobucket.com/user/hawkeye1932/media/a2af3838-d076-41ed-962d-5f513d801fe1_zpscb658ef1.jpg.html)
![[Linked Image from i1311.photobucket.com]](http://s1311.photobucket.com/user/hawkeye1932/media/008_zpsqnq8bv29.jpg.html)
![[Linked Image from i1311.photobucket.com]](http://s1311.photobucket.com/user/hawkeye1932/media/013_zpskcnzmqfb.jpg.html)
![[Linked Image from i1311.photobucket.com]](http://s1311.photobucket.com/user/hawkeye1932/media/019_zps617s0uvk.jpg.html)
![[Linked Image from i1311.photobucket.com]](http://s1311.photobucket.com/user/hawkeye1932/media/020_zpstmlxkoco.jpg.html)
![[Linked Image from i1311.photobucket.com]](http://s1311.photobucket.com/user/hawkeye1932/media/028_zpsaf9vfzz1.jpg.html)
![[Linked Image from i1311.photobucket.com]](http://s1311.photobucket.com/user/hawkeye1932/media/026_zpsmvjbxadb.jpg.html)
![[Linked Image from i1311.photobucket.com]](http://s1311.photobucket.com/user/hawkeye1932/media/004_zpsqkfvtzci.jpg.html)
![[Linked Image from i1311.photobucket.com]](http://s1311.photobucket.com/user/hawkeye1932/media/005_zpsl5rmd0gv.jpg.html)
![[Linked Image from s19.postimg.cc]](https://s19.postimg.cc/bxphj9sjz/002.jpg)
![[Linked Image from s19.postimg.cc]](https://s19.postimg.cc/lv0icdpvz/004.jpg)
![[Linked Image from s19.postimg.cc]](https://s19.postimg.cc/pemg2bicv/009.jpg)
![[Linked Image from s19.postimg.cc]](https://s19.postimg.cc/69j6smvzz/012.jpg)
![[Linked Image from s19.postimg.cc]](https://s19.postimg.cc/xk4i0km27/011.jpg)
![[Linked Image from s19.postimg.cc]](https://s19.postimg.cc/g6u7lqtbz/012.jpg)
![[Linked Image from s19.postimg.cc]](https://s19.postimg.cc/l5hq0a4un/014.jpg)
![[Linked Image from s19.postimg.cc]](https://s19.postimg.cc/slgzm37zj/003.jpg)
![[Linked Image from s19.postimg.cc]](https://s19.postimg.cc/e29ukoua7/010.jpg)
![[Linked Image from s19.postimg.cc]](https://s19.postimg.cc/avfb12hjz/014.jpg)