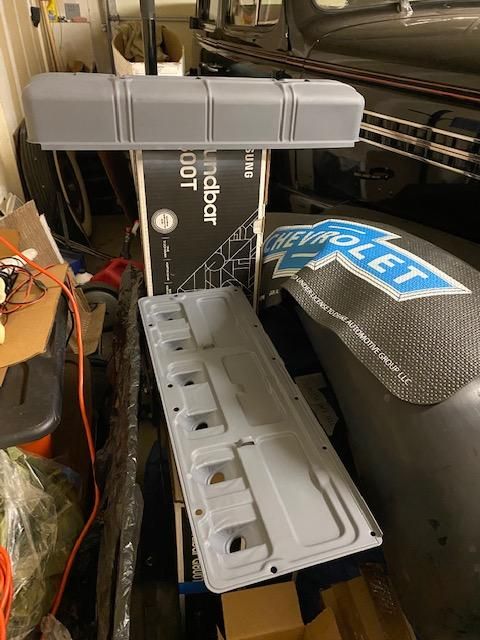
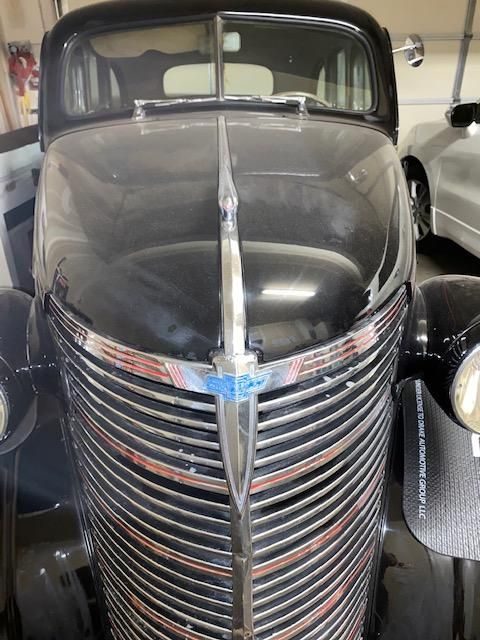
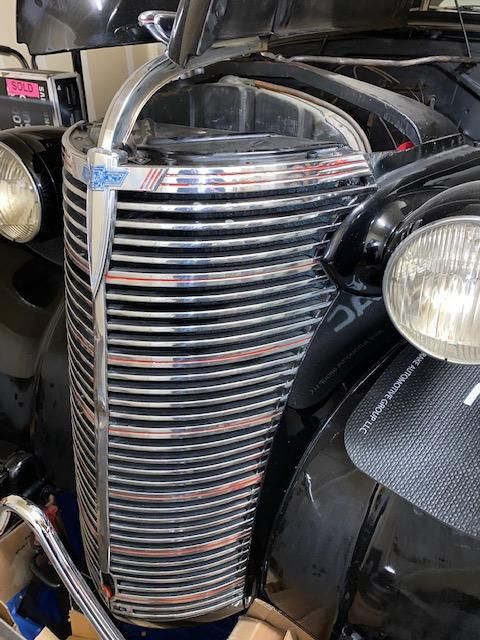
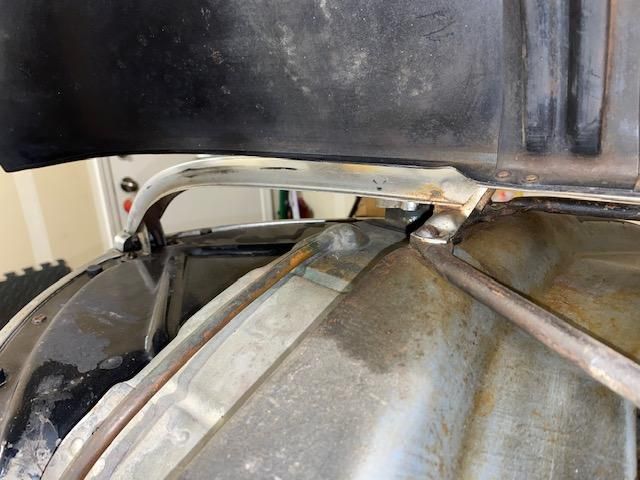
I tried to reply to the original post but discover it is locked maybe due to going offtrack. I haven't been mentioning my starting problems as the 38 had been firing up on the first spin until yesterday. She fired up but and i ran her for a while but i could start her later. I connected my small charger and it showed nearly fully charged but i did not check the voltage. the battery sat on the small charger for about three hours and it then showed fully charge, oh well. The 38 did fire up immediately which leads me to believe the battery might not be charging.
I am not sure that running an engine for even an hour would discharge a fully charged battery. The ignition only draws about 5 amps.
My thinking is that it is a heat driven issue. Sorry that I do not remember all the fixes you have tried.
Will the engine not crank over or will it crank and not start? If it will crank have you confirmed there is no spark?
Remember to be logical and organized as you troubleshoot this.
Engine fires up immediately when the starter spins. The no starting issue is when the starter doesn’t spin from what appears to be a weak battery. I haven’t taken any voltage readings as of now.
Yes, you should take some voltage readings.
One suspicion I have is that the problem is either in the starter motor or the contacts in the mechanical switch. When they get hot from the engine heat their resistance increases. Or the armature expands so much that it drags on the field coils.
Just some guesses. The next time that happens pour a bucket of water slowly over the starter to cool it. Then try to start it.
I assume we have gotten past the “too small a battery cable” issue.
I don't recall if your car is still 6 volt or not. If it is:
1: Clean battery cable to starter and ground connections.
2: 0 or 00 gauge battery cables.
Clean connections and properly sized cables are essential to a 6 volt system.
My first thoughts are the same as Tiny. I constantly have to insure clean cables and posts on the single 6 volt battery that I move between vehicles or engines. If clean cables and battery posts does not solve the problem I would suspect the battery. It may have a defect. Checking the voltage when fully charged and when it doesn't want to crank over the engine should help ID the problem. I keep a quality VOM on the shelf and use it often.
I would suggest making sure you follow Tiny's advice in the previous post, especially about the size of the battery cables (O, OO, or even OOO). In addition to the things mentioned by Tiny, you should have a good ground strap from engine to frame. Finally, rather than attaching your battery ground cable to the transmission housing or frame, try moving it as close as possible to the starter, even placing it on a starter mounting bolt; this will increase your cranking capabilities considerably.
This information comes from a little book that I recommended earlier, "Help: My Car Won't Start When It's Hot," by Randy Rundle. There is a wealth of info about electrical systems in this little book. I have followed the advice about attaching the ground cable to a starter mounting bolt and it has really eased starting in my 6-volt vehicles.
Jim
My 38 is 6 volt and I replaced all of the wits and cables for the ignition and charging and the strap is connected to the transmission housing. The positive cable is 1/0 from Napa with a lousy temporary connection. I didn’t drop almost $60.00 for a cable yet. I will order a new cable and connect the ground strap to the starter bolt if long enough. Thanks again gents
Am I mistaken or is the positive battery cable black while the ground is the strap and what length? I’m not at home so I don’t remember the length but not critical at the moment until I order cable
Go to a welding supply shop to have your cables made. Much less expensive than parts house cables. At least around here they are. Be prepared to tell them the sizes and types of ends you want on the cables (top or side terminal on battery end/size of hole in the terminal on the other).
Red is positive, black negative, but I don't remember seeing red on older cars.
Connecting to the starter bolt is a good idea. Brush the surfaces (starter and bolt) clean and don't use a lockwasher.
I recently measured the voltage drop across this connection and found 2/10 Volt, quite a bit when you start with six and actual cranking voltage is more like FOUR.
You can measure voltage drops with a digital meter. Just measure across each connection to see if any are dirty/corroded. Measure from end to end of each cable to see if their terminal connections are failing.
Wilson
I can say with all confidence that connections are good in terms of cleanliness/conductivity and I have suspected the battery early on as so many have suggested. With such a primitive system, I’m amazed at how sensitive this charging system is. A horse would be much more reliable.
Red is positive, black negative, but I don't remember seeing red on older cars.
Connecting to the starter bolt is a good idea. Brush the surfaces (starter and bolt) clean and don't use a lockwasher.
I recently measured the voltage drop across this connection and found 2/10 Volt, quite a bit when you start with six and actual cranking voltage is more like FOUR.
You can measure voltage drops with a digital meter. Just measure across each connection to see if any are dirty/corroded. Measure from end to end of each cable to see if their terminal connections are failing.
Wilson
^^This is how you find the trouble when the obvious things don't fix it.
I would only add that all Chevrolets of this era (and probably forever) are negative ground cars, unlike some other makes.
The cable going to the frame, transmission, or starter-to-bellhousing bolt (preferably a starter-to-bellhousing bolt) is ground. It may be a strap, and if so it will be bare and have no color. It goes to the negative post of the battery.
The positive cable will go to the starter power connection up on top of the starter. If old, it probably won't be red, maybe brown or black.
Never believe colors, always follow the cables and look. In the 70s and 80s (and maybe still) the cheapie replacement cables sold in parts stores were often colored more according to length or number of extra wires hanging out than anything else. It is common to see old cars today with the colors reversed.
I would start with a very slow charge (Battery Tender). This is going to take a day or two. I take my battery out of my car in the winter and put on a wood work bench, do not put it on concrete.
Your local auto parts store will test the battery for you at no charge.
If you need to replace the battery you need to do your home work, deep cycle, cold cranking amps, etc. I am not a big fan of sealed battery where you can not check fluid level.
My battery is 101/8 x 6 3/4 x 8" high at the time it was largest battery that would fit in the car. The posts are on the top
The strap that bloo is talking about can been seen of The Filling Stations web site part # SA-102 and SA-103.
Everyone has said that the GROUND is very important.
The strap is installed but to the trans housing. The positive is new but not the best at the battery terminal, I need a good positive terminal connection
Hi Mike,
Keep focused on the basics. If the connection to the positive battery terminal is not solid you will have issues. Ignoring that will simply continue the problems. Remember that this connection is also how the battery gets recharged by the generator.
Here are a few other points.
The color of the covering on the cable is irrelevant. The idea of red for positive is a “nice to know” thing that some manufacturers promote. There are no standards even today that control this. Obviously there were none back in the 30’s either.
There are many similar looking but different size battery posts. On a typical automotive battery the positive post will be larger than the negative. To confuse it even more the posts sizes on batteries for European cars are slightly smaller than U.S. cars. In the situation with 6 volt batteries it can be even more confusing. I have what NAPA calls an “industrial” 6 volt battery in my car. Both posts are the same size.
So this also means that there are different battery cable terminal clamp sizes to properly fit these posts. The most common problem I see is someone trying to use a positive clamp on a negative post. No matter how tightly they tighten the clamp bolt it will not fit tightly on the post. You can buy “universal” clamps that are supposed to be able to fit both size posts. I have seen mixed results with those.
I have 2/0 cables that I bought off the shelf at our local farm and tractor supply store (Farm &Fleet). I just checked their pricing and they would cost me about $40 total to replace them today. They clamp nicely on the battery posts. The ground is connected to the lug on the transmission. Obviously the positive goes to the terminal on the manual starter switch. I do not have any starting problems, hot or cold.
Chipper is correct. A volt meter is critical to sorting this out.
If you go back and go over your original post, there were some really good steps in there including comparing your wiring piece by piece to the proper schematic. I believe you started and then gave up part way through. It only takes one incorrect wire or poor connection to cause many gremlins...
That old wives tale of storing batteries on concrete just will not die lol.
Go slow with the basics like Rusty suggests. Heck, maybe make a youtube video showing us details of your wiring as maybe there is something really glaring. You just never know with wiring once people mess with it, especially over many decades...
I replaced all of the wires in the ignition/charging system but did not work on lights yet
Maybe I am confused. I thought you were having starting problems.
I am not sure I understand how replacing the wiring for the ignition and charging relates to that problem.
If you look at the wiring diagram for a 1938 car you will see that the starting circuit is between the battery and the engine. The lighting and charging are downstream from the starting circuit. As I have stated before, the starting circuit is also the path for the generator to recharge the battery.
If the starting circuit is not working correctly nothing electrical on the car will work as it should.
Prior owner had the car wires as positive ground so it was recommended I replace regulator and the wire insulation was gone in many places so i replaced the wire also in case it was contributing to other potential issues
I have a digital multimeter
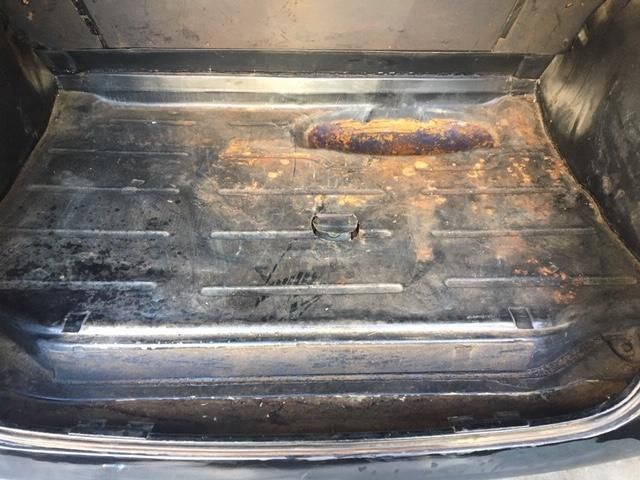
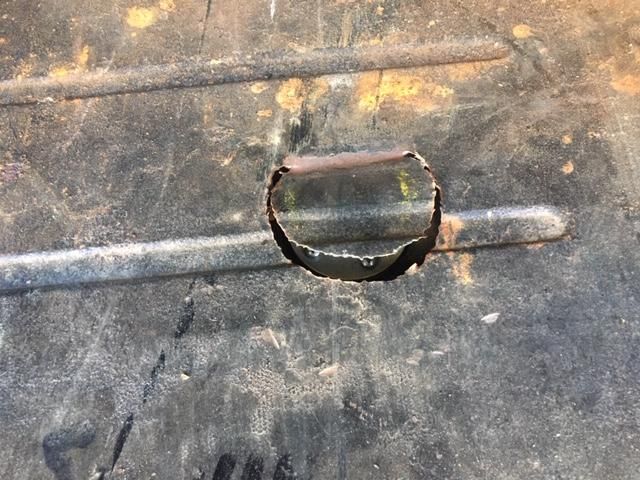
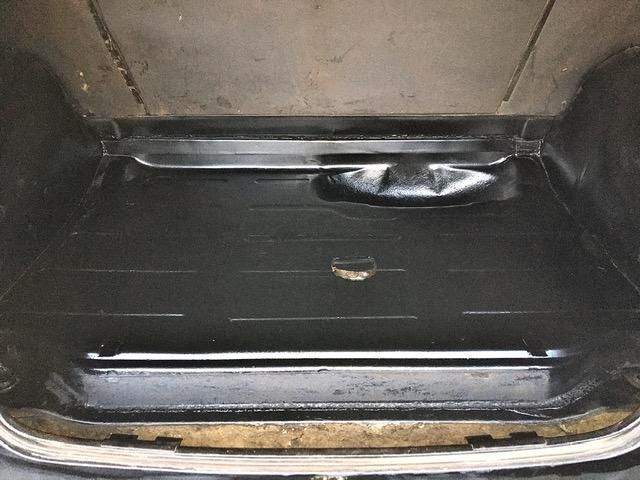
Had a scare yesterday, went for a spin and my 38 died at the intersection.gas showed 1/2 tank but no go. Removed air cleaner and saw no gas squirting in, she was out of gas so I have to fix gauge more specifically wiring and or sending unit(supposed new tank and hole in trunk might indicate something was done. I also received my repops vent shades and need to determine oil filter color-(new topic)
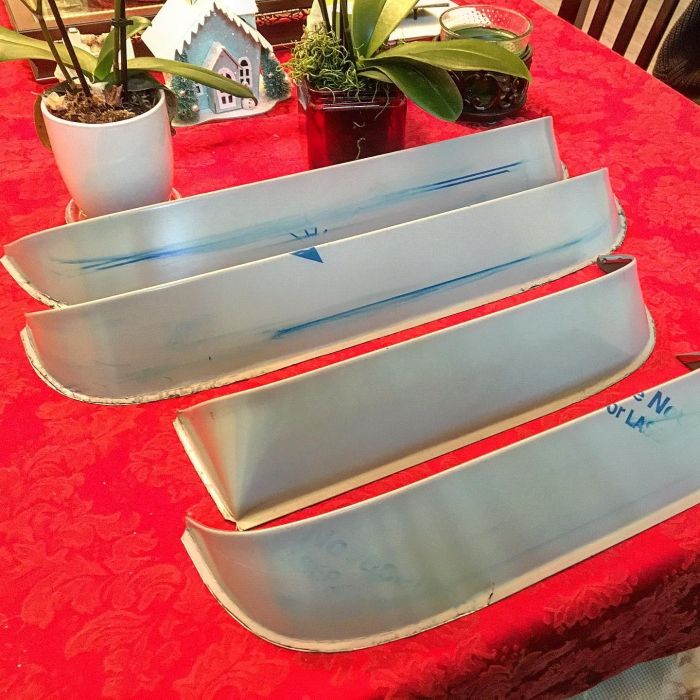
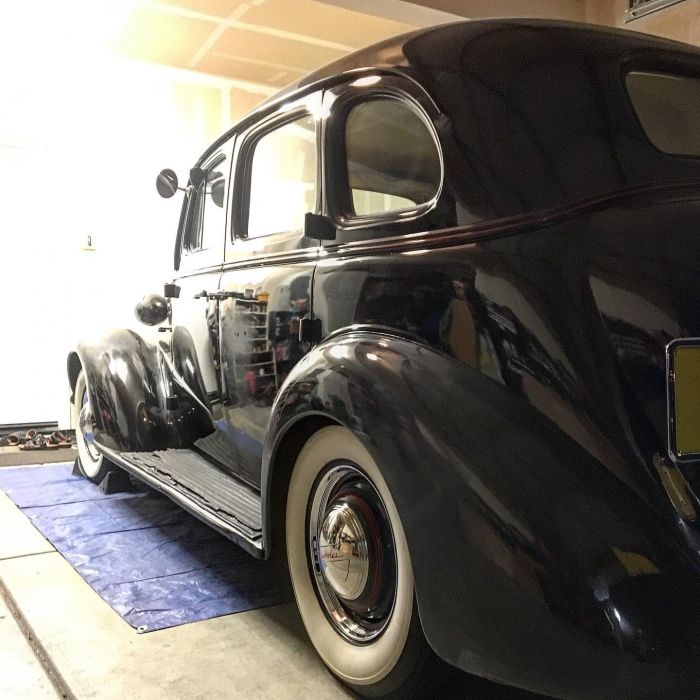
The 1938 vent shades were painted to match the car color.
I assume that you confirmed that the tank was just about empty. You can "run a car out of gas" if the tank is not vented properly.
Modern gas caps will fit the filler neck but they are not vented. The venting is provided through the evaporative emissions system.
Given all the interesting discoveries you have had with this car that would not surprise me.
I did not confirm tank was empty but I have not put gas in her since purchasing and have ran her as much as possible and took her for short trips never noticing the gauge going below 1/2 tank. I am using a reproduction 1930s GM Locking cap. I hope it is vented but never had a problem with my old 38 using the same type of cap. I can only guess the work done on her was incomplete or possibly flawed.
Michael,
Does the fuel gauge read empty when you turn off the ignition? If you disconnect the wire to the sending unit at the terminal on the gauge it should read full when the ignition is turned on. If you ground that terminal it should read empty.
Try to measure the resistance of the sending unit. If the float arm is stuck at the 1/2 point it should read about 15 ohms.
I do not know how you access the sending unit on your car. Another way to check would be to disconnect the wire that goes to the sending unit at the gauge post. The measure the resistance between that wire and a good ground.
Remember to disconnect the battery before you start messing with wires behind the dash.
Hi Michael,
I thought I had heard that in that era sedan you needed to drop the gas tank to get to the sending unit. Obviously a previous owner for your car had other ideas about access. Which also raises a flag that things are probably not like they should be with the sending unit.
By using the special key (a pair of pliers) to open the custom access door you should be able to reach the sending unit. If you disconnect the lead at that unit the gauge should read full. If you ground that lead (make sure it is a good ground) the gauge should go to empty.
You should also be able to directly read the resistance of the sending unit. Connect one lead of the ohm meter to the terminal on the sending unit. Connect the other lead to a good ground.
Maybe so but the more shiny(Stainless), the more horsepower. I might even cap the oil filter lines but leave everything as a conversation piece after I clean and paint plus replace lines with fresh ones. I do appreciate the advice and references to originality but I will deviate from original on occasion.in most cases I can’t afford or will pay for original parts if I can get nice repops, bumper guards for example. A complete NOS set of 38-39 bumper guards went for $1900 on eBay, too rich for my blood when I can get repops for $125 each. Thank again for the references to authenticity
Quite an adventure today going for what I thought to be an uneventful drive. Knowing I have less than two gallons of gas(two gallon container to add gas to thirsty 38), i filled her up.
-After filling her up I noticed a stronger than normal gas smell in the cabin as I headed to the antique store looking for old Chevy memorabilia. After leaving the antique store I noticed the 38 smelled like gas as I walked around her and the smell was stronger from the trunk which has as big hole above tanks level sensor, I suspect. Surprisingly not much of a gas smell from the engine compartment.
-I notice she tends to bog at lower rpms in all gears especially first and even backfires a little.
-As I was nearing a amber light signal around 20 mph I realized I should stop but my 38 on bias plys didnt agree and slid about ten feet into the intersection, fortunately I was in the right lane so i slid into a right turn and kept going until i could make a u turn. My old 38 Master Deluxe seemed to be a bit more responsive vs the sluggishness of my Master Sport.
I have much work to do to track down the source of the gas smell and my brakes need adjusting as well as advanced planning everything I do will require advanced planning.
I started to adjust carburetor and discovered I have a Rochester B type carb
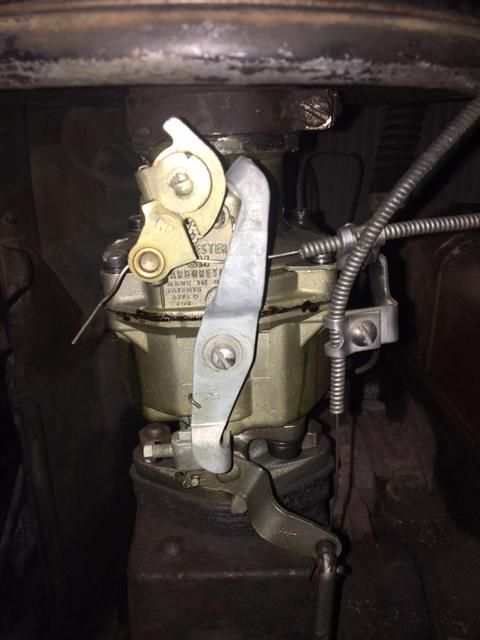
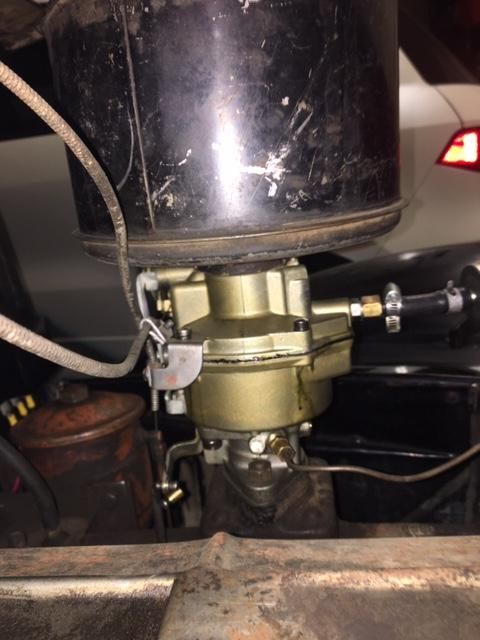
The fact that someone cut an access hole to the sender should be sending you at least 2 strong signals.
One is that someone has done work on the sending unit.
The other is that whoever did that work liked to take short cuts, does sloppy work, and is not necessarily concerned with the long term results.
It would not surprise me if that sending unit was re-installed without a gasket. That would allow gasoline to splash out the top of the tank.
Did you ever figure out if the sending unit or the gauge was defective?
I only see the car on weekends, just had time to put gas in
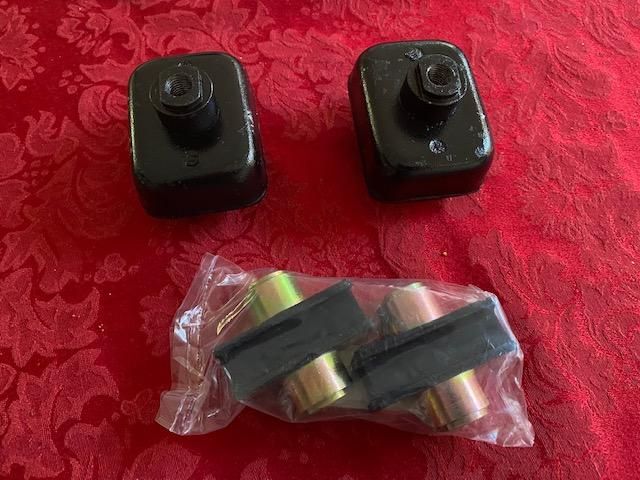
If you are going to order the motor mounts from The Filling Station I suggest that you order the reducer also from The Filling Station.
Make your shopping, list it will say you time and money in the long run.
Ordering from two different supplers will cost you dearly in freight.
Tim
VCCA 5049
Member since 1970.
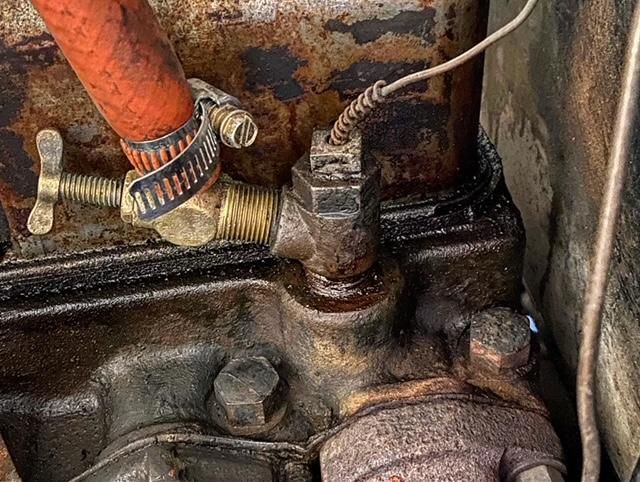
There have been multiple posts lately about hose routings for heaters. That location on the block provides the hottest water to the heater.
I agree it is a pain when you want to remove the valve cover. I do run mine from the water pump and front of the block.
I did exactly that and a bit less expensive too
Thank you
Ok, started to clean engine and made some discoveries that might mean nothing. Some of the pushrods are straight and some are slightly bent. The sleeves where the pushrods run into the lower block are mostly flush but one sticks up more than others, I suspect it’s no issue. Do the lower pushrod openings or sleeves drain off into the oil pan. I drained the oil for gasket replacements including oil pan, I want to use isopropyl alcohol to clean everything thoroughly. Is that ok as there is grime in the pushrod sleeves
Thanks
Michael
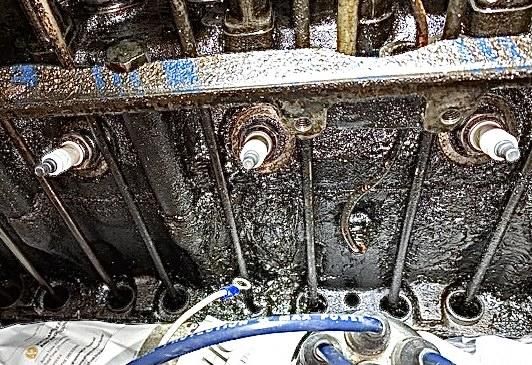
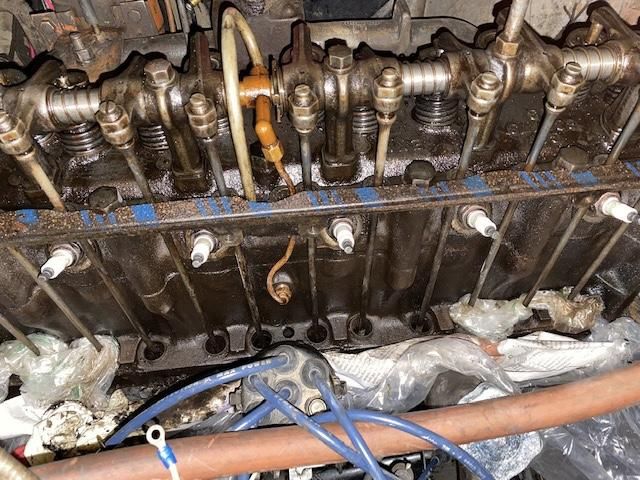
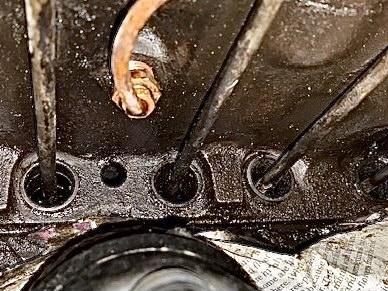
Maybe I am missing something in the pictures. From what I can see the “sleeves” are really the valve lifters. The top of the lifter does come above the edge of the block during the opening cycle for that valve.
I strongly recommend replacing the bent pushrods. That situation never gets better. Typically a bent pushrod means that the valve has or is sticking and will not open properly.
You should watch the valve opening action for all valves as someone cranks the engine by hand. Removing the spark plugs makes that a lot easier.
Also, plan on removing the rocker arm shafts and taking all that apart to clean it. You need to confirm that the rocker arm assembly is getting adequate oil flow and that the rocker arms have not scored the bottom of the shafts.
To test if pushrods are bent, with the removed from the engine place each end of the rod on flat surface and roll them if the centre oscilates they are bent but if the centre stays level there is no bend. If there is a bend it will only get worse when the engine is running.
Tony
Congratulations, you still have the original lifters and pushrods. As Rusty noted the "sleeves" are your lifters. They are shaped like a cup. The longer pushrods that are used with those lifters are notorious for bending. I believe Egge sells the longer pushrods but don't know that to be fact. When I first got my 38 I bent several by inadvertently sticking the intake valves closed. At that time I was unable to find the longer pushrods and ended up using later model "milk can" lifters and shorter pushrods. You might consider that route. If you decide to stay with the cup lifters and longer pushrods I kept my old ones and there are a few that are still straight if you need them.
Thank you gents for the sound advice and patience with my lack of knowledge. Tiny, I will be keeping the engine stock as far as I know not wanting to make things worse by trying to modify it. I am interested in your pushrods if you think they will work for me. I assumed the pushrods would be readily available with so many stovebolts on the road. In regard to bent rods. I rotated them in place and saw some wobble. I now have to learn how to replace pushrods and adjust valves, not what an impatient person was hoping for. I pray for patience on occasion so I guess the Lord is teaching me through the 38, LOL. I’ll be reading my 38 service manual and watching YouTube videos. Keep you all posted
I'd recommend buying new ones if available. I checked Egge and this is what they list. You'll need to measure on of yours to make sure it's the correct length.
https://egge.com/part/nos-1330-838409os/There are folks who recommend setting your valves loose cold then resetting at full operating temperature. My experience is different. If you check the graph on the repair manual the lash is the same cold and fully hot. I set to spec cold then re-check when hot and I've never had to readjust. To be honest I don't even re-check any longer. I just set to spec cold and go with it. Never had a problem. You'll hear that the lash gets tighter as the engine warms, that's why you need to set them loose. Just the opposite happens. The block gets hot and grows before the pushrods are warmed by the oil so the lash actually get looser rather than tighter. As I said above, when it's full hot it all returns to the same lash as cold. That's been my experience.
Replacing pushrods and lifter is pretty easy with the rocker arms removed. Which I already recommended you do.
I agree with getting new pushrods if possible. Tiny is heading you in the right direction.
I also agree with Tiny’s experience regarding setting valve clearances. There have been multiple posts about hot or cold. In one of those threads I even noted that the thermal expansion rate of the cast iron in the block and head was very close to the same as the steel in the pushrods, lifters, and valves. So everything “grows” uniformly with heat. The only guidance I offer is to only set them either with everything at ambient temperature or after everything is uniformly hot after a long drive. I prefer cold because you can take your time and do not have to worry about things cooling down.
Now a question for the experts. Hopefully Gene is checking on us! On my ”˜37 there is an additional set of lighter load springs that fit between the top of the lifter and a slip-on retainer that fits into a groove in the pushrod. Were those eliminated in ”˜38?
So I basically remove rocker arms and rods simply come out? Adjusting valves cold is fine with me and more convenient. I can do everything while pans are removed and spark plugs are out. This is fun.
Push rods and lifters for a 1938 may be difficolt to find.
I would recomed using the 1940 and up push rods and lifters
The lifters are taller and push rods shorter which prevents the from flexing.
If I were to take the layer model lifter and pushrod, who is a good source to purchase an entire set? I can look myself but trust all of you with experience.
Thank you
not neceasary to replace all.
If you are using any of the original lifters put them back in the original hole (or location)
Is this the consensus view that I follow Chev nuts advice and go with taller rockers and shorter rods? This makes sense to me but will cost a bit more. I do plan on putting a larger engine in my 38 to accommodate ac as we might be moving to the Houston area. I might go in the cheap knowing I will swap engine. I suspect this engine is long in the tooth and would require an overhaul even if I decided to keep it. Thoughts?
push rods are easy to straighten
A side note if you're planning to swap the engine. Check the VIN on your title. Most states used the engine number as the VIN on the title through 55. If your title has the engine number as the VIN and you swap the engine you'll have difficulty ever selling or re-assigning the title in the future unless you re-title the after the swap. If, on the other hand, a different number such as the unit serial number on the data plate was used you should be good to go.
I would straighten the pushrods and make sure the valves are all
moving nicely.
What is the best technique to straighten rods?
Thanks again
Michael
Lay them on a perfectly flat surface and roll roll. is a test. bend sligtly as necessary to straighten.
Sure. All you need is a hard surface and a small hammer. If you determine the pushrod is bent, roll it on the hard surface until the center of the bend is up. Tap the center of the bend with the hammer until it's flat. Repeat until straight. The "hard surface" will need to allow the shaft of the pushrod to lay flat without the ends of the pushrod touching. For the hard surface you can use a steel table, anvil, body & fender dolly, piece of train track rail or about anything that's flat and hard.
Sounds good, there are train tracks about a mile from my home. I don’t think the train is running on them any longer? LOL. Thanks Tiny and maybe someday I can share knowledge with folks once I know something
you do not even need a hammer, can be bent by hand.
Already received my motor mounts and thermostat reduction nut, but i have work to do on my regular car so the 38 has to take the backseat for a couple of weeks. I have to read how to adjust valves too, I might measure gap and set each one to the same until all pushrods have been checked and straightened then i will adjust properly
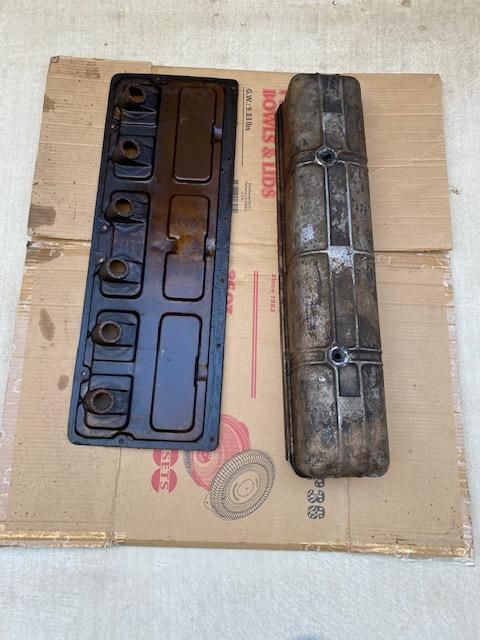
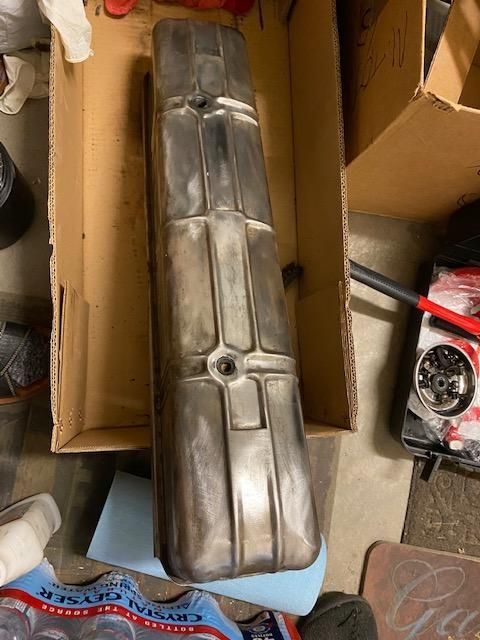
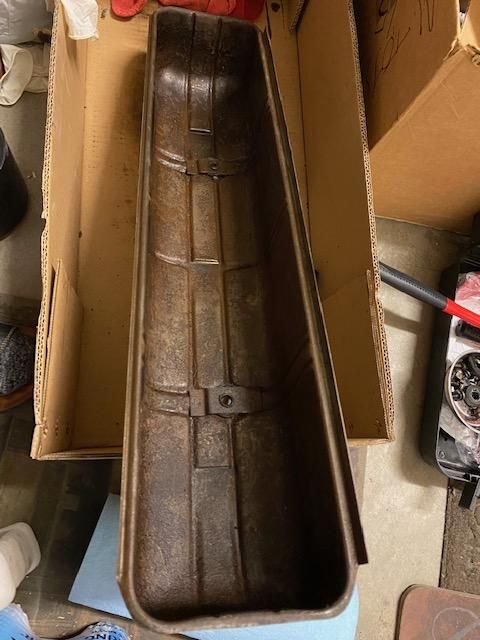
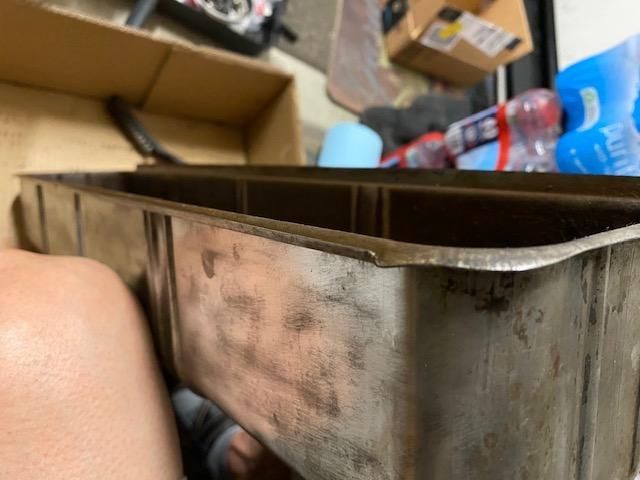
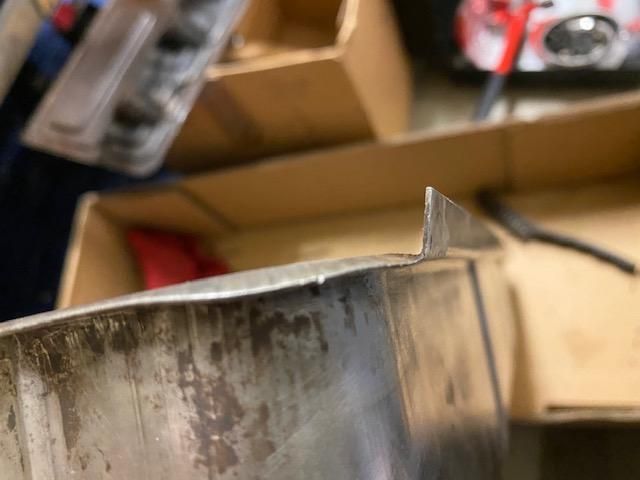
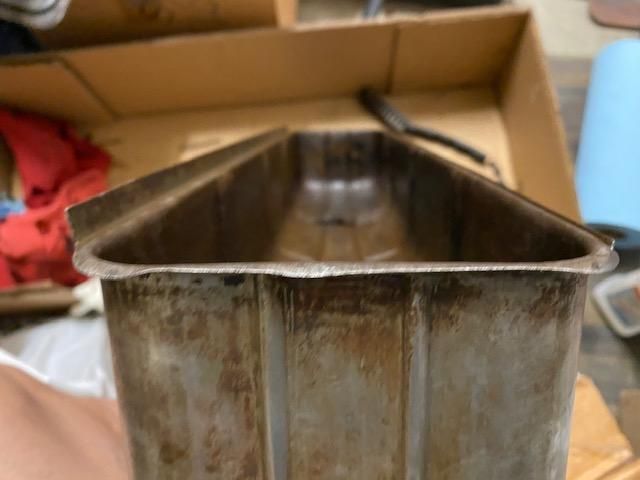
All of the edges of the valve cover that rest on the head need to be flat and at right angles to the vertical part of the cover.
Your cover shows the typical signs of someone trying to stop leaks by constantly over-tightening the nuts on the 2 studs.
Notice the the long edge with the short flange is actually bent up some. Obviously the ends are pretty messed up, especially the corners. I cannot determine the condition of the long edge with the large flange. Spend the time to make everything flat.
When you set the cover on the machined surface of the head without a gasket it should touch all the way around. You can check this by putting a very thin coat of grease on the head. That grease should transfer to the perimeter of the mating surface on the cover.
Going by previous posts the engine was painted after assembley so the inside would not have been painted and rusty is correct about the edges of the rocker cover. The edges of the side cover should also be flat though I have had success with having the stud holes slightly raised outwards in comparison the the spaces as this applies extra pressure on the gasket when all is tightened down.
Tony
When you're tapping things back flat be gentle. It doesn't take a lot of force to straighten the edges. Hammering too hard against a hard surface can stretch the metal creating much larger problems with fit. Just take your time, lay the item on a hard surface & use the tool of your choice (I use a cross peen hammer and/or drift punch) to lightly tap the edge to be flattened. If it doesn't move tap a bit harder. When it's flat move on to the next section.
Cross peen hammer.
Thank you gents, I have been watching videos on sheet metal and body repair. I purchased a set of body work hammers with dollys for my trim but have already started to us them on the valve cover and what surprised men most was tapping the raised edges of the dented side to draw the dent out. Metal
Work is an art that I want to learn. I want to restore the arrow on my running boards unlike the Master Deluxe that has a chrome strip, mine was sideswiped among the way. Much to do, keep you all posted as everything is new to me
I used a combination of methods to get my valve cover edges straight. Like Tiny said, I was concerned with stretching the metal due to hammering too hard. There were a few places I used a hammer.
The primary tool I used was a pair of wide jaw vice grip pliers. The jaws are about 2 inches wide. I would clamp it on the edge and bend just slightly, then move it about half the width of the jaws and bend the next section. It took a while because I did not try to bend it completely straight in one motion. I don’t remember exactly but I bet I made at least 3 or 4 passes around the cover before I was happy things were straight.
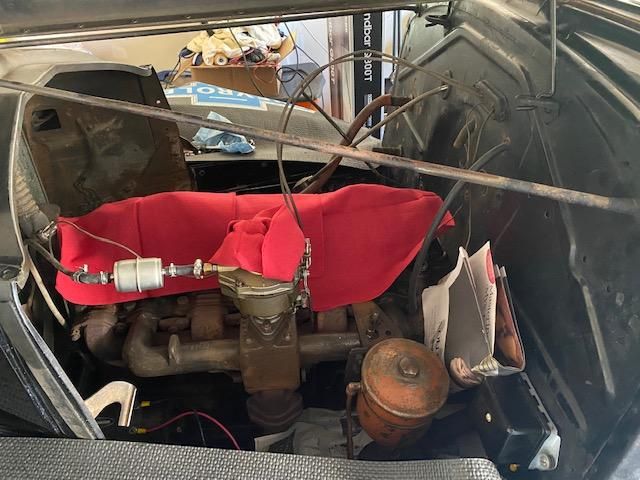
*What primer is recommended for engine block should i pant it?
Some work done,
Removed oil filter
removed horn for access
cleaned up around motor mount
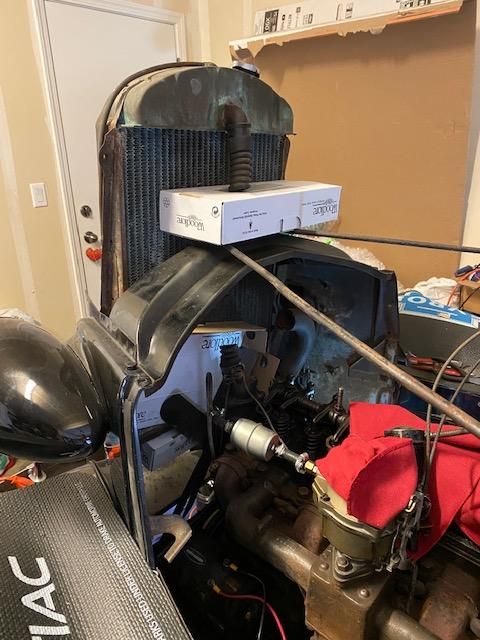
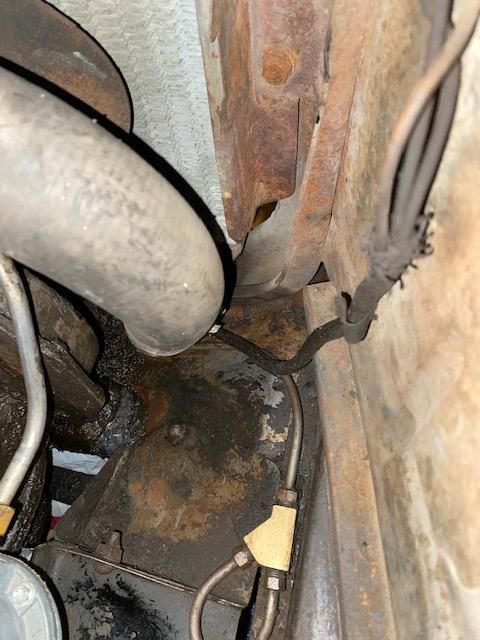
*Do I have to remove the radiator to have better access to motor mounts in front? I think I will remove the radiator and accessories for cleaning and painting as well as change belt clean and paint radiator and fan plus change hoses.
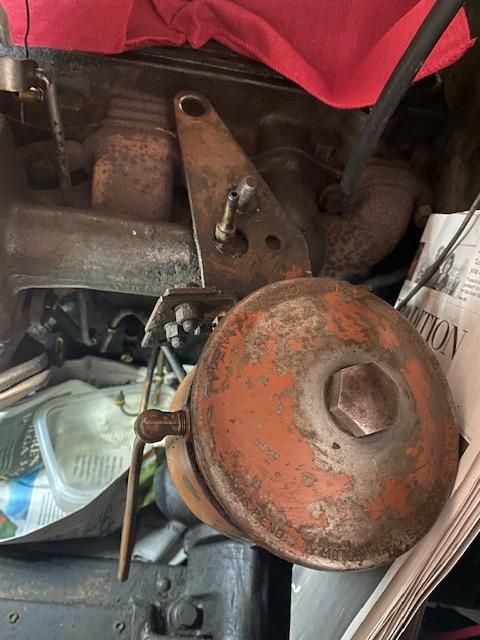
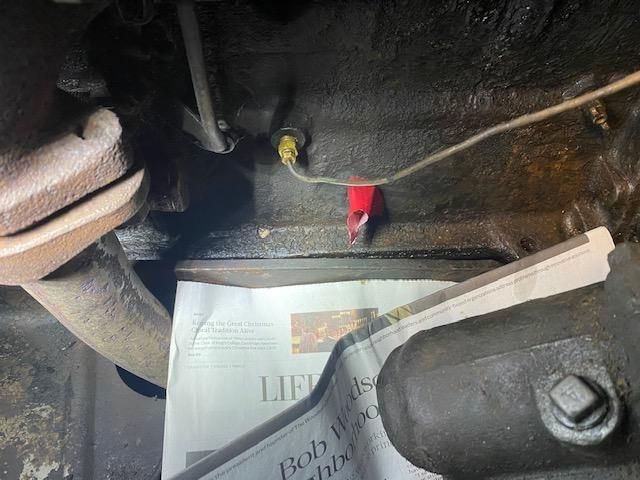
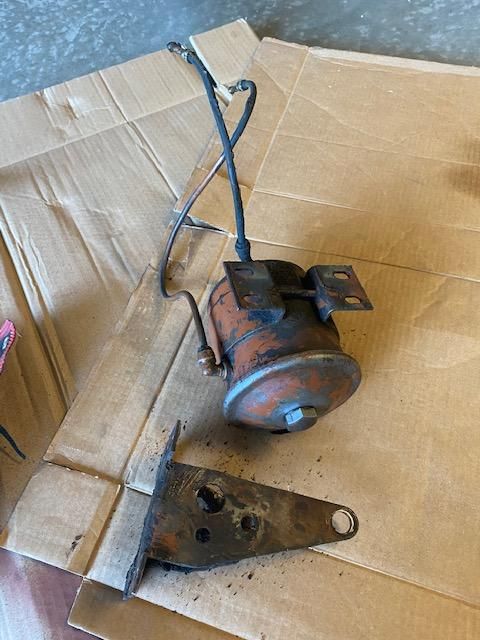
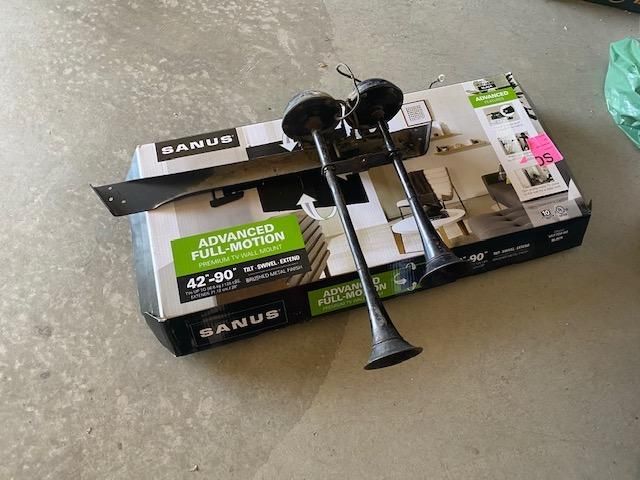
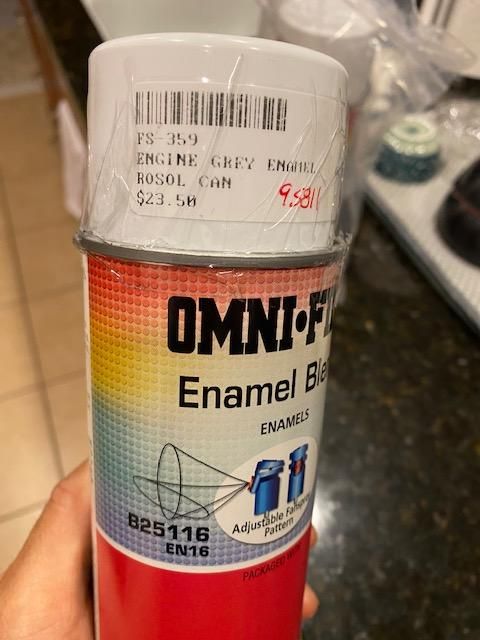
Get your paint from the Filling Station either in a spray can or quart can. Do not use primer, no need.
i already have a couple of cans from the Filling Station, no primer? OK,
Thanks
Michael
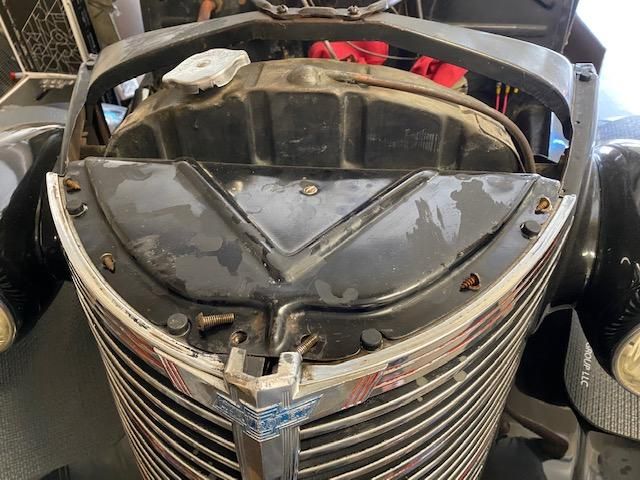
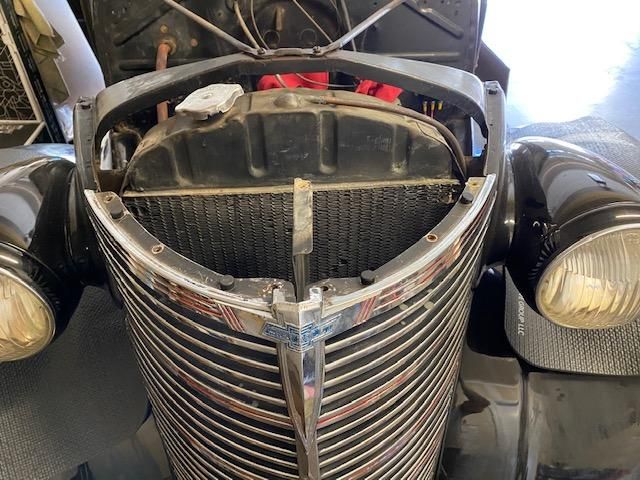
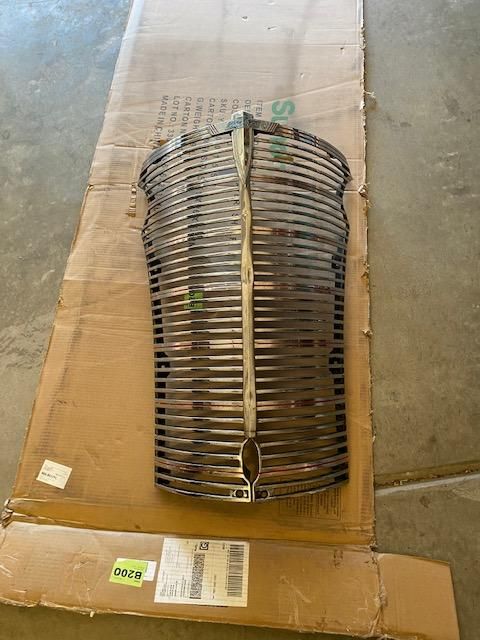
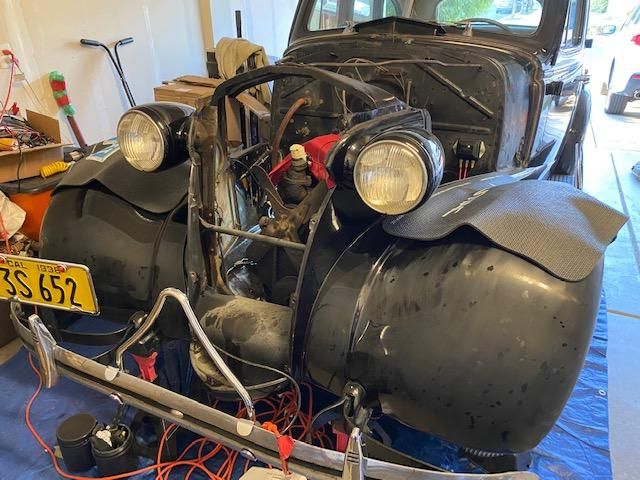
It looks like I will have to remove grille to remove radiator, I want to anyways
Maybe a ”˜38 is different than a ”˜37. Check your shop manual.
It looks like the radiator needs to come to the rear. The mounting flange on the radiator is behind the radiator mount. So even if the grill is out you can’t move the radiator to the front.
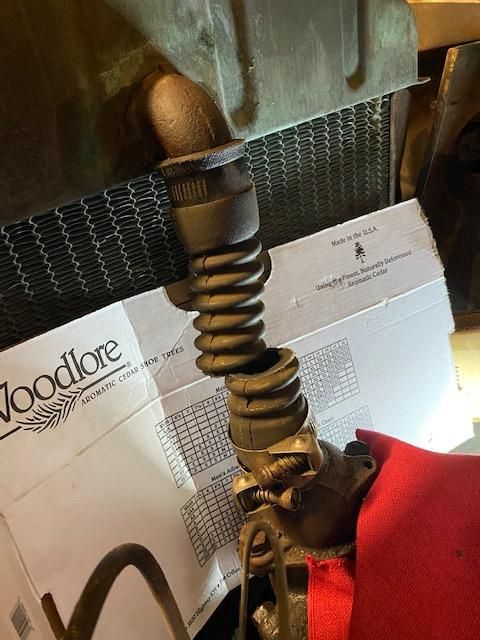
Start by removing the hood and the v-shaped support rods. You need to remove the water pump and the water outlet with thermostat housing from the head as well as the valve cover. Loosen the 6 mounting bolts and drop the radiator down , tilt it to the rear, and bring it up and put at an angle.
I cover the back side of the radiator with a piece of cardboard so I will not damage any of the fins when I slide it up and out.
You actually have to have the radiator out to remove the grill unless you are going to remove the whole front clip assembly with the front fenders.
A light coat of automotive primer will enhance the life of the engine paint. It also helps to smooth the surface.
I was kind of wondering what the paint will stick to, figured it was formulation implementing primer qualities with adding a step therefore keeping
production costs down in 1938 of course
Keep you all posted
I agree with the recommendation to use a high temperature primer. It will help with adhesion, appearance, and durability of the engine paint.
The real key is getting the engine clean enough that you have a reasonable chance of any paint adhering to it.
I have never seen an in-vehicle engine paint job that held up very long. Unless of course the car was never driven.
I’ve seen some nice jobs but agree that it won’t be as good but better than what it is and my engine is running ok for now. I will spend most of my time cleaning the engine and everything around it. This is a good opportunity to detail berthing I can get to revealing leaks and damage as I go along
I just looked at the ”˜38 shop manual. It is easier to remove the radiator than on my ”˜37. You do not need to remove the water pump and water outlet.
You still need to remove the hood and braces. The upper shell of the radiator core comes off so you can lift the radiator up after you tilt it slightly to the rear.
The removable upper shell is the big change from the ”˜37.
I also realize I should replace wiring while there, oh man, my simple gasket install job and growing exponentially. I’ll soon be doing a frame off
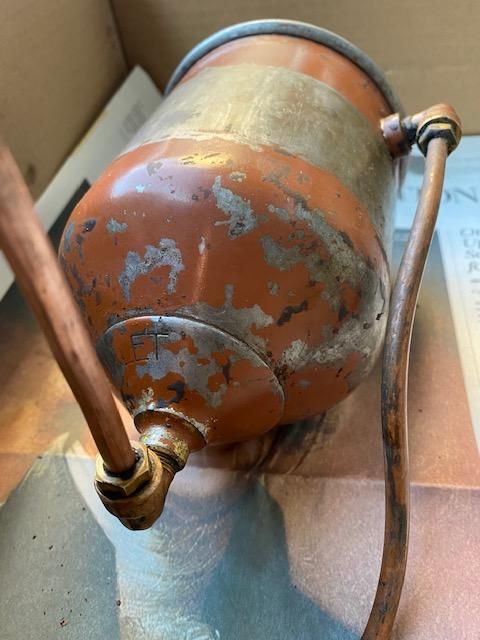
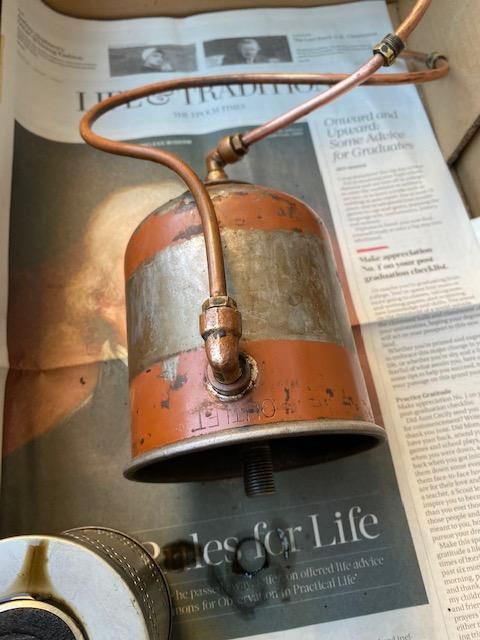
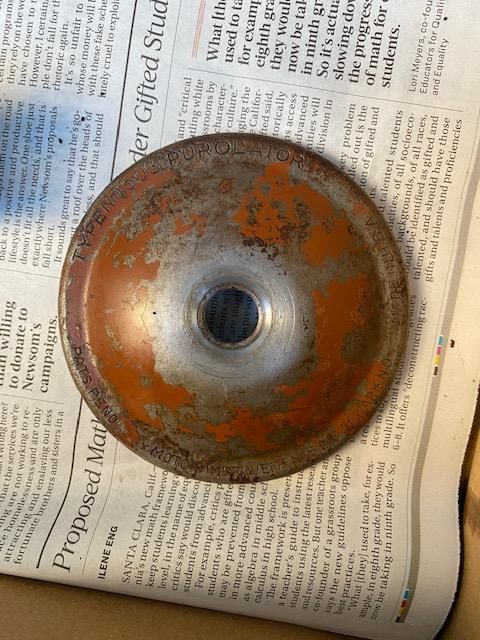
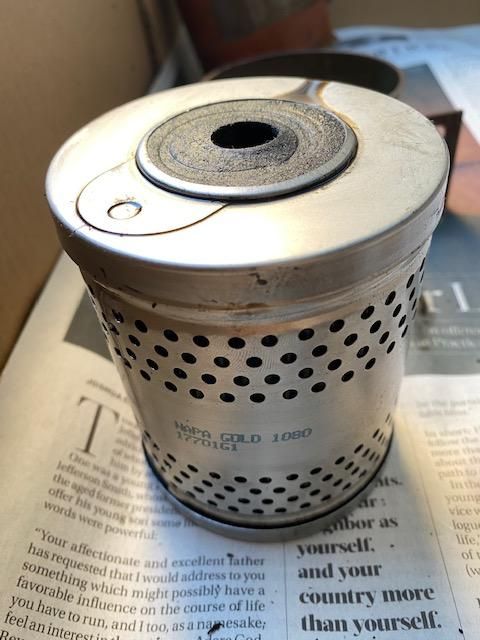
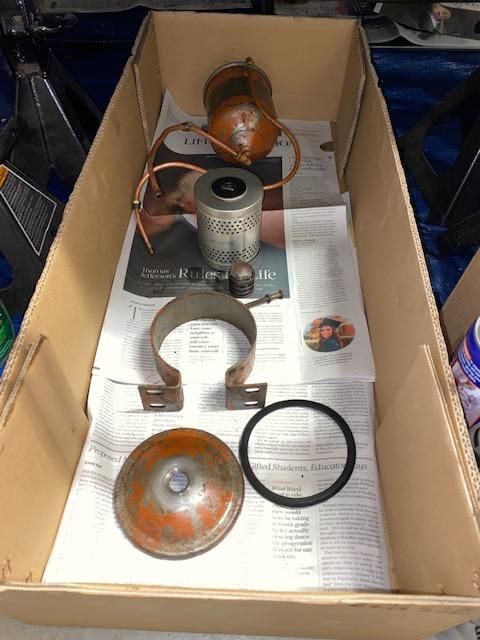
Unusual to see copper used for oil filter lines. Copper has a tendency to work harden and crack under vibration and age. Bye,bye oil and engine if you are not alert. The oil filter lines I had on a '52 and '60 were flex.
Painted valve and pushrod covers, Filling Station gray is definitely dark. The gray looks nothing like most 30s gray painted engines I’ve seen. I will say it does look close to the remnants of paint in my valve cover, I thought it was old black paint.
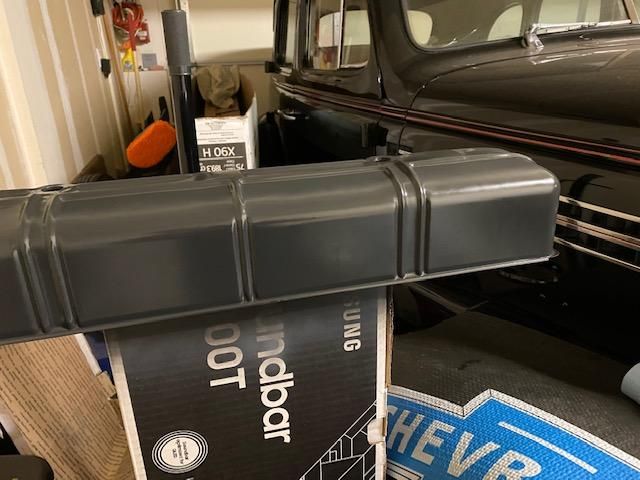
Yep, that's the right color. Most folks just grab a can of gray paint at the hardware store and go after it. There's at least one other vendor selling the "correct" color gray that is way too light. The write up on TFS's site pretty much explains how they came up with that color. This is my engine with TFS paint after the rebuild.

Yep, that's the right color. Most folks just grab a can of gray paint at the hardware store and go after it. There's at least one other vendor selling the "correct" color gray that is way too light. The write up on TFS's site pretty much explains how they came up with that color. This is my engine with TFS paint after the rebuild.
Very nice, this is simply to make the engine compartment a bit more presentable and identify any leaks going forward until I rebuild .
Thanks Tiny. Filling Station recommended two cans but I think I will need three and the spray cans say the paint is not high temp though I used high temp primer.
High temp won't be an issue unless you're referring the the exhaust manifold. The factory didn't use high temp paint. Any that got on the manifold burnt off anyway.
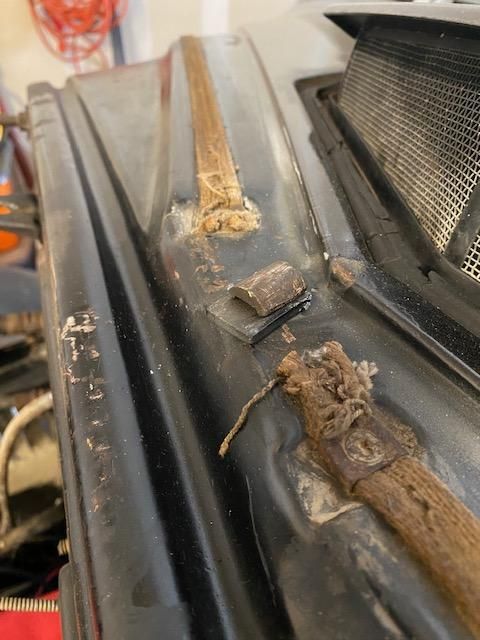
It's a nut under the dash. It's held in place by pinching it. Loosen the nut then slide the chrome piece forward. Here's what the assembly looks like. The pinch is between the two flat pieces:
https://store.fillingstation.com/detail/GR-97/Chevrolet_193738_HOOD_HOLDDOWN_BRACKETREAR.html
Tiny
Thank you for the clarity and visual reference.
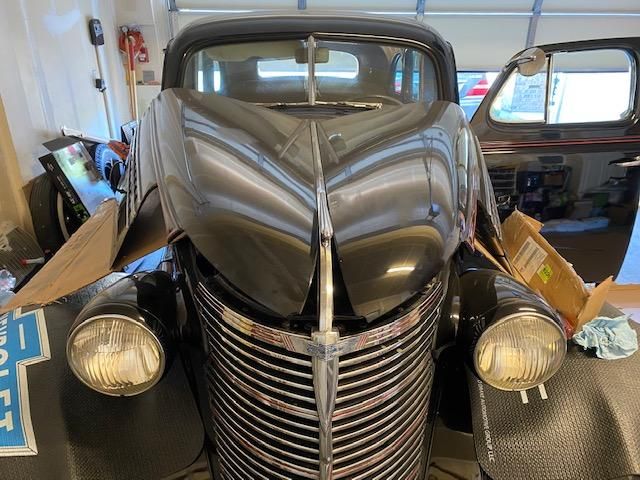
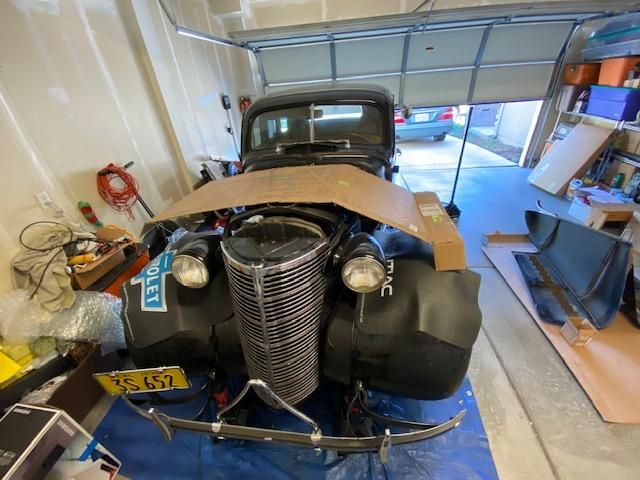
-Do you think I and my little strong wife can safely remove hood assembly or should I get one of my men friends to help?
It's not heavy but pretty unwieldy. I'd have at least two capable people but would prefer three. One on each side and one to pitch in where/when needed. I did it with a buddy and myself but it was like trying to herd cats.
I can remove the hood by myself but I prefer 2 people, especially to install it. And it is a whole lot easier when the front bumper is removed. You can get right up against the grill.
The trick I learned on this forum is to use a bungee cords to hold the 2 halves in the open position. Position an folded old blanket (I used a furniture moving pad) along the center chrome strip. When you open the halves the blanket gets compressed and prevents the halves from being pulled too far open. The bungee cords keep it in that position.
That is a fairly stable assembly. Then you can remove the rear retainer between the cowl and the strip and the front screws. One person can stabilize it while you are removing the screws. Then each person can move to a side and just walk it forward.
If you do not have enough room in your shop you can remove it outside and then drive the car into the shop. Even if you have already drained the cooling system you can run the engine for a couple of minutes without any concerns.
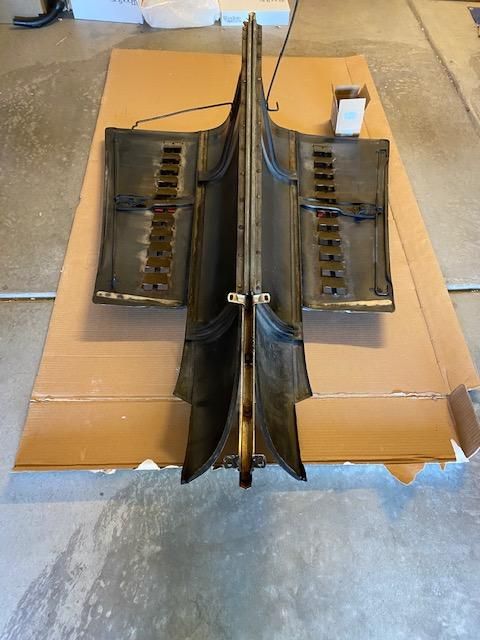
The real pain is safely storing that big assembly while it is removed.
Funny, my mind was working on how I can remove assembly alone and securing the way you describe was crossing my mind. Storage will require me to better organize my garage as I have room but not very tidy at the moment. Thank you for the advice gentlemen, I do appreciate it and I will share when progress is being made
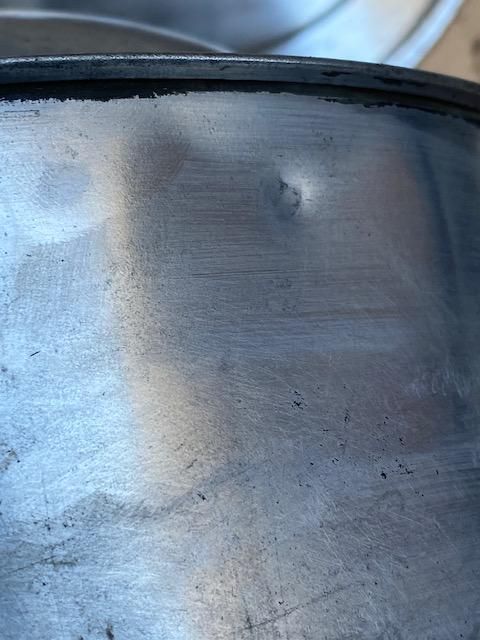
How about mixing up some Bondo and fill the dents then sand and paint ?
Dents in curved surfaces like that are difficult to fill with body filler without pulling/pushing the dent out first because they leave an eyebrow that is visible when painted. You have a few options. You can buy a
Stud Welder and pull the dents out. You can take it to an area body shop and pay them to use their stud welder which would probably be cheaper. OR you can drill a small hole in the center of each dent and use a slide hammer with a screw fitting to pull the dents out then weld the holes shut. OR you can drill holes in an unobtrusive spot that would allow a pry tool to access the back side of the dents and push them out, then weld the hole(s) shut and finish it off. My recommendation would be to take it to a body shop and let them do it. They already have the equipment and skills to do it. If you want to have the bragging rights of "I did it myself" tell them to leave the final putty finish work for you once they have the dents out.
I have a hot glue device I bought for removing hail and door dings and it works well. There are replacement rods available and they work as Tiny describes with the stud welder except you glue them in place and remove them with solvent when done. Could work well on thin metal and you could pull with vice grips possibly. Today's high end bondos can hide lots but you need to at least lessen the dent so that the high spots on the edges can settle back.
Some Paintless Dent Repair shops might do this as drop off and could be cheap.
My wife has a hot glue gun, she fixes everything with it. I’ll glue some small nails to the cleaner and try. Thank you gents for the suggestions
Regarding the hood: I put 1x2s underneath, secure it with rope and bungies and hook it up to a small electric winch that I have mounted on the ceiling. The hood then gets relocated up near the ceiling until I am ready to reinstall it.
If only I had a winch mounted overhead. I see folks store their removable car roofs that way. I’m still trying to find the time and inclination to get out there and remove the hood, that is holding up everything.
My winch is quite small and good for only 200 lbs. The hood probably weighs about 20 lbs. I bought it at our Canadian store, which has a parallel line of products as Harbor Freight.
Next up is to remove my grille, radiator and install front and rear motor mounts. I have a NORS 38 Master Deluxe lighting wire harness that i might install wires at a time that run near the radiator and grille. So much to do but fun at the same times.
Beware of NOS cloth wiring. The cloth insulation does not age well. If it was my choice I'd go with modern repop from YNZ. Looks the same but won't set your car on fire.
This will be a temporary replacement for what is in there now, basically bare wire with some brittle strands hanging on and oil soaked as well in some places. Thank you for the warning, I appreciate it. I’m caught between repairing and wanting to drive her.
I cannot say enough to endorse Tiny’s recommendation about high quality wiring. All it takes is one bare wire at the wrong location to create a disaster.
When you reinstall the hood I strongly recommend having a second person to help stabilize and guide the hood. It is a little tricky to get things assembled and lined up properly especially at the top of the firewall area.
Without a doubt a second person, I narrowly avoided dropping hood removing it solo. It amazes me the car hasn't had any incidents up til now with the condition of the original 1938 wiring
Any suggestions on changing motor mounts
Changing the mount at the rear of the transmission and the side mounts is fairly easy. Make sure you install the side mounts last. In fact I suggest you at least disconnect them when you work on the other mounts.
The side mounts do not support the weight of the engine and transmission. Their purpose is to prevent the engine from rolling side-to-side or twisting in reaction to the torque in the drivetrain. Check your shop manual for the process to make sure they are set at the correct height. The engine height is set by the height of the new front and rear mounts.
I replaced the front mounts on my ”˜37 working from above and below the front of the engine. You car might be slightly different. I made a simple wooden frame to support front of the engine while I lifted it slightly with a bottle jack. It takes some patience and finagling to get the bolt lock tabs bent away and the bolts out on the top side. If I remember I did have the radiator out when I did that so it gave me a little more room. In my case I determined I could do it that way in less time and with a lot less collateral damage than trying to remove the grill or the front cowl around the radiator.
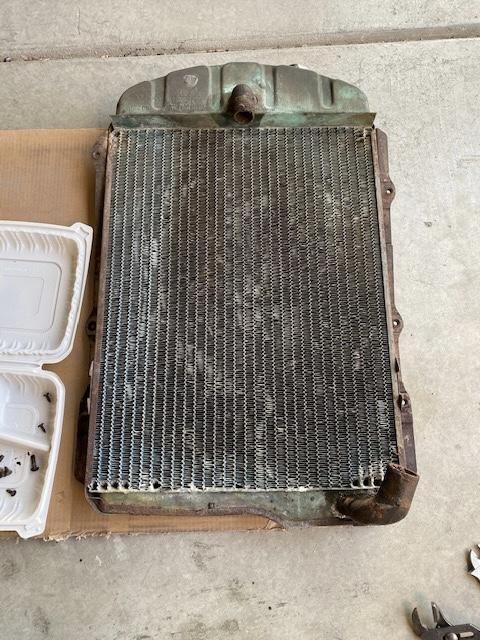
Looks a little sad. I dont know about in the US but here in Aus they are still listed and available though are rather pricey.
Tony
If you have a radiator shop in your area you can get it re-cored. We have one 25 miles away that was able to patch mine.
I have a good ”˜39 radiator that was re-cored a few years ago. It was converted to work with a pressure cap but that can be fixed easily. I was going to use it in my ”˜37 but the mountings and the size are different. I did not want to go through all the work to modify my ”˜37 so I just waited until my radiator was re-cored.
I am not sure if it will fit a ”˜38. The Master Parts List lists different radiators for ”˜37, ”˜38, and ”˜39. A big difference between ”˜37 and ”˜38 was the change to the shroud above the radiator so you could pull the radiator up vertically to remove it. The ”˜39 is the same way.
Maybe Gene or someone else can help determine if the ”˜39 will fit your car with only minor modifications.
I should mention that mine was not leaking, this is just precautionary while I have it out as someone suggested I have the radiator pressure checked which made sense to me. I am going to drop it off at a reputable radiator shop recommended by one of the local car clubs and have it checked. I’ll keep you posted as usual.
Thank you
That is a good plan. I strongly recommend that you spend the money now to have the radiator cleaned while it is at the shop.
A word of caution. I know this sounds crazy but make sure the shop knows this is a non-pressure system. My radiator guy only tests this type radiator to about 5 psi. This construction cannot handle 20 psi like today’s radiators.
My concern is that if you get some less experienced technician testing it the radiator can be ruined.
Good point, I had a 51 Styleline Deluxe that could use a new radiator cap. Stopped by the local Autozone and asked for a recommendation, the young man recommended 7lb cap. Soon followed by coolant in the cabin leaking from the blown heater core, darn! I now ask for advice then do research to confirm the advice
Thank you
I recommend having the radiator properly re-cored by a competent shop
That’s the plan, longtime vintage car community recommended a shop so I will drop my radiator with them
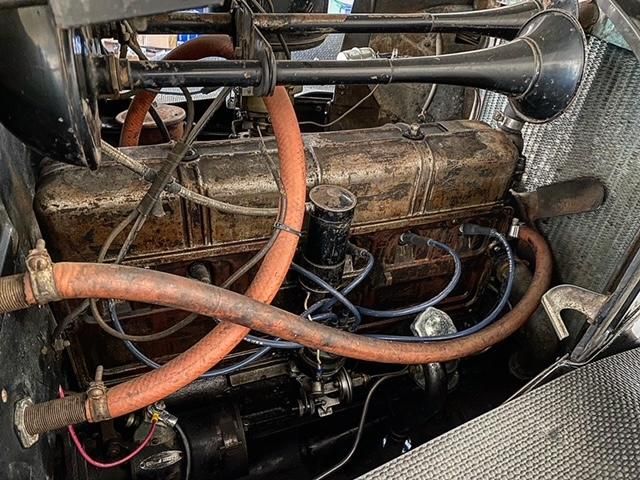
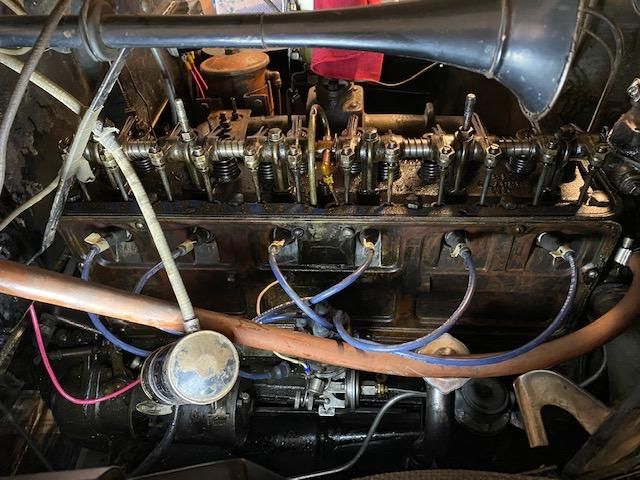
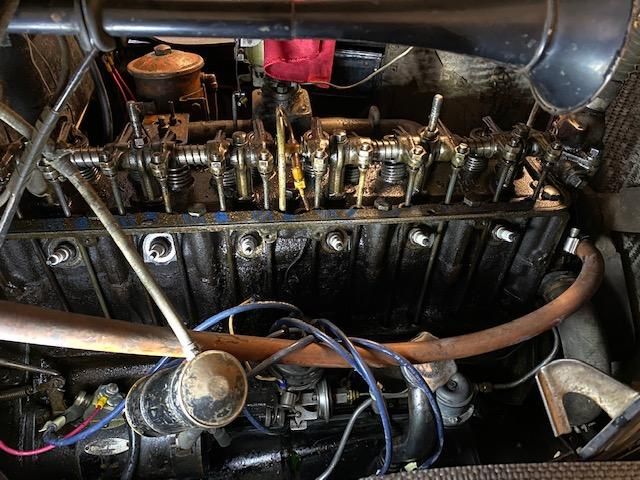
I'm still here and remember this topic but lost track of the outcome. In preparation to change valve and pushrod covers gaskets and paint, I decided to paint the engine too but having a heck of a time prepping engine block surface having years of oil and dirt. After chipping dirt and oil, the block surface still has a sheen. the last chemical i've used is acetone which seems to work well, but the uneven surface makes it almost impossible clean. I don't have the privilege of soaking the engine and rinsing with water as the car is in the garage. Any successful experiences are appreciated


