|
|
Joined: Jan 2002
Posts: 1,869
ChatMaster - 1,500
|
OP

ChatMaster - 1,500
Joined: Jan 2002
Posts: 1,869 |
Now that it runs I guess I can go ahead and adjust the valves. That might get rid of the "spit" in the exhaust. I know that is done on a warm engine. Is is done with the engine running or stopped? Neither the shop manual or the Motor manual is very clear. Any tips, techniques etc?
Best Regards, Pat
|
|
|
|
|
Joined: Dec 2001
Posts: 10,379 Likes: 1
Technical Advisor ChatMaster - 10,000
|
|
Technical Advisor ChatMaster - 10,000
Joined: Dec 2001
Posts: 10,379 Likes: 1 |
I much prefer to do the valve adjustment under running conditions after it is well warmed up.  
RAY Chevradioman http://www.vccacolumbiariverregion.org/1925 Superior K Roadster 1928 Convertible, Sport, Cabriolet 1933 Eagle, Coupe 1941 Master Deluxe 5-Passenger Coupe 1950 Styleline Deluxe 4-Door Sedan 1950 Styleline Deluxe Convertible 2002 Pontiac, Montana, Passenger Van 2014 Impala, 4-Door Sedan, White Diamond, LTZ 2017 Silverado, Double Cab, Z71, 4X4, White, Standard Bed, LTZ If you need a shoulder to cry on, pull off to the side of the road. Death is the number 1 killer in the world.
|
|
|
|
|
Joined: Sep 2009
Posts: 6,689 Likes: 21
ChatMaster - 6,000
|
|
ChatMaster - 6,000
Joined: Sep 2009
Posts: 6,689 Likes: 21 |
As long as the valve being adjusted is closed, it can be done either way. If at ambient temperature use the cold feeler gauge settings and visa-versa for hot. Running with heat stabilized at max for the thermostat installed is the preferred method by many and may be a bit more accurate. If you have a low degree thermostat, you may want to put a piece of cardboard in front of the radiator to bring the temperature up to about 180 degrees or so. Just my opinion. Good luck with it, Charlie 
|
|
|
|
|
Joined: Jan 2002
Posts: 1,869
ChatMaster - 1,500
|
|
OP
ChatMaster - 1,500
Joined: Jan 2002
Posts: 1,869 |
How is it done with the engine runnin? Loosen the arm until the gsauge goes in then retighten? That's what I'd like to know.
Best Regards, Pat
|
|
|
|
|
Joined: Oct 2009
Posts: 1,294
ChatMaster - 1,000
|
|
ChatMaster - 1,000
Joined: Oct 2009
Posts: 1,294 |
You need a good feel to adjust when running. If you have little experience at it,you would do better with a warm engine shut down. Just start with the timing mark on #1. Turn the motor over by hand and follow the firing order. You should see the intake close on each one. 1-5-3-6-2-4.
|
|
|
|
|
Joined: May 2011
Posts: 825
ChatMaster - 750
|
|
ChatMaster - 750
Joined: May 2011
Posts: 825 |
I remember many years ago that you had to adjust the tappets on a Vauxhall Viva running, (small English GM car) This was done using a long strip of feeler gauge material the right size of course, because the tappets gave the feeler gauge a real hammering. You would then cut of the end bit and carry on to the next tappet. This was in the late 1960's in the UK. I have always adjusted cold or a little on the warm side and not erred on the side of being pedantic about it all... and my feeler gauges last for ever  Peter
|
|
|
|
|
Joined: Jan 2002
Posts: 1,869
ChatMaster - 1,500
|
|
OP
ChatMaster - 1,500
Joined: Jan 2002
Posts: 1,869 |
You need a good feel to adjust when running. If you have little experience at it,you would do better with a warm engine shut down. Just start with the timing mark on #1. Turn the motor over by hand and follow the firing order. You should see the intake close on each one. 1-5-3-6-2-4. That sounds good. That's more or less how I did it initially when i assembled it.
Best Regards, Pat
|
|
|
|
|
Joined: May 2002
Posts: 6,149 Likes: 42
ChatMaster - 6,000
|
|
ChatMaster - 6,000
Joined: May 2002
Posts: 6,149 Likes: 42 |
An easy way to get TDC, when adjusting #1 turn engine by hand and watch #6 when the ex is nearly closed and in just opening (changing over) adjust both #1 valves, then watch #2 and when they are changing adjust #5, #3 changing adjust #4, #1 changing adjust #6, #5 adjust #2, #3 adjust #4.
To make sure you have adjusted all valves you can place a marker as you adjust each valve.
Tony
1938 1/2 ton Hope to drive it before I retire
|
|
|
|
|
Joined: Sep 2009
Posts: 6,689 Likes: 21
ChatMaster - 6,000
|
|
ChatMaster - 6,000
Joined: Sep 2009
Posts: 6,689 Likes: 21 |
Tony, Great reply to Pat, mate. Trumps all I have ever seen. Simple and easy to follow. If there was an award for the simplest and most straightforward answer and solution for a problem, I would vote for your instant response for the best for 2012. Would too!  Best, Charlie
|
|
|
|
|
Joined: Apr 2008
Posts: 1,194
ChatMaster - 1,000
|
|
ChatMaster - 1,000
Joined: Apr 2008
Posts: 1,194 |
Another thing I do is loosen the lock nuts and then snug them back down. Then once you have finished adjusting your valves go back and make sure they are tight.
|
|
|
|
|
Joined: Jan 2002
Posts: 1,869
ChatMaster - 1,500
|
|
OP
ChatMaster - 1,500
Joined: Jan 2002
Posts: 1,869 |
We did the adjustments today with the help of an old time mechanic friend. He also refined my ignition adjustments. It now runs absolutely still at a steady 170 degrees. But it leaks, does it ever leak! Erlier someone had suggested the oil gallery plug. I opened the flywheel cover and the oil appears to come from behind this pan. ![[Linked Image from i1176.photobucket.com]](http://i1176.photobucket.com/albums/x324/landman2/P1000898.jpg) Someone else had suggested the oil slinger. It is supposed to be integral to the crankshaft. The first photo below shows one of my old ones. The black thing close to the flywheel flange must be the slinger. The second photo shows the crankshaft I installed. It looks like it doesn't have one. ![[Linked Image from i1176.photobucket.com]](http://i1176.photobucket.com/albums/x324/landman2/Lukaweskyengine7.jpg) ![[Linked Image from i1176.photobucket.com]](http://i1176.photobucket.com/albums/x324/landman2/20110611003.jpg) That could well be the problem. I really don't like the sound of this. I suppose we could check that by remoVing the oil pan and the rear bearing cap. If we get that far and there is in fact no slinger, is there some thing I could put in there to control that oil?
Best Regards, Pat
|
|
|
|
|
Joined: Nov 2001
Posts: 19,758 Likes: 63
ChatMaster - 15,000
|
|
ChatMaster - 15,000
Joined: Nov 2001
Posts: 19,758 Likes: 63 |
is there some thing I could put in there to control that oil? Yes install a crankshaft with a slinger on it. I don't know of a seal that can be installed. The oil that flows out of the back of the rear main bearing needs to be slung into the depression that drains back into the oil pan. Otherwise some of it just runs out the back of the engine.
How Sweet the roar of a Chevy four!
|
|
|
|
|
Joined: Jan 2002
Posts: 1,869
ChatMaster - 1,500
|
|
OP
ChatMaster - 1,500
Joined: Jan 2002
Posts: 1,869 |
Can I confirm the slinger thing by pulling the rear main cap? Maybe I should do that before taking off half cocked looking for another NOS crankshaft or getting an old one rebuilt. If the slinger is there, then we're back to the gallery plug....But photos seldom lie.
Best Regards, Pat
|
|
|
|
|
Joined: Nov 2001
Posts: 19,758 Likes: 63
ChatMaster - 15,000
|
|
ChatMaster - 15,000
Joined: Nov 2001
Posts: 19,758 Likes: 63 |
Yupster, Pull that cap and have a gander. If no slinger it means a lot more work.
How Sweet the roar of a Chevy four!
|
|
|
|
|
Joined: Jan 2002
Posts: 1,869
ChatMaster - 1,500
|
|
OP
ChatMaster - 1,500
Joined: Jan 2002
Posts: 1,869 |
I'll say... 
Best Regards, Pat
|
|
|
|
|
Joined: Dec 2001
Posts: 90
Shade Tree Mechanic
|
|
Shade Tree Mechanic
Joined: Dec 2001
Posts: 90 |
Checkout the photo I posted. Going through a learning curve on how to post pics in the forum. I'll get it right one of these days!
|
|
|
|
|
Joined: May 2002
Posts: 6,149 Likes: 42
ChatMaster - 6,000
|
|
ChatMaster - 6,000
Joined: May 2002
Posts: 6,149 Likes: 42 |
That is the way I was taught as an apprentice. The variation is when the firing order is different but easy way is to look at firing order start at adjust #1 and have the cylinder half way around the distributor cap rocking then to next pair, this works with even number of cylinders. I have never tried the engines with odd number of cylinders (VW and Audi) to know of an easy way for them.
Tony
1938 1/2 ton Hope to drive it before I retire
|
|
|
|
|
Joined: Jan 2002
Posts: 1,869
ChatMaster - 1,500
|
|
OP
ChatMaster - 1,500
Joined: Jan 2002
Posts: 1,869 |
thanks Master. Have a look at mine above. It certainly looks like the second one doesn't have one. What do you think?
Best Regards, Pat
|
|
|
|
|
Joined: Dec 2001
Posts: 90
Shade Tree Mechanic
|
|
Shade Tree Mechanic
Joined: Dec 2001
Posts: 90 |
Don't mean to take discussion off topic-but the crankshaft in your post could have a slinger-hard to tell from the angle in which the pic was taken.
|
|
|
|
|
Joined: Jan 2002
Posts: 1,869
ChatMaster - 1,500
|
|
OP
ChatMaster - 1,500
Joined: Jan 2002
Posts: 1,869 |
Yupster, Pull that cap and have a gander. If no slinger it means a lot more work. I'll do this first as it is the worst case scenario. If there is a slinger, then I'll pull the transmission, clutch flywheel & bell housing. Any pointers on this will be welcome. The body is on the car.
Best Regards, Pat
|
|
|
|
|
Joined: Jan 2002
Posts: 30,701 Likes: 141
ChatMaster - 25,000
|
|
ChatMaster - 25,000
Joined: Jan 2002
Posts: 30,701 Likes: 141 |
The slinger has to be there because it is part of the crankshaft forging, not added part. There will be a big grove running around the main bearing cap and block and the slinger is spaced into this grove.
The slinger can be seen on page 14 of the 1934 shop manual, fig. #22. It is a raised flange at the rear of the main bearing journal about 1/8" wide and sticks out about 1/4" or less. Not to be confused with the large flange that the flywheel is bolted to.
There is a cut out on each side of the rear main beaing shim that matches the cut out for the slinger that is in the block and main bearing cap.
Last edited by Chev Nut; 05/23/12 04:14 PM.
Gene Schneider
|
|
|
|
|
Joined: Jan 2002
Posts: 1,869
ChatMaster - 1,500
|
|
OP
ChatMaster - 1,500
Joined: Jan 2002
Posts: 1,869 |
Hi Gene,
I realize that it should be there however unless my picture isn't clear enough, I can't see it. I certainly hope that crankshaft had one on it. We'll know for sure tomorrow.
It would be a shame to take it apart as it runs so well. It's almost as if he balanced the engine.
Last edited by Pat S; 05/23/12 04:28 PM.
Best Regards, Pat
|
|
|
|
|
Joined: Jan 2012
Posts: 179
Shade Tree Mechanic
|
|
Shade Tree Mechanic
Joined: Jan 2012
Posts: 179 |
Sure looks like the shop that ground your crank ground off the slinger. If so the crank is junk unless a real capable machinist can turn one, split it in half and weld it in the proper position on the shaft. Don't laugh guys it can be done. Good cranks for that motor are out there and thats likely the way to go. Bummer!
DFC
|
|
|
|
|
Joined: Apr 2002
Posts: 598
Oil Can Mechanic
|
|
Oil Can Mechanic
Joined: Apr 2002
Posts: 598 |
Pat, If you do need a crankshaft check out Ebay item # 250789331221. It has a good picture of what you should see. It is being sold by our own Bruce Bugay, Chevy B.
Richard
I try to be the person my dog thought I was.
|
|
|
|
|
Joined: Jan 2002
Posts: 1,869
ChatMaster - 1,500
|
|
OP
ChatMaster - 1,500
Joined: Jan 2002
Posts: 1,869 |
Sure looks like the shop that ground your crank ground off the slinger. If so the crank is junk unless a real capable machinist can turn one, split it in half and weld it in the proper position on the shaft. Don't laugh guys it can be done. Good cranks for that motor are out there and thats likely the way to go. Bummer!
DFC DFC, nobody ground it, it is NOS. Like Gene says, it HAS to have a slinger. But that picture....
Last edited by Pat S; 05/23/12 06:32 PM.
Best Regards, Pat
|
|
|
|
|
Joined: Jan 2002
Posts: 1,869
ChatMaster - 1,500
|
|
OP
ChatMaster - 1,500
Joined: Jan 2002
Posts: 1,869 |
Well, last night I took all those pictures to the cruise night and had the guys look at them. Everyone was sure they could see the slinger. one suggested I use the zoom feature of the computer to have a closer look. Why didn't I think of that?
It is definitely visible.
Today I'll see about getting a borescope to look up behind the flywheel in the area of the oil gallery plug. Then I'll likely come here again for pointers and tips on how to remove the transmission while the body is on the car. I seem to remember someone saying you have to back off the rear end.
At least I had my gauges come in to boost the morale. See photos in Member's projects.
Best Regards, Pat
|
|
|
|
|
Joined: Jan 2002
Posts: 30,701 Likes: 141
ChatMaster - 25,000
|
|
ChatMaster - 25,000
Joined: Jan 2002
Posts: 30,701 Likes: 141 |
To remove the transmission (and bell housing) it is necessary to only open up the U joint ball and unbolt the U joint.
Gene Schneider
|
|
|
|
|
Joined: Apr 2002
Posts: 598
Oil Can Mechanic
|
|
Oil Can Mechanic
Joined: Apr 2002
Posts: 598 |
Chev Nut Is absolutely correct, unless you have a riveted U joint rather than the bolted model, then you must push back the rear end. I have seen It happen, ask Wino Wally.
Richard
I try to be the person my dog thought I was.
|
|
|
|
|
Joined: Mar 2008
Posts: 287
Backyard Mechanic
|
|
Backyard Mechanic
Joined: Mar 2008
Posts: 287 |
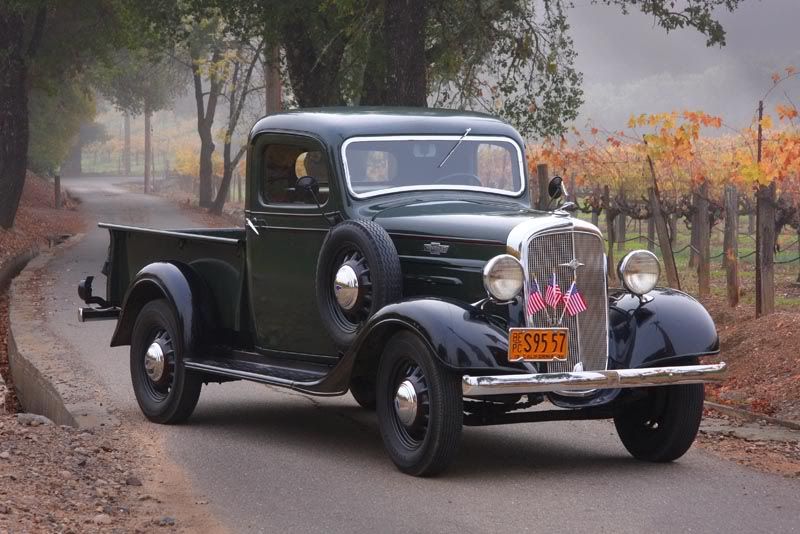
1936 Low Cab Pickup
|
|
|
|
|
Joined: Jan 2002
Posts: 30,701 Likes: 141
ChatMaster - 25,000
|
|
ChatMaster - 25,000
Joined: Jan 2002
Posts: 30,701 Likes: 141 |
The Standard came with a riveted U joint, the Masters were bolted.
Gene Schneider
|
|
|
|
|
Joined: Mar 2008
Posts: 287
Backyard Mechanic
|
|
Backyard Mechanic
Joined: Mar 2008
Posts: 287 |
Chev Nut is correct. My driveline, however, came with a 4 speed 1-1/2 ton truck transmission and special u-joint, which we were unable to separate easily. We decided to pull the rear end back instead. We then installed a new, bolted Master u-joint to complement the newly rebuilt 3-speed transmission we were installing. Any future transmission / driveline work on my truck can now be done by splitting the new u-joint.
Thanks for keeping us on our toes, Gene.
1936 Low Cab Pickup
|
|
|
|
|
Joined: Jan 2002
Posts: 1,869
ChatMaster - 1,500
|
|
OP
ChatMaster - 1,500
Joined: Jan 2002
Posts: 1,869 |
To remove the transmission (and bell housing) it is necessary to only open up the U joint ball and unbolt the U joint. Gene, would I need to support the rear of the engine since the right mount bracket is attached to the bell housing? Or are the front ones combined with the left side strong enough?
Last edited by Pat S; 05/25/12 01:26 PM.
Best Regards, Pat
|
|
|
|
|
Joined: Jan 2002
Posts: 30,701 Likes: 141
ChatMaster - 25,000
|
|
ChatMaster - 25,000
Joined: Jan 2002
Posts: 30,701 Likes: 141 |
I would support the engine to avoid damaging the rear mounts.
Gene Schneider
|
|
|
|
|
Joined: Jul 2009
Posts: 1,478
ChatMaster - 1,000
|
|
ChatMaster - 1,000
Joined: Jul 2009
Posts: 1,478 |
Yes. the Book says suport the rear of the engine. I blocked it up. I removed the floor board and got some air from a fan I had blowing under the truck. Also gave some extra room to work.
|
|
|
|
|
Joined: Jan 2002
Posts: 1,869
ChatMaster - 1,500
|
|
OP
ChatMaster - 1,500
Joined: Jan 2002
Posts: 1,869 |
I got as far as separating the u-joint. That wasn't easy because the last bolt was turning. Aren't those bolts supposed to be pressed in there? Next problem, the yoke won't retract all the way to the torque tube. I doubt the transmission would ever come out like that, it has some 5" of front shaft to clear. I think I know why. It's because I followed someone's example and put the new driveshaft bushing in front of the old one. ![[Linked Image from i1176.photobucket.com]](http://i1176.photobucket.com/albums/x324/landman2/May2520124.jpg) So, it looks like I may have to back off the differential after all. Isn't this fun?
Best Regards, Pat
|
|
|
|
|
Joined: Apr 2002
Posts: 598
Oil Can Mechanic
|
|
Oil Can Mechanic
Joined: Apr 2002
Posts: 598 |
Won't the torque tube drop straight down? From the photo It looks like It would, allowing your transmission to be pulled straight back.
Richard
I try to be the person my dog thought I was.
|
|
|
|
|
Joined: Dec 2001
Posts: 10,379 Likes: 1
Technical Advisor ChatMaster - 10,000
|
|
Technical Advisor ChatMaster - 10,000
Joined: Dec 2001
Posts: 10,379 Likes: 1 |
RAY Chevradioman http://www.vccacolumbiariverregion.org/1925 Superior K Roadster 1928 Convertible, Sport, Cabriolet 1933 Eagle, Coupe 1941 Master Deluxe 5-Passenger Coupe 1950 Styleline Deluxe 4-Door Sedan 1950 Styleline Deluxe Convertible 2002 Pontiac, Montana, Passenger Van 2014 Impala, 4-Door Sedan, White Diamond, LTZ 2017 Silverado, Double Cab, Z71, 4X4, White, Standard Bed, LTZ If you need a shoulder to cry on, pull off to the side of the road. Death is the number 1 killer in the world.
|
|
|
|
|
Joined: Dec 2001
Posts: 90
Shade Tree Mechanic
|
|
Shade Tree Mechanic
Joined: Dec 2001
Posts: 90 |
The torque tube will drop to the riveted pan on the chassis. It takes some finagalling(is that a word?) to get the trans out. Also a few cuss words.
|
|
|
|
|
Joined: Jan 2002
Posts: 1,869
ChatMaster - 1,500
|
|
OP
ChatMaster - 1,500
Joined: Jan 2002
Posts: 1,869 |
I've got it jacked right up in the photo. If I let it drop to the riveted pan Master Six mentions above, there wouldn't be enough clearance.
Best Regards, Pat
|
|
|
|
|
Joined: Dec 2001
Posts: 90
Shade Tree Mechanic
|
|
Shade Tree Mechanic
Joined: Dec 2001
Posts: 90 |
That's what I was saying,Pat. Be sure the torque tube ball is all the way back (loosen the seal collar and be sure the torque tube is clean). You then may have to lift the torque tube as high as you can and tie it off. This is the procedure on page 37 of the shop manual. Using two homemade guide pins helps out also.
|
|
|
|
|